Build a simple game with Flutter and Flame
Learn how to build a simple game in Flutter by using the Flame package.
Flutter is a powerful development framework for building applications across different platforms. It is so versatile that we can even make a game with it.
In this tutorial, we will learn how to build a very basic game in Flutter using the Flame game engine. We will go through each step in building this 2D game called Bug Squash, in which you try to squash as many bugs as you can.
We will start by setting up the project, adding game sprites to represent the bugs, build the user interface, and eventually, adding the game logic. This article should help you learn the basics of Flame so that you can make more complex games moving forward.
What is Flame?
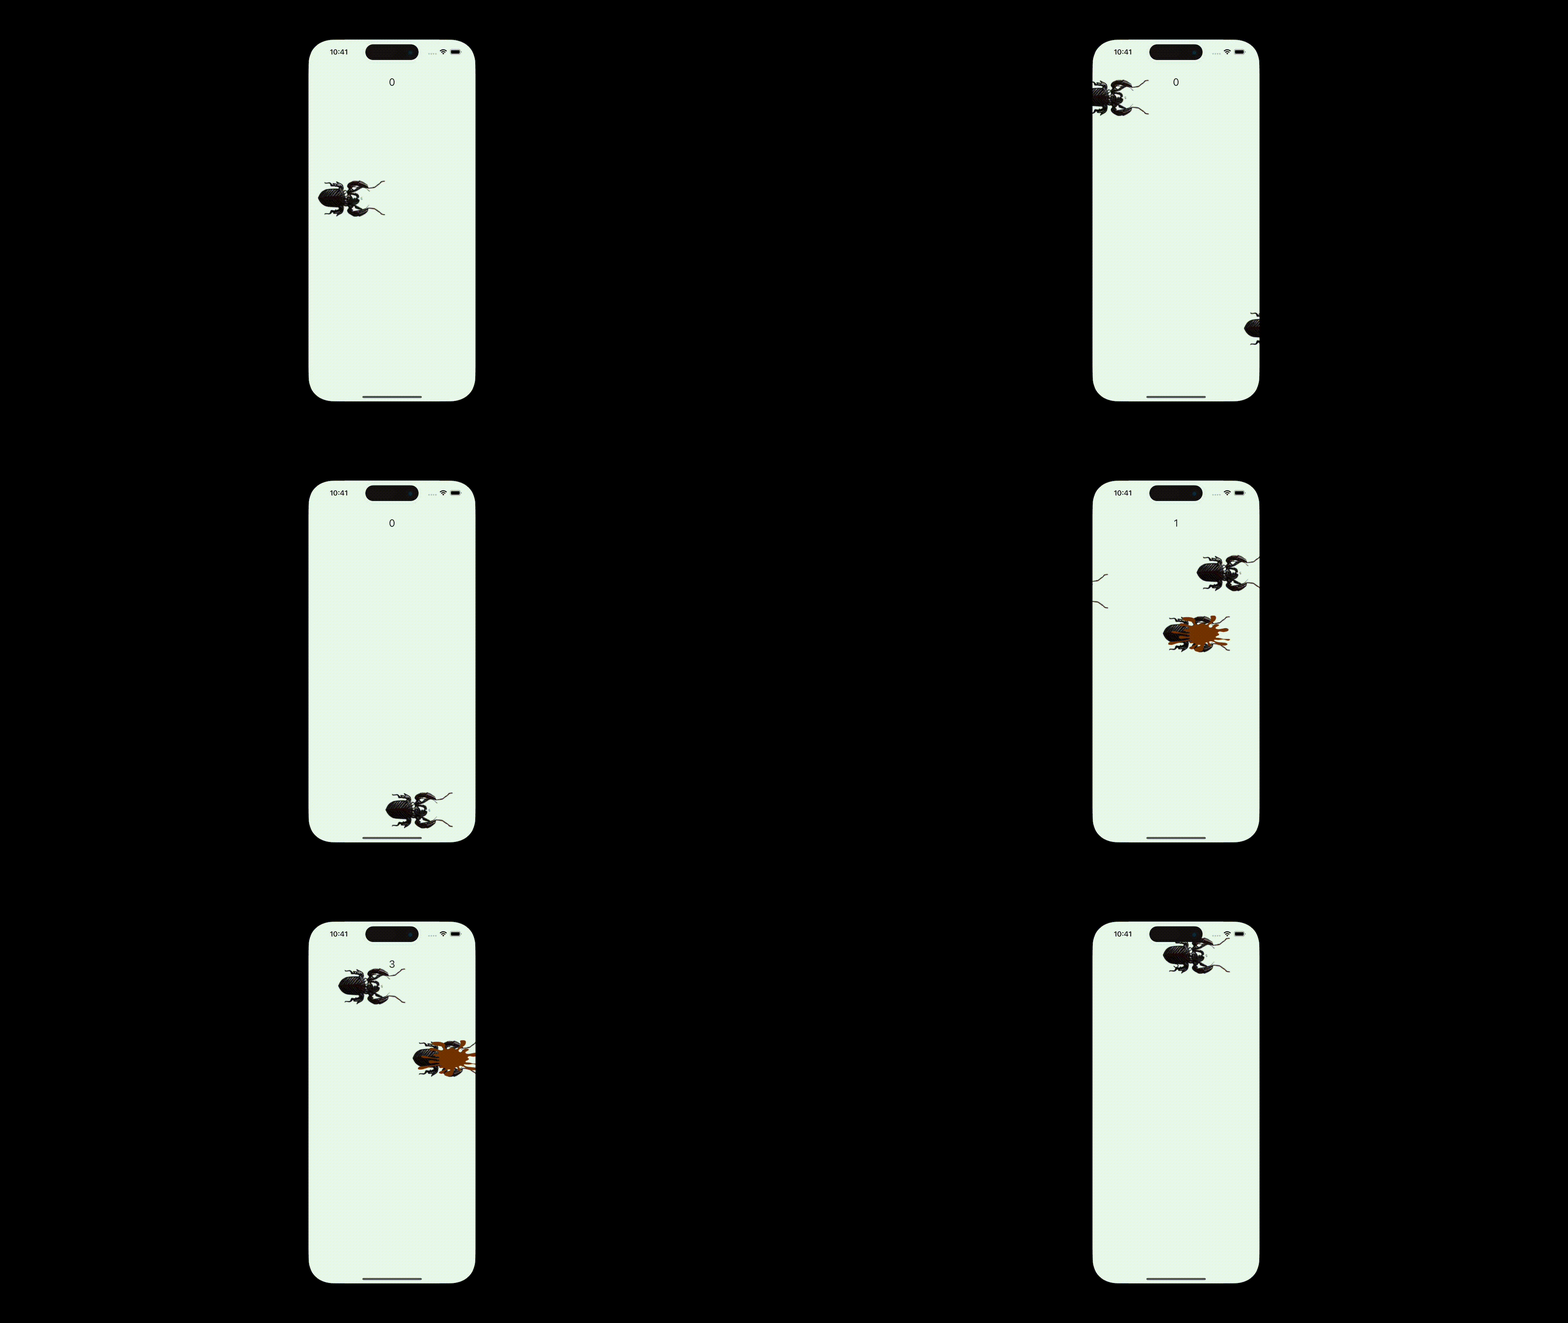
Flame is a game engine built for Flutter that provides a complete set of solutions for building different types of games. It contains all the necessary features to build a game such as its own game loop, sprites, animations, input, and collision detection.
The Flame engine follows a component system (similar to Flutter's widget tree) called Flame Component System (FCS). While this sounds like a lot, we will only be using a few of the components in this system to build our game.
The Bug Squash game
I was inspired to build this simple game when the summer season arrived here in Australia. This warm weather comes with a bunch of real-life bugs crawling in our home trying to escape the heat outside. So instead of removing real life bugs (and software bugs), let's build a game where we can squash bugs.
Before we write our code, let's first think about what our game should be, how it should work, and how it would look like. I want this game to be really simple so that we can understand how to use Flame in Flutter.
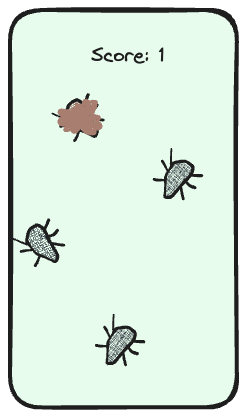
Figure 1. Bug squash game design.
This game is a straightforward squash as many bugs as you can type of game. These critters will appear on the screen and to get points, you need to click or tap the bugs.
Project Setup
Create the project by either using the terminal with flutter create bug_squash --org com.yourname or using Visual Studio Code's Flutter: New Project > Empty Application. Regardless, we want a clean starter project to begin with.

Install Flame
Add the Flame library by running flutter pub add flame command in the terminal to get the latest version. Doing so will add the dependency to your project's pubspec.yaml. Another option is by directly updating the pubspec.yaml and adding Flame as part of the dependencies, which at the time of writing is at version 1.14.0:
flutter pub add flame
# pubspec.yaml
dependencies:
  flame: ^1.14.0
  flutter:
    sdk: flutter
If you run into some version conflict problems, you may run flutter pub upgrade --major-versions to upgrade, and then try adding the Flame library again.
Clean up main.dart
It is much easier to learn Flame if we remove the clutter in our app. Start by making sure that main.dart only has the runApp() function just to be sure that we are starting out from scratch. Then, let's add the minimum requirements for building a game using Flame: The GameWidget and the FlameGame. I will discuss these two components later but for now, make sure you have your main.dart written up like this.
//main.dart

import 'package:flame/game.dart';
import 'package:flutter/material.dart';

void main() {
  runApp(
    GameWidget(
      game: FlameGame(),
    ),
  );
}
Run the app on your device
You can use whichever device you want to test your game. I will be using an iPhone simulator and make sure that our code builds successfully.
Figure 2.1 Hello world of Bug Squash game
Alright! We have a running Flutter app using Flame as its game engine. It does not show anything, but we will eventually build our way up to our beautiful game.
Now that our app is running, let's start building Bug Squash!
GameWidget and FlameGame
The fundamental widget used in building a game on Flutter with Flame is the GameWidget. Because it is a Widget, we can insert a Flame game anywhere in the widget tree of any Flutter app. We can think of GameWidget as a container for another important component of Flame called Game. A Game is an interface in which the game itself gets rendered. A ready-made implementation of Game that we will use in this project is the FlameGame.
Building our own Game instance
We want to add bugs, animations, and game logic in Bug Squash. The best way to do it is to create a class that extends from FlameGame. Let's create a class called BugSquashGame that extends FlameGame. Replace the game: instance in our main.dart and run the app.
//bug_squash_game.dart

import 'package:flame/game.dart';

class BugSquashGame extends FlameGame {}
// main.dart

import 'package:bug_squash_demo/bug_squash_game.dart';
import 'package:flame/game.dart';
import 'package:flutter/material.dart';

void main() {
  runApp(
    GameWidget(
      game: BugSquashGame(), // Use our BugSquashGame
    ),
  );
}
Once we have this setup, we can start adding our game logic within the BugSquashgame class. If we run the app again, we will see the same screen as seen in Figure 1.
Changing the background colour
We can change the default background colour by overriding the backgroundColor property of BugSquashGame.
//bug_squash_game.dart

import 'dart:ui';

import 'package:flame/game.dart';

class BugSquashGame extends FlameGame {
  @override
  Color backgroundColor() {
    return const Color(0xFFEBFBEE);
  }
}
We should see our game change its background to green.
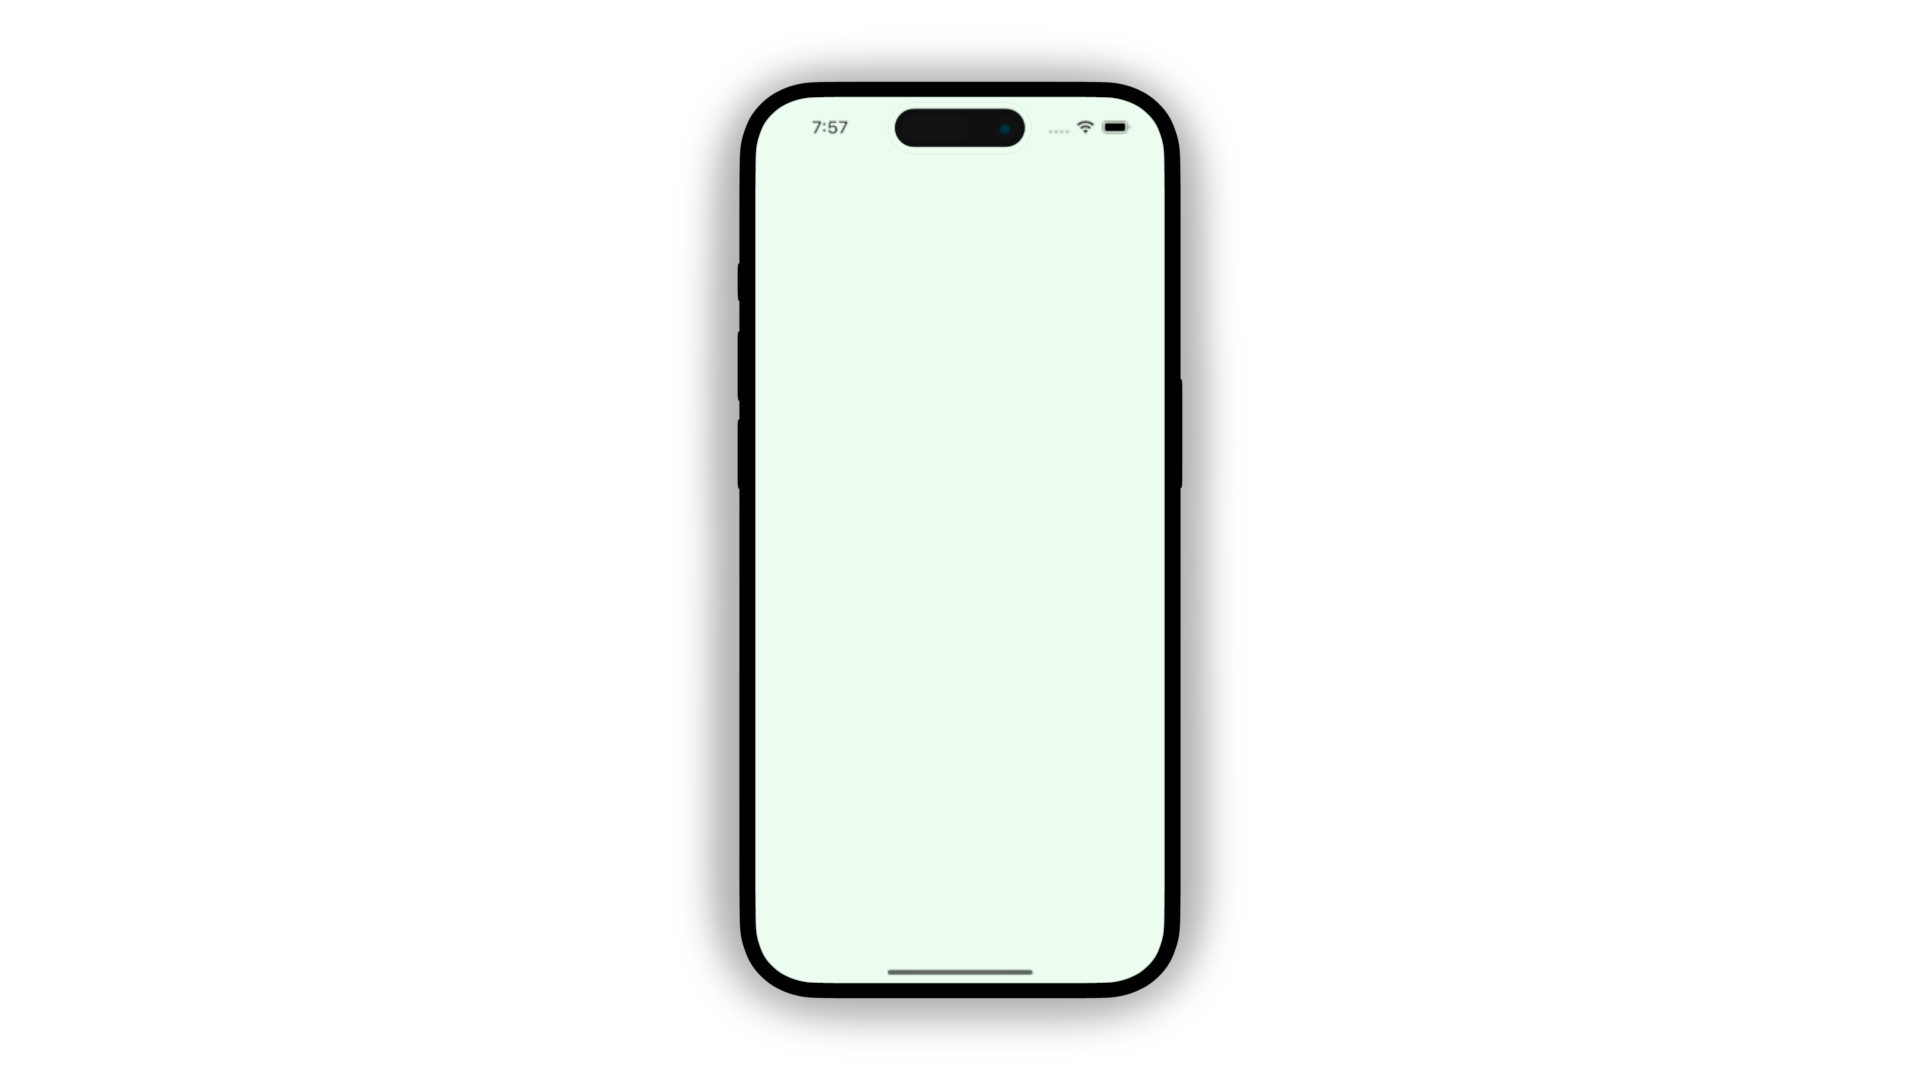
Figure 2.2. Updated background colour.
Loading components
Components in Flame represents objects that we can either see or interact within the game. In Bug Squash, we will be dealing with components such as sprites that are moving around the screen which we can squash when we tap on them. In order to load components in our game, we have to be familiar with Flame's lifecycle.

Figure 3. The Game class lifecycle.
All instances of Game follow the lifecycle represented in Figure 3. For now, let's focus on the onLoad method.
The onLoad method is where we initialise the components that we want to see in our game. If we want to add a sprite of a bug in our game, the onLoad method is the best place to do so.
Set up the assets directory
Flame has a proposed file structure for organising our game's assets such as videos, images, and audio. In the root directory of your project, create a folder called assets and make sure you have the following structure:
.
└── assets
    ├── audio
    │   └── squash.mp3
    └── images
    		└── bug.png
    		└── squashed_bug.png
You can download the assets that I used for this game using this link, or feel free to use your sound effects and images.
Don't forget to add these to your pubspec.yaml to make sure that these assets are accessible from your app.
# pubspec.yaml

flutter:
  uses-material-design: true
  assets:
    - assets/images/bug.png
    - assets/images/squashed_bug.png
    - assets/audio/squash.mp3
Adding sprites
Let's add a bug component to our game. We will be using a component called SpriteComponent to represent our bug. A SpriteComponent lets us use an image that will be rendered in our game. We learned that we can initialise and load this image in the onLoad() method of our BugSquash game, so let's do that.
We override the onLoad() method in our BugSquashGame so we can load the bug sprite. Since we want to make sure that the image bug.png has been loaded correctly, we need to make the onLoad() method an async method and wait for the image to load first.
//bug_squash_game.dart

import 'dart:async';
import 'dart:ui';

import 'package:flame/components.dart';
import 'package:flame/game.dart';

class BugSquashGame extends FlameGame {
  @override
  Color backgroundColor() {
    return const Color(0xFFEBFBEE);
  }

  @override
  FutureOr<void> onLoad() async {
    final bugSprite = await Sprite.load('bug.png');
    final bugComponent = SpriteComponent(sprite: bugSprite);
    add(bugComponent);
    return super.onLoad();
  }
}
We first instantiate a Component. A SpriteComponent requires a Sprite instance, therefore we instantiate the bugSprite first before building the Component. It can be added to the game by using the Game interface method called add(). Take note that the add() method can be called anywhere in the lifecycle of the Game, and will be displayed on the screen once the render() method of the Game and Component has been called.
If we run the updated BugSquashGame, we should be able to see our bug sprite on the screen.
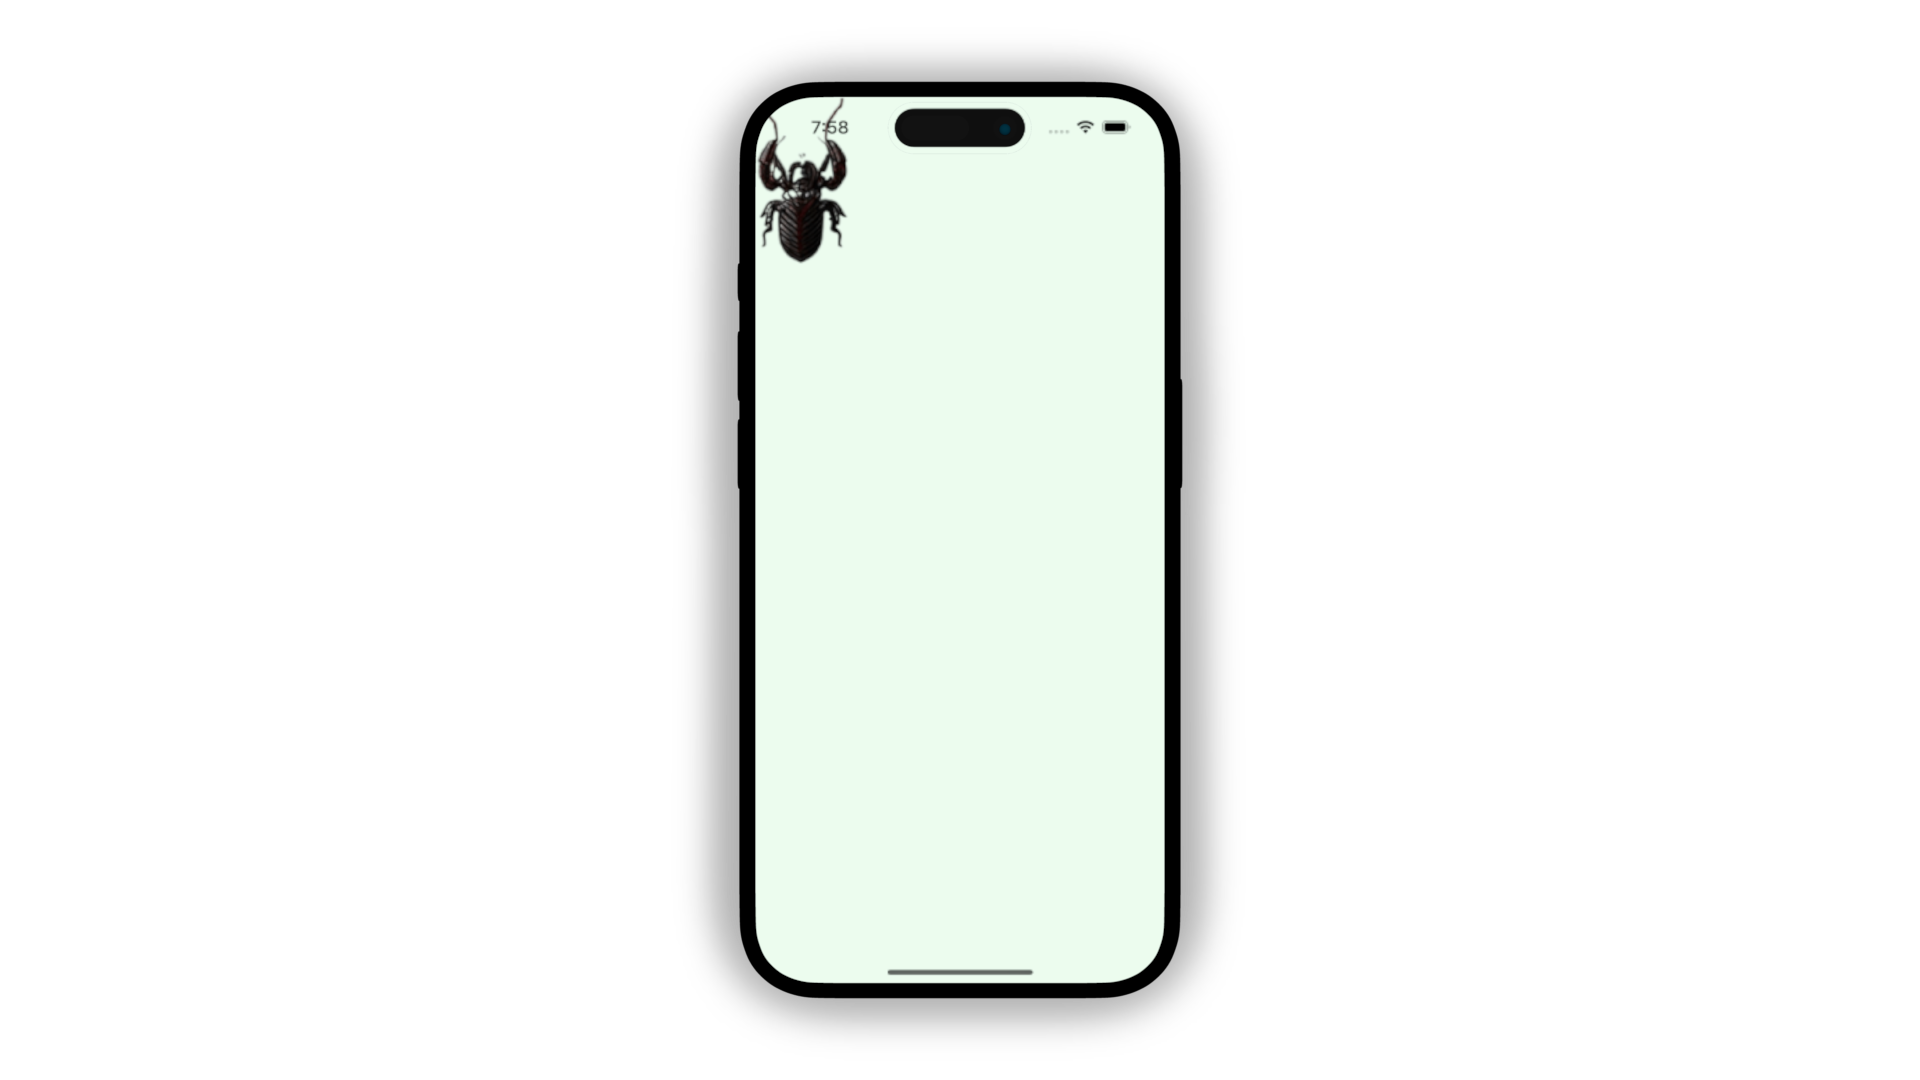
Figure 4. Loading bug image in the game with SpriteComponent.
So now we have successfully added the bug sprite. It may or may not be the position where we want to put this bug, but at least it's there.
Position of Components
A Component can be set to a particular location on the screen as long as it is a type of PositionComponent. A PositionComponent represents an object that can be moved around the screen. It can also be rotated, translated, and scaled accordingly.
Many of the Components in Flame including the SpriteComponent extends PositionComponent, which means that we can move this bug around.
X-Y Axis
Any position on the screen can be represented by a point defined by its x and y coordinates. The 0 position of the X-axis starts from the left, whilst the 0 of the Y-axis starts at the top.
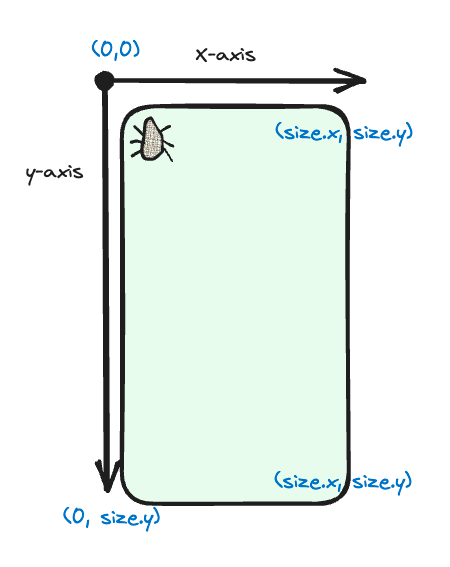
Figure 5. Coordinate system of Flame
When we loaded the bugComponent in our game, its properties assumed the default values. The default position of a component is (0,0) or x = 0 and y = 0.
Setting a component's position
To set the position of the Component, we update the PositionComponent's property called position and assign a Vector2 value on it where the first argument is the x-coordinate whilst the second is the y-coordinate.
//bug_squash_game.dart

import 'dart:async';
import 'dart:ui';

import 'package:flame/components.dart';
import 'package:flame/game.dart';

class BugSquashGame extends FlameGame {

	//rest of the code

  @override
  FutureOr<void> onLoad() async {
    final bugSprite = await Sprite.load('bug.png');
    final bugComponent = SpriteComponent(sprite: bugSprite);
    bugComponent.position = Vector2(100, 300); //Set the position
    add(bugComponent);
    return super.onLoad();
  }
}
If we set the x-coordinate to be 100 and the y-coordinate to be 300, then we expect the bug to be located at this part of the screen.
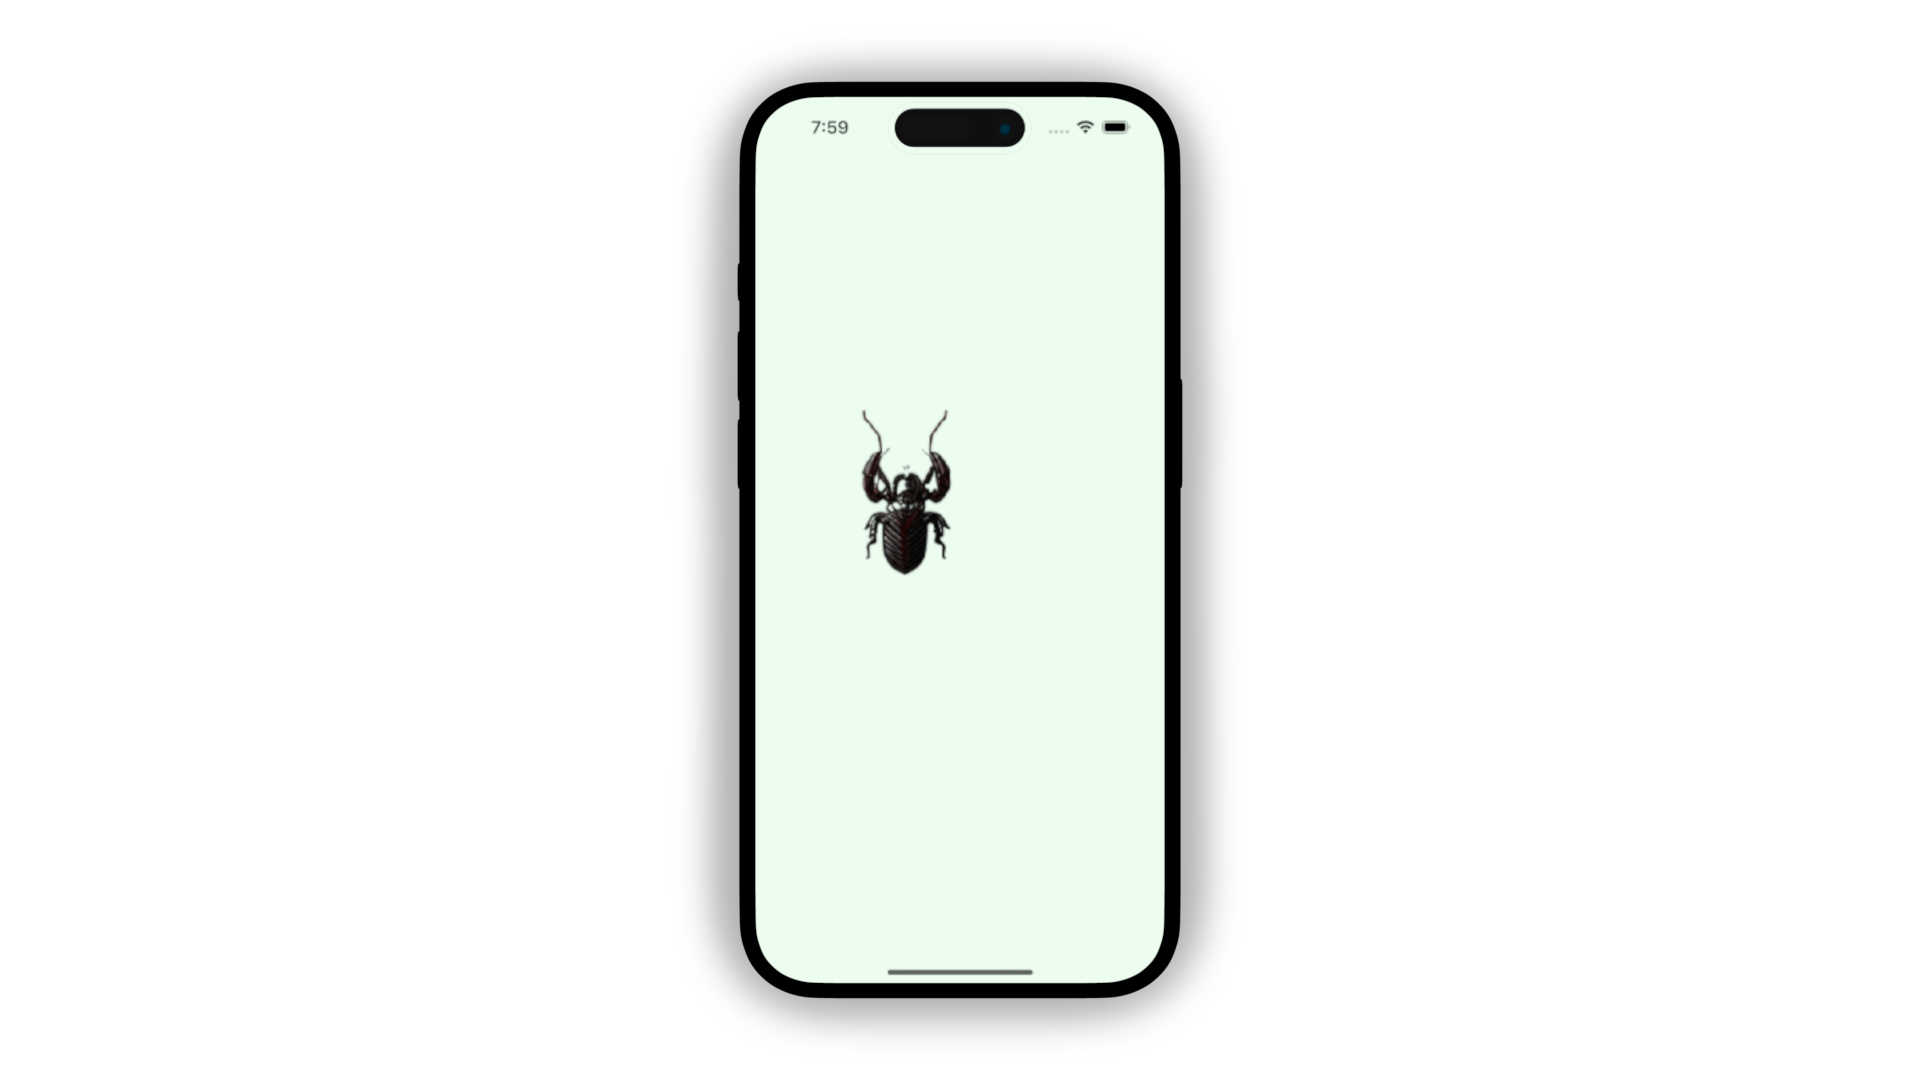
Figure 6. Updating the position of the sprite component
If the GameWidget is the root widget of your app, then the Game fills up the space that it can. In BugSquashGame, we can determine the size of the screen by getting the value of size which is a type of Vector2. We can use this value as a reference to position any component anywhere within the bounds of the game's size.
It means that if we want to position our component at the centre of the screen, we can set the position at the half point.
//bug_squash_game.dart

bugComponent.position = Vector2(size.x / 2, size.y/2); //size is a `Game` property
However, if we update our code and run it, the bug is not quite at the centre as you can see in Figure 7.
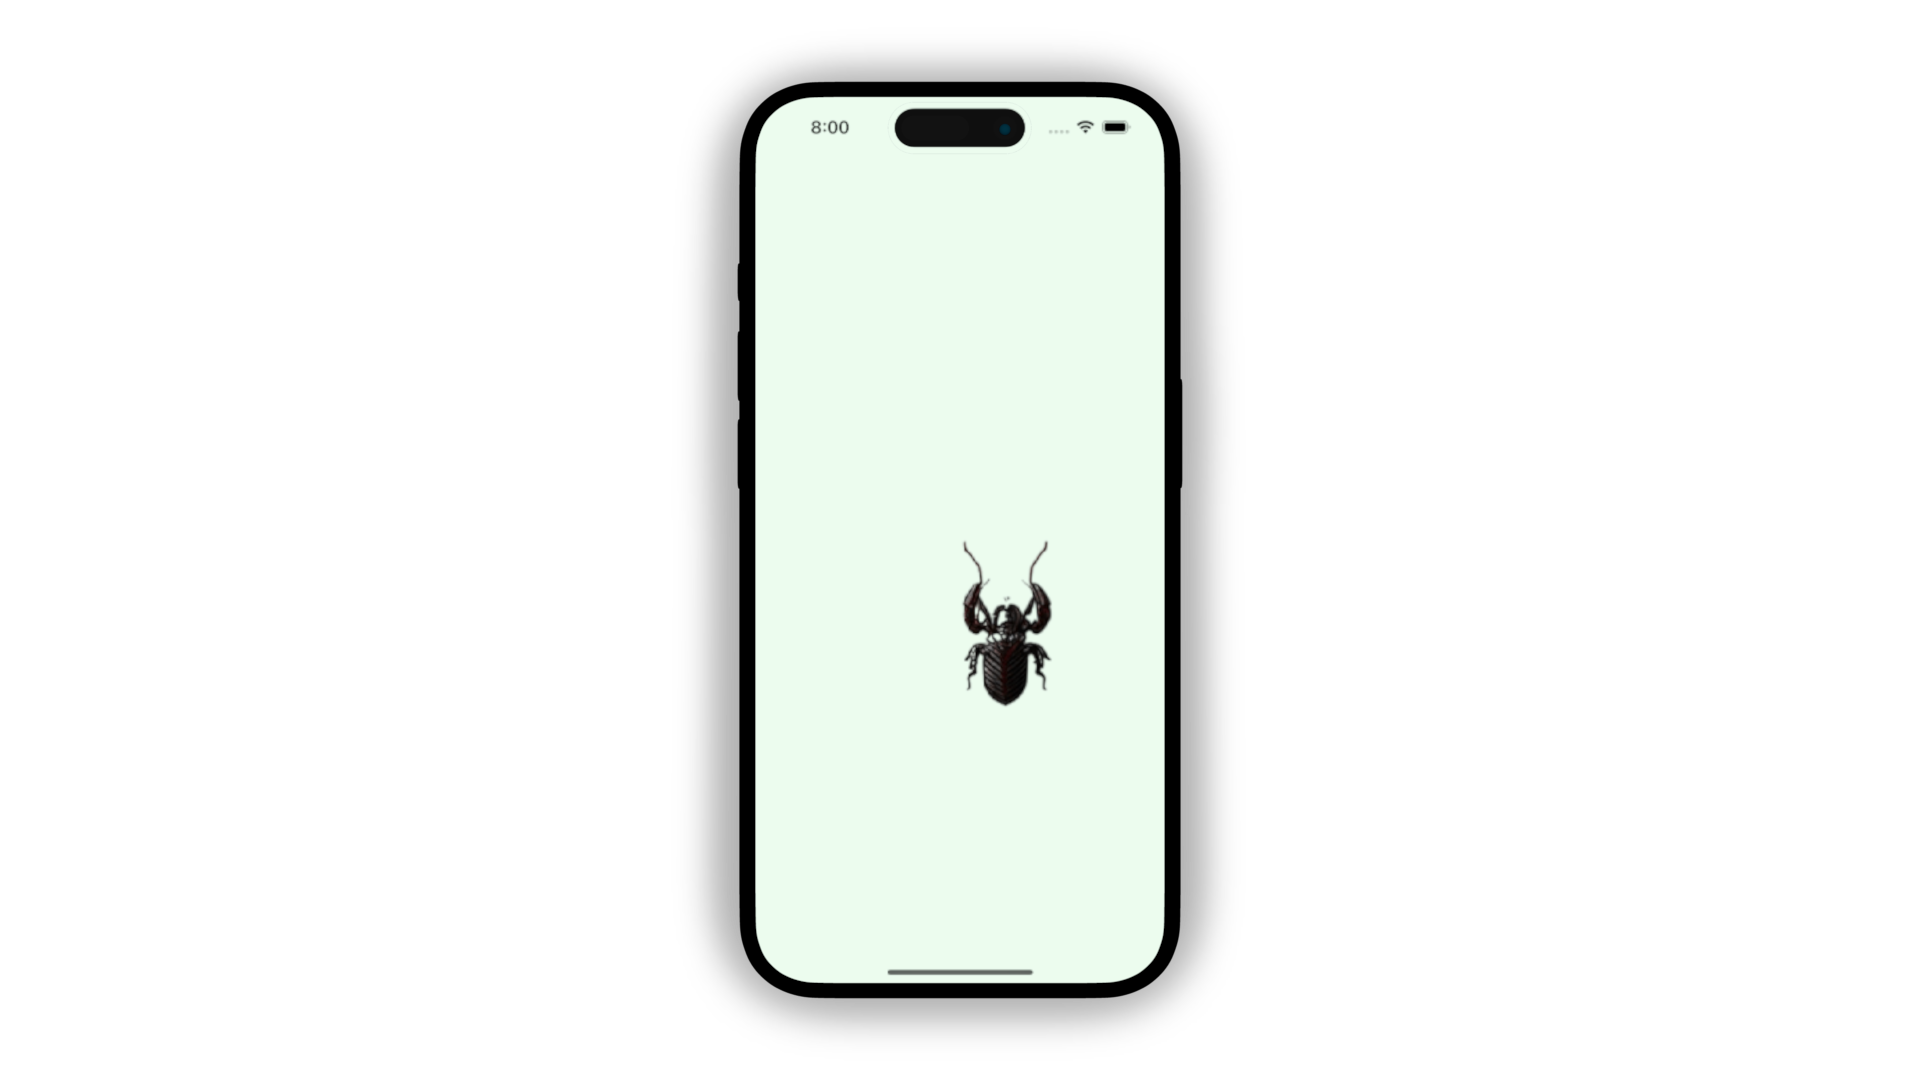
Figure 7. Bug not in the centre
The reason is that we have to consider another property of a component called anchor.
Setting a component's anchor
The anchor of a component is where this component is referenced and measured in terms of its position. We can also think of the anchor as the point where we can rotate it. By default, the anchor of a component is at (0, 0), or top-left.
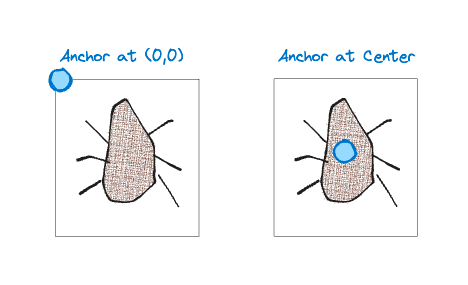
Figure 8. Anchor of a component
It is common to always set the anchor of a component to center to make it more intuitive when positioning components across the screen. To do so, we can set it by using the provided Anchor constants.
//bug_squash_game.dart

//rest of the code
bugComponent.position = Vector2(size.x / 2, size.y / 2);
bugComponent.anchor = Anchor.center;
add(bugComponent);
If we run with this updated code, we should be able to see the component exactly in the middle of the screen.
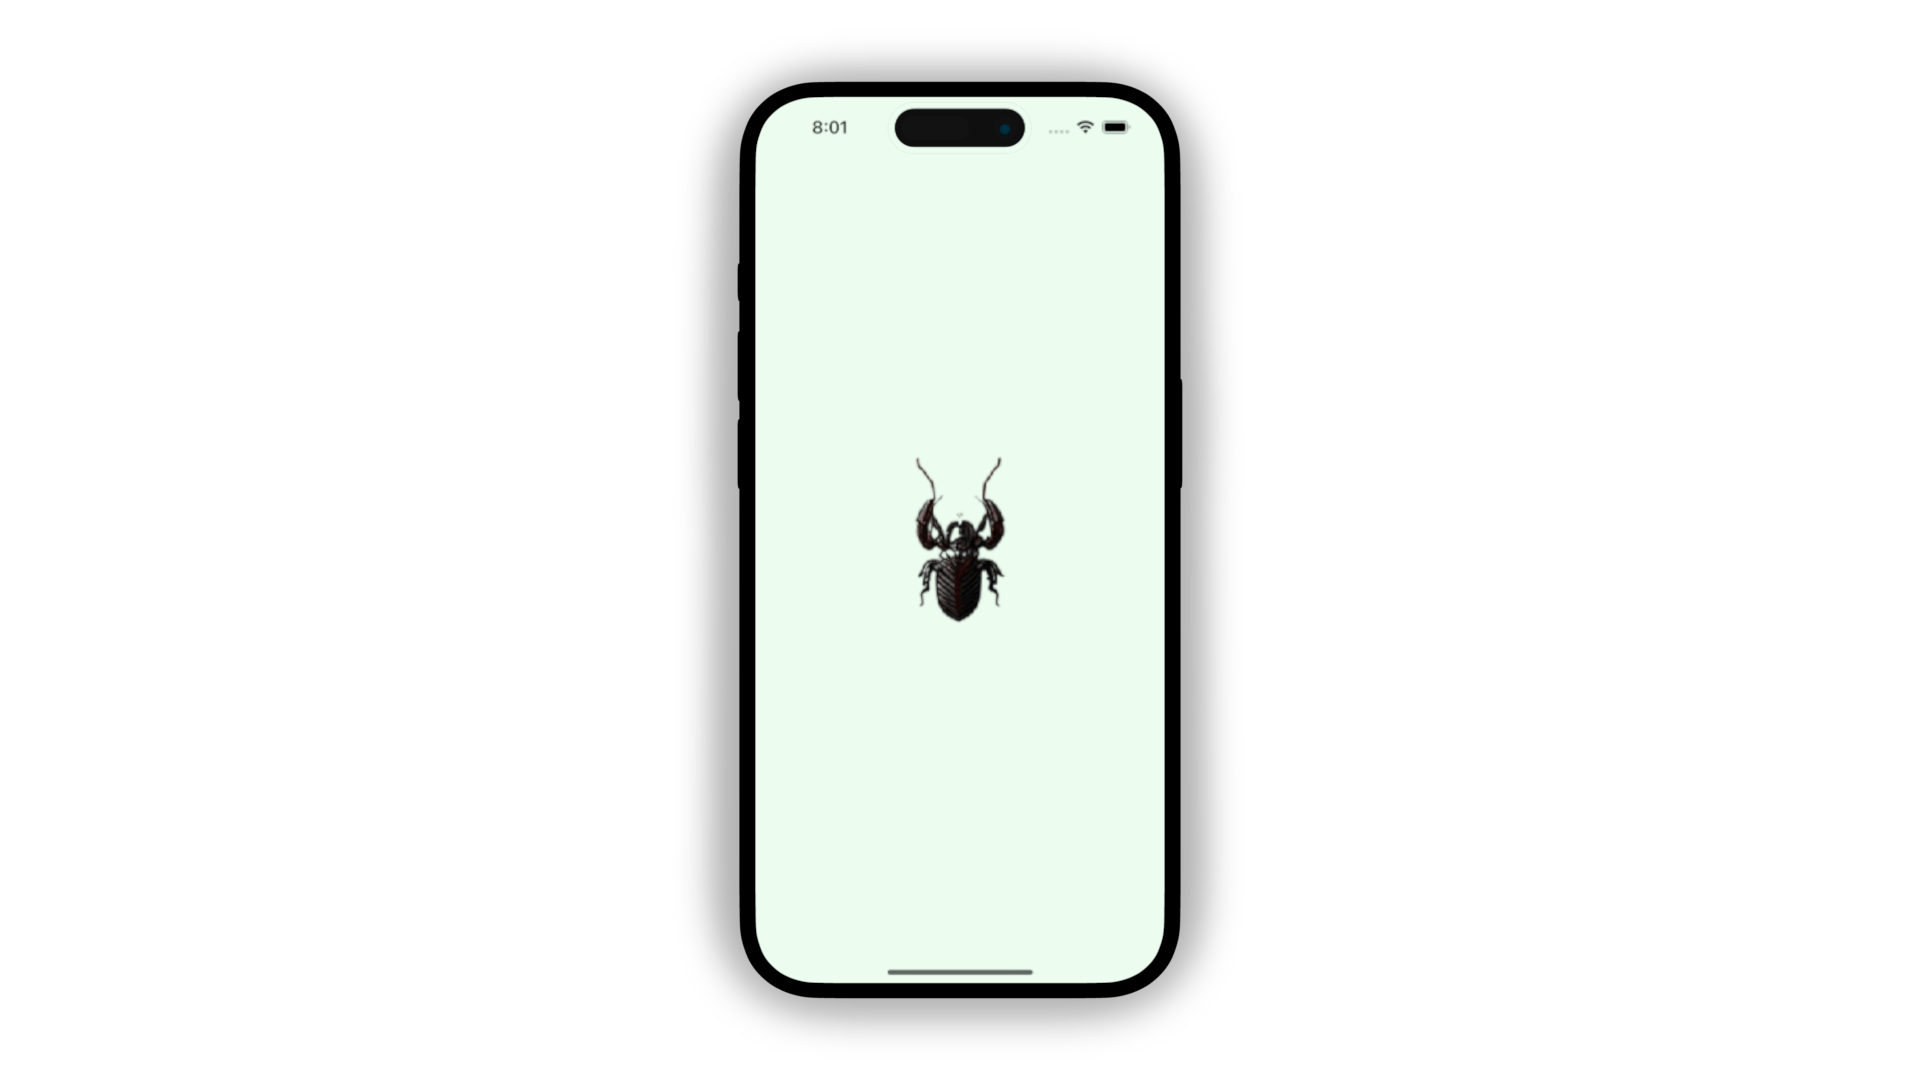
Figure 9. Bug in the center of the screen
We should now know how to place any components in our game on the screen. Understanding both position and anchor should save you the headache in the long run when you are designing your own game later.
Adding tap capability
Our game is squashing bugs, let's add a feature to handle tap events. By default, the SpriteComponent and other Component classes do not accept tap inputs. The way to add this capability is by creating our own Component and implementing the mixin called TapCallbacks.
Creating your own Components
First, let's create a class that extends SpriteComponent and call it Bug. Components have similar lifecycle as a Game, in which we put the initialisation of properties within the onLoad() method.
Instead of building the bug SpriteComponent from the BugSquashGame, we can contain this initialisation within the new Bug class.
// bug.dart

import 'dart:async';

import 'package:flame/components.dart';

class Bug extends SpriteComponent {
  @override
  FutureOr<void> onLoad() async {
    sprite = await Sprite.load('bug.png');
    return super.onLoad();
  }
}
Since we know that a Bug will always have the bug.png sprite, we can initialise this sprite during the onLoad() method of our Bug component. This Bug can now be instantiated anywhere in the app, but for now, let's create one in BugSquashGame.
//bug_squash_game.dart

import 'dart:async';
import 'dart:ui';

import 'package:bug_squash_demo/bug.dart';
import 'package:flame/game.dart';
import 'package:flame/particles.dart';

class BugSquashGame extends FlameGame {
  @override
  Color backgroundColor() {
    return const Color(0xFFEBFBEE);
  }

  @override
  FutureOr<void> onLoad() async {
    final bugComponent = Bug();
    bugComponent.position = Vector2(size.x / 2, size.y / 2);
    bugComponent.anchor = Anchor.center;
    add(bugComponent);
    return super.onLoad();
  }
}
If we run the updated code, we should see the same result as Figure 9. Nothing has changed except that we have a more customisable Bug component.
Implementing the TapCallbacks mixin
To make our component tappable, we need to implement the TapCallbacks mixin. This interface has a few methods we can use to handle inputs such as tapping down, tapping up, long tapping, and even cancelling the tap. In our Bug Squash game, we will just handle the event of tapping down the bug.
// bug.dart

import 'dart:async';

import 'package:flame/components.dart';
import 'package:flame/events.dart';

class Bug extends SpriteComponent with TapCallbacks {

  @override
  FutureOr<void> onLoad() async {
    sprite = await Sprite.load('bug.png');
    return super.onLoad();
  }

  @override
  void onTapDown(TapDownEvent event) {
    //Write logic when the bug is tapped.
  }
}
Adding sound effects
Now to the fun part, let's add a sound effect whenever we tap the bug on the screen. Make sure that you have added the squash.mp3 audio file in your project, as well as putting it in the correct directory.
Unfortunately, Flame does not have an audio player built in the same library. We have to add this separately in our project.
flutter pub add flame_audio
This should add the dependency in your pubspec.yaml.
Then, all we need to do is play this sound whenever we tap the bug.
// bug.dart

import 'dart:async';

import 'package:flame/components.dart';
import 'package:flame/events.dart';
import 'package:flame_audio/flame_audio.dart';

class Bug extends SpriteComponent with TapCallbacks {
  @override
  FutureOr<void> onLoad() async {
    sprite = await Sprite.load('bug.png');
    return super.onLoad();
  }

  @override
  void onTapDown(TapDownEvent event) {
    FlameAudio.play("squash.mp3");
  }
}
If you don't hear any sound, try closing the app and then rebuild your code as FlameAudio requires some rebuilding when being added to a project.
You should now be able to hear the bug being squashed!
Displaying the bug being squashed
When we tap the bug, it is better to see the bug being squashed to inform us that we should squash the next bug. There are many ways we can do this, but I will show you one option.
Composition of components
The components of Flame were designed to be composable just like Flutter widgets. A component can have multiple children components which can be grouped however it would make sense to you.
An example of this is the BugSquashGame that we have. This class extends from FlameGame which is, you guessed it, is also a component. The BugSquashGame can contain multiple components such as Bug, Score, and another user interface that we want to add. Think of it as a container of components.
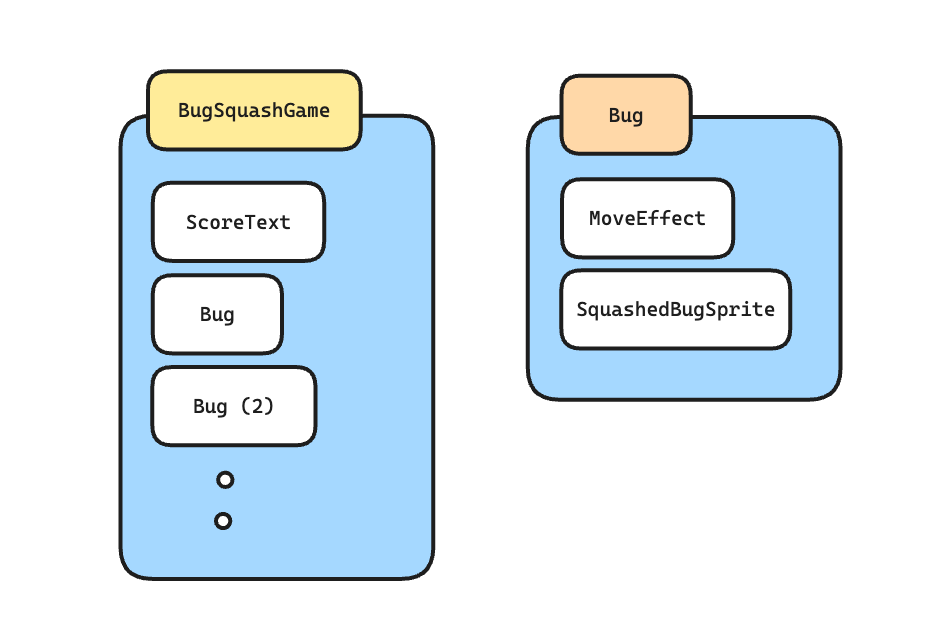
Figure 10. Components having children components
We can use this idea to add an effect of the bug being squashed by adding a child component to the Bug component class. The Bug class can have a SpriteComponent child that has an image of a squashed bug. We use the add() method of Component to add this sprite inside the onLoad() function.
// bug.dart

//rest of the code

  @override
  FutureOr<void> onLoad() async {
    sprite = await Sprite.load('bug.png');

    final squashedBugSprite = await Sprite.load('squashed_bug.png');
    final squashedBugComponent = SpriteComponent(sprite: squashedBugSprite);
    add(squashedBugComponent);
    return super.onLoad();
  }

//rest of the code
If you run your project with the updated code above, you will see that the squashed bug is on top of our normal bug sprite. Adding a component always goes on top of previously added components by default in that order. You can change this behaviour by updating the priority property of a component (the higher priority, the more front the component will be).
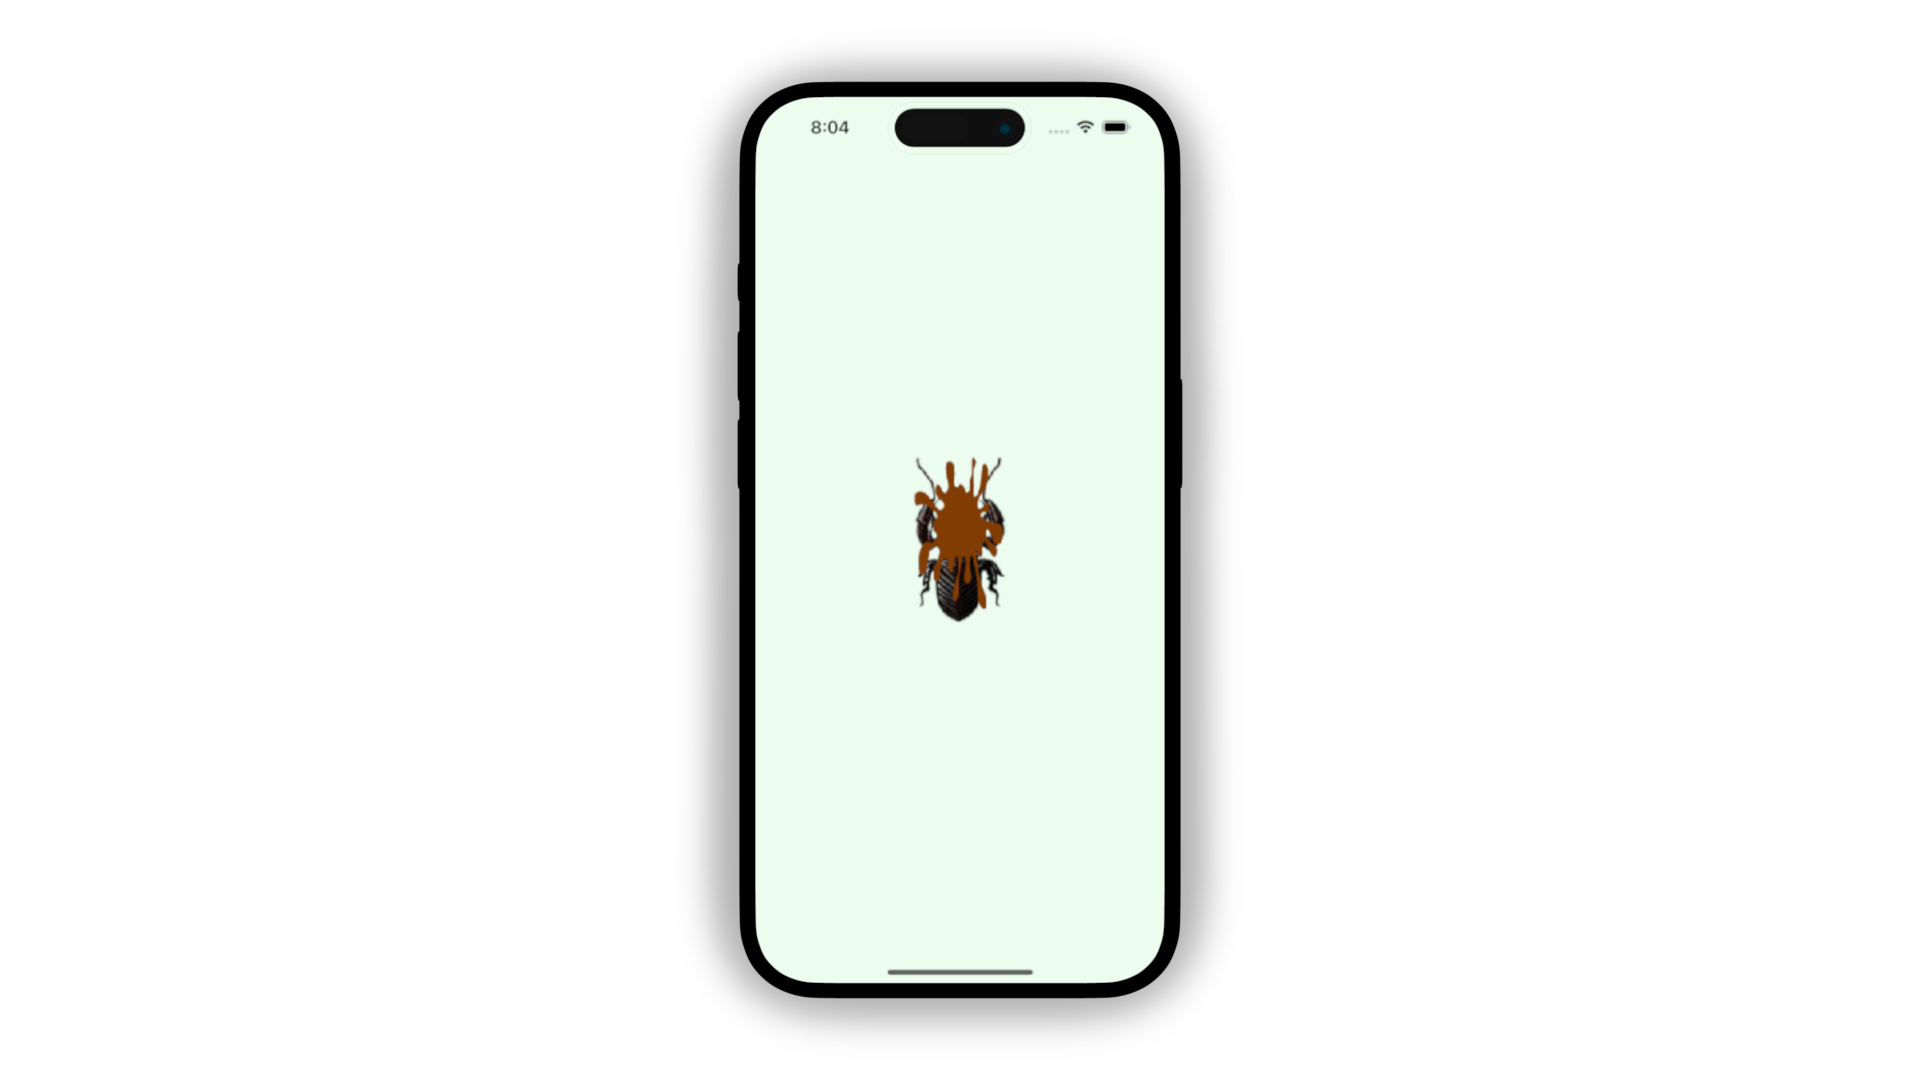
Figure 11. Squashed bug
Our Bug component has a child SpriteComponent that shows a squashed bug. But this is not the behaviour that we want. We expect this sprite to only appear after we tap on the bug. That's the game!
Let's fix this by hiding the splatter, and only showing it after tapping the bug. What we can do is set the opacity of the splatter to 0, so we don't see it initially. Once we tap it, we can set the opacity to 100% so we can see it.
// bug.dart

import 'dart:async';

import 'package:flame/components.dart';
import 'package:flame/events.dart';
import 'package:flame_audio/flame_audio.dart';

class Bug extends SpriteComponent with TapCallbacks {
  late SpriteComponent _squashedBugComponent;

  @override
  FutureOr<void> onLoad() async {
    sprite = await Sprite.load('bug.png');

    final squashedBugSprite = await Sprite.load('squashed_bug.png');
    _squashedBugComponent = SpriteComponent(sprite: squashedBugSprite);
    _squashedBugComponent.opacity = 0;
    add(_squashedBugComponent);
    return super.onLoad();
  }

  @override
  void onTapDown(TapDownEvent event) {
    FlameAudio.play("squash.mp3");
    _squashedBugComponent.opacity = 1;
  }
}
We made the squashedBugComponent to be a private variable inside the Bug class so that it can be accessed across different method. We initially set the opacity to 0 in onLoad() and set it to 100% opacity = 1 when we tap the bug. The visual effect should be better!
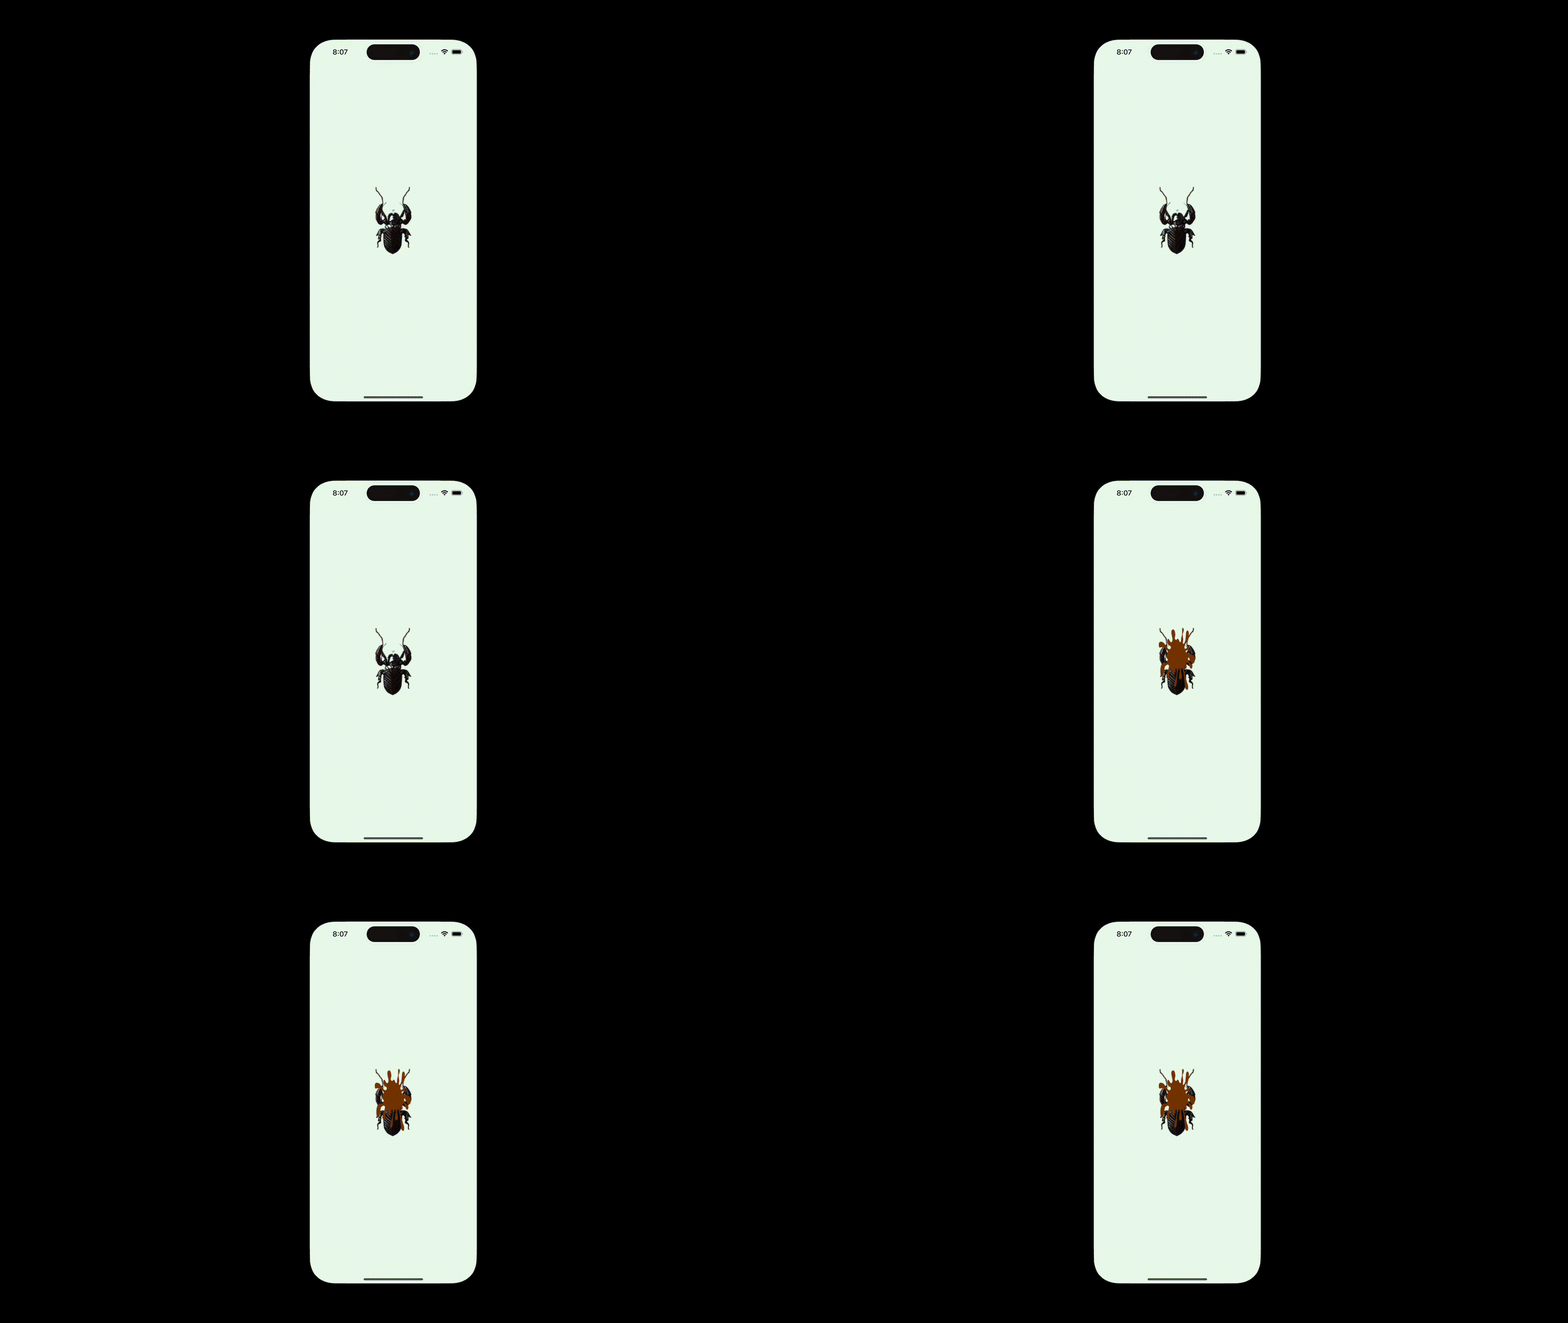
Video 1. The bug is squashed when tapped
As we can see in Video 1, the basic logic of our app is now working!
Animating Components using Effects
A game is boring if nothing is moving around. Let's solve this by using Effects. An Effect is a type of Component that changes its properties over time. Time moves forward when a game is running, and Effects use this to alter a Component's properties such as angle, position, opacity, and more.
There are many types of Effects, but for this game, we will only use a few.
Moving a Component using MoveEffect
The simplest way to move a Component around is by using the MoveEffect. This effect changes the position of a component in different ways. Let's start with MoveEffect.to().
The MoveEffect.to() accepts two arguments; a destination represented by a Vector2 and EffectController which determines the time and approach a component would take to reach the destination.
Let's try an example. Add the following code at the end of onLoad() function in bug.dart.
// bug.dart

//rest of the code

  @override
  FutureOr<void> onLoad() async {
    sprite = await Sprite.load('bug.png');

    final squashedBugSprite = await Sprite.load('squashed_bug.png');
    _squashedBugComponent = SpriteComponent(sprite: squashedBugSprite);
    _squashedBugComponent.opacity = 0;
    add(_squashedBugComponent);

    //Add move effect
    final destination = Vector2(100, 600);
    final effectController = EffectController(
      startDelay: 2.0,
      duration: 1.0,
    );
    final moveEffect = MoveEffect.to(destination, effectController);
    add(moveEffect);

    super.onLoad();
  }

//rest of the code

}
The MoveEffect.to() is a method to use if we want to change the position of a Component to a specific location on the screen using a Vector2 type. The EffectController can be used to change how an Effect is done, whether it would repeat, reverse, how fast, and more.
Using the code above, the bug will start moving to position x: 100 and y: 600 after 2 seconds. The duration of this movement will last for 1 second.
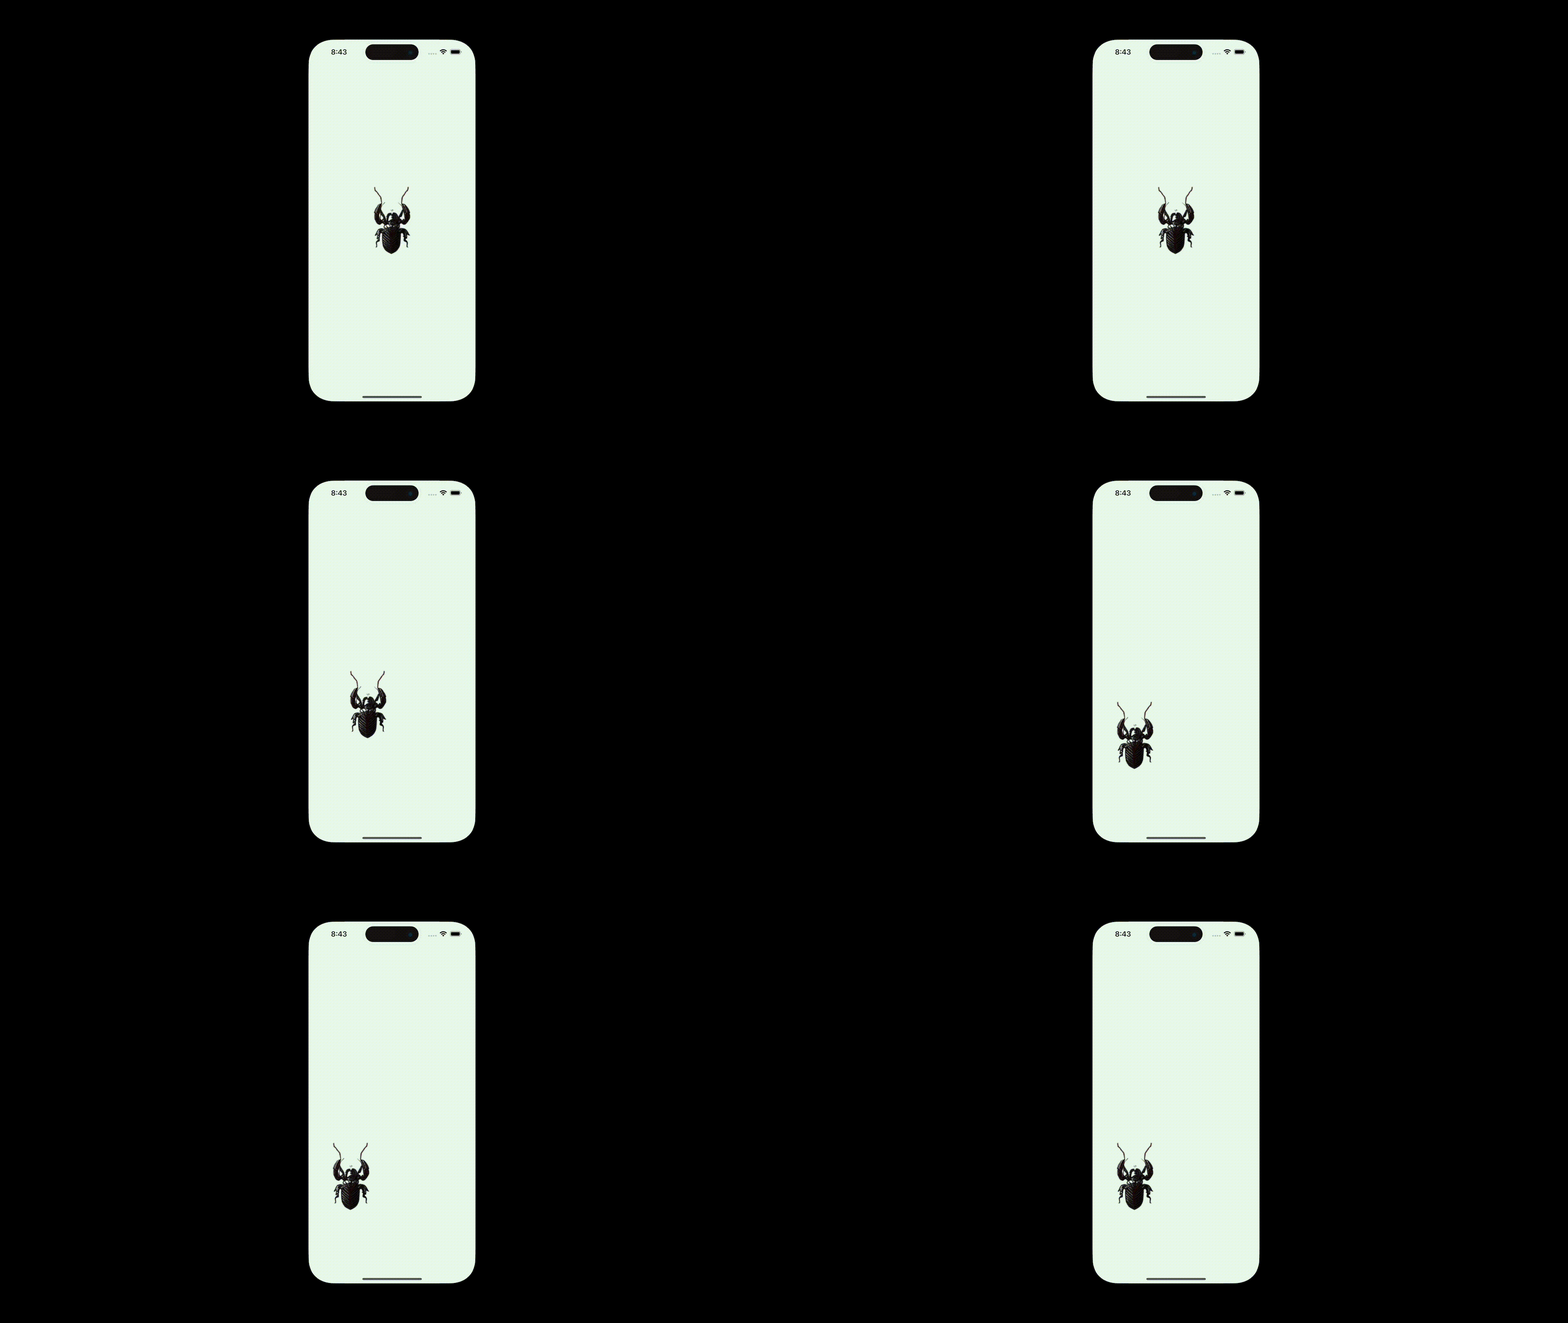
Video 2. Bug movement (It's stuttering due to .gif compression)
Of course, there are many other types of MoveEffect that you can use, so feel free to find out what works best for your game.
Changing the angle of a component
The movement of the bug shown in Video 2 does not seem natural because the bug is facing up the entire time while moving. Let's change the angle of the bug to the direction of movement.
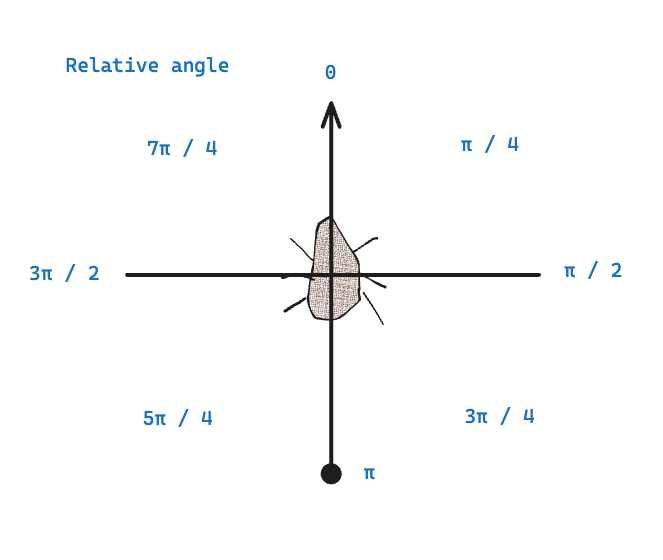
Figure 12. Relative angles in radians
In Flame, the angle property of a Component is represented in radians. Since the bug is facing up, we can assume that the upwards direction is 0 radians. Since it's moving to the bottom-left, that direction is around 5 * pi / 4.
// bug.dart

//rest of the code

  @override
  FutureOr<void> onLoad() async {
    sprite = await Sprite.load('bug.png');

    final squashedBugSprite = await Sprite.load('squashed_bug.png');
    _squashedBugComponent = SpriteComponent(sprite: squashedBugSprite);
    _squashedBugComponent.opacity = 0;
    add(_squashedBugComponent);

    //Change the bug angle
    angle = 5 * pi / 4;

    //Add move effect
    final destination = Vector2(100, 600);
    final effectController = EffectController(
      startDelay: 2.0,
      duration: 1.0,
    );
    final moveEffect = MoveEffect.to(destination, effectController);
    add(moveEffect);

    super.onLoad();
  }

	//rest of the code
}
Removing components
Our game should have multiple bugs running around. Once they are squashed, they should disappear from the game. A convenient way to do this is to remove the bug Component from the game. This will also save your device's memory, in the long run, the moment you have a lot of bugs running around the screen.
A parent Component has a method called remove() to dispose the a child Component. In our code, we can add a logic in our BugSquashGame to remove a Bug when tapped. We should also keep track of the Bug components that the game has added.
The first thing we can change is how we set the OnTapDown method of Bug. We can keep the logic of playing the squash sound effect and making the visual effect appear. However, we must set another logic to remove this Bug from the parent. We will do this by making the onTapDown method settable outside the class.
// bug.dart

import 'dart:async';
import 'dart:math';

import 'package:flame/components.dart';
import 'package:flame/effects.dart';
import 'package:flame/events.dart';
import 'package:flame_audio/flame_audio.dart';

class Bug extends SpriteComponent with TapCallbacks {
  late SpriteComponent _squashedBugComponent;

  Function()? onTap;

  late MoveEffect _moveEffect;

  @override
  FutureOr<void> onLoad() async {
    sprite = await Sprite.load('bug.png');

    final squashedBugSprite = await Sprite.load('squashed_bug.png');
    _squashedBugComponent = SpriteComponent(sprite: squashedBugSprite);
    _squashedBugComponent.opacity = 0;
    add(_squashedBugComponent);

    //Change the bug angle
    angle = 5 * pi / 4;

    //Add move effect
    final destination = Vector2(100, 600);
    final effectController = EffectController(
      startDelay: 2.0,
      duration: 1.0,
    );
    _moveEffect = MoveEffect.to(destination, effectController);
    add(_moveEffect);

    super.onLoad();
  }

  @override
  void onTapDown(TapDownEvent event) {
    //Stop the movement of the bug when tapped.
    if (!_moveEffect.isPaused) {
      _moveEffect.pause();
    }
    FlameAudio.play("squash.mp3");
    _squashedBugComponent.opacity = 1;

    // Call the onTap method set by the parent component
    onTap?.call();
  }
}
//bug_squash_game.dart

import 'dart:async';
import 'dart:ui';

import 'package:bug_squash_demo/bug.dart';
import 'package:flame/game.dart';
import 'package:flame/particles.dart';

class BugSquashGame extends FlameGame {
  @override
  Color backgroundColor() {
    return const Color(0xFFEBFBEE);
  }

  @override
  FutureOr<void> onLoad() async {
    final bugComponent = Bug();
    bugComponent.position = Vector2(size.x / 2, size.y / 2);
    bugComponent.anchor = Anchor.center;

    // Remove the bug 500 ms after tapping
    bugComponent.onTap = () {
      Future.delayed(const Duration(milliseconds: 500)).then(
        (value) {
          if (!bugComponent.isRemoved) {
            remove(bugComponent);
          }
        },
      );
    };

    add(bugComponent);
    return super.onLoad();
  }
}
We add a slight delay before removing the component so we can still see the squash effect and hear the sound before making the bug disappear from the screen. Also, remember that the bug should stop moving immediately after squashing the bug to make squashing the bug more believable.
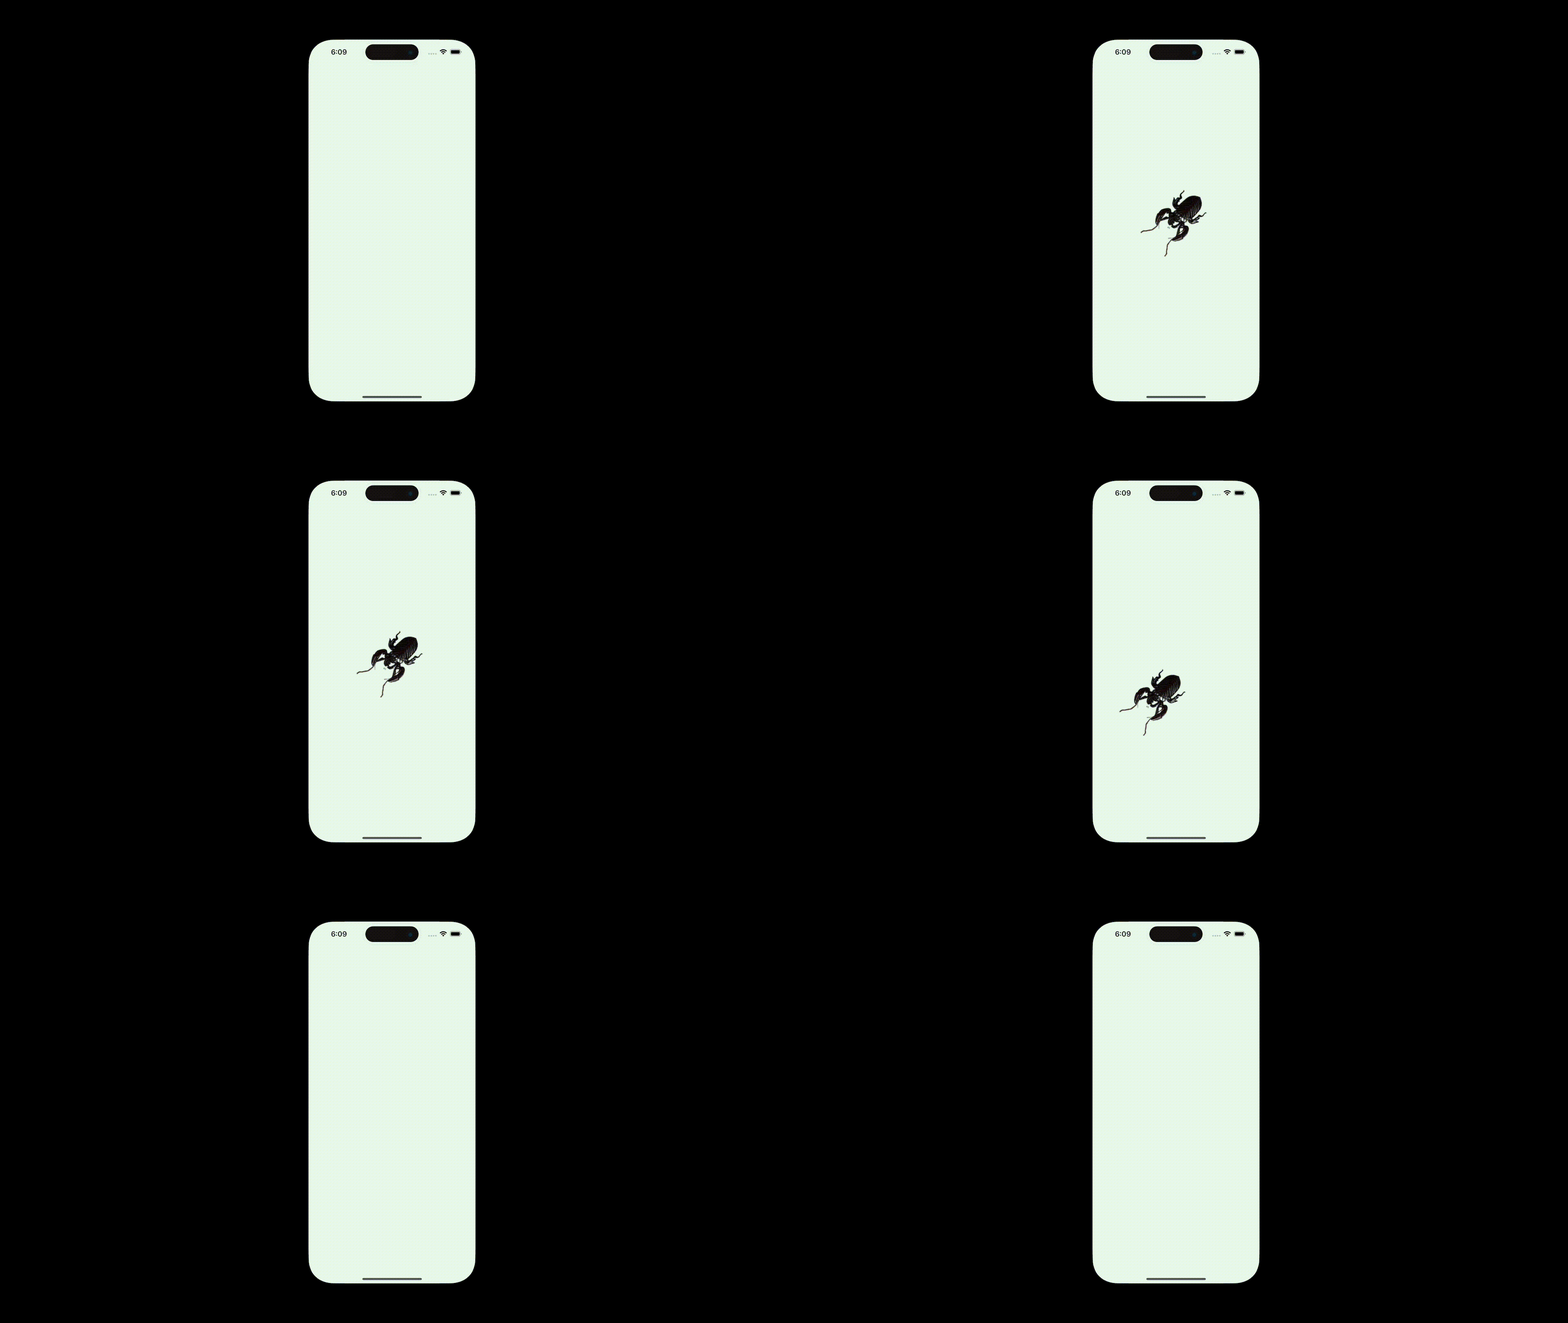
Video 3. Bug stops and is removed after tapping.
The app should now behave as seen in Video 3. All the basic functions of our game have been implemented. We now know how to add, animate, and remove a component. For the next part of this tutorial, we will add the logic of adding multiple bugs on the screen and keeping a count of the number of bugs squashed.
Adding more bugs to squash
To keep the game simple, we can add a timer function that will continuously add bugs. Let's add a limit so our game won't be filled with thousands of bugs unless that's what you want in your game.
It is also important to note that we have not randomised the location where the bugs would appear, as well as their movement patterns. For now, let's make the game easy and make the bugs appear from the left side, and will just walk straight to the right.
Move the Bug Component from left to right
If we want to make the Bug move across the screen from left to right, we need to know the size of the game and how far it will travel. The Bug component does not hold any information about its parent component. However, we know that Bug will always be part of our BugSquash game.
We can use a mixin called HasGameReference<> implemented by Flame to make our component know that it is part of a Game component. Let's use this approach so that the Bug can access the size of the game from its properties.
// bug.dart

import 'dart:async';
import 'dart:math';

import 'package:flame/components.dart';
import 'package:flame/effects.dart';
import 'package:flame/events.dart';
import 'package:flame_audio/flame_audio.dart';

class Bug extends SpriteComponent with TapCallbacks, HasGameReference<BugSquashGame> {

  //rest of the code
Once Bug is implementing the HasGameReference<BugSquashGame>, we can use the reference game to update our MoveEffect to move by the game's width. We should add the Bug's width in this movement so that the bug disappears at the right side.
We will also have to clear this bug after the move effect is finished since they are not needed anymore.
// bug.dart

import 'dart:async';
import 'dart:math';

import 'package:bug_squash_demo/bug_squash_game.dart';
import 'package:flame/components.dart';
import 'package:flame/effects.dart';
import 'package:flame/events.dart';
import 'package:flame_audio/flame_audio.dart';

class Bug extends SpriteComponent
    with TapCallbacks, HasGameReference<BugSquashGame> {
  late SpriteComponent _squashedBugComponent;

  Function()? onTap;

  late MoveEffect _moveEffect;

  @override
  FutureOr<void> onLoad() async {
    sprite = await Sprite.load('bug.png');

    final squashedBugSprite = await Sprite.load('squashed_bug.png');
    _squashedBugComponent = SpriteComponent(sprite: squashedBugSprite);
    _squashedBugComponent.opacity = 0;
    add(_squashedBugComponent);

    //Set the bug angle to face right
    angle = pi / 2;
    //Set the bug position where it is not visible from the left
    position = Vector2(-size.x, position.y);

    //Move the bug from left to right
    final destination = Vector2(game.size.x + (2 * size.x), 0);
    final effectController = EffectController(
      startDelay: 2.0,
      duration: 0.8,
    );
    _moveEffect = MoveEffect.by(destination, effectController);

    // Remove this bug after movement is finished
    _moveEffect.onComplete = () {
      parent?.remove(this);
    };
    add(_moveEffect);

    super.onLoad();
  }

  @override
  void onTapDown(TapDownEvent event) {
    //Stop the movement of the bug when tapped.
    if (!_moveEffect.isPaused) {
      _moveEffect.pause();
    }
    FlameAudio.play("squash.mp3");
    _squashedBugComponent.opacity = 1;

    // Call the onTap method set by the parent component
    onTap?.call();
  }
}
The BugSquashGame should be updated as well so that the bugs created are in a random y-position. The value of the y-position ranges from 0 to the game's height. We set the angle of the Bug to be facing right so that the movement would look more natural.
//bug_squash_game.dart

import 'dart:async';
import 'dart:math';
import 'dart:ui';

import 'package:bug_squash_demo/bug.dart';
import 'package:flame/game.dart';
import 'package:flame/particles.dart';

class BugSquashGame extends FlameGame {
  @override
  Color backgroundColor() {
    return const Color(0xFFEBFBEE);
  }

  @override
  FutureOr<void> onLoad() async {
    final bugComponent = _createBug();
    // Remove the bug 500 ms after tapping
    bugComponent.onTap = () {
      Future.delayed(const Duration(milliseconds: 500)).then(
        (value) {
          if (!bugComponent.isRemoved) {
            remove(bugComponent);
          }
        },
      );
    };
    add(bugComponent);
    return super.onLoad();
  }

  Bug _createBug() {
    final bugComponent = Bug();
    final gameHeight = size.y;
    final randomYPosition = Random().nextDouble() * gameHeight;
    bugComponent.anchor = Anchor.center;
    bugComponent.position = Vector2(0, randomYPosition);
    bugComponent.angle = pi / 2;
    return bugComponent;
  }
}
If we run the updated code, we should see the bug crawling from left to right from a random y-position.
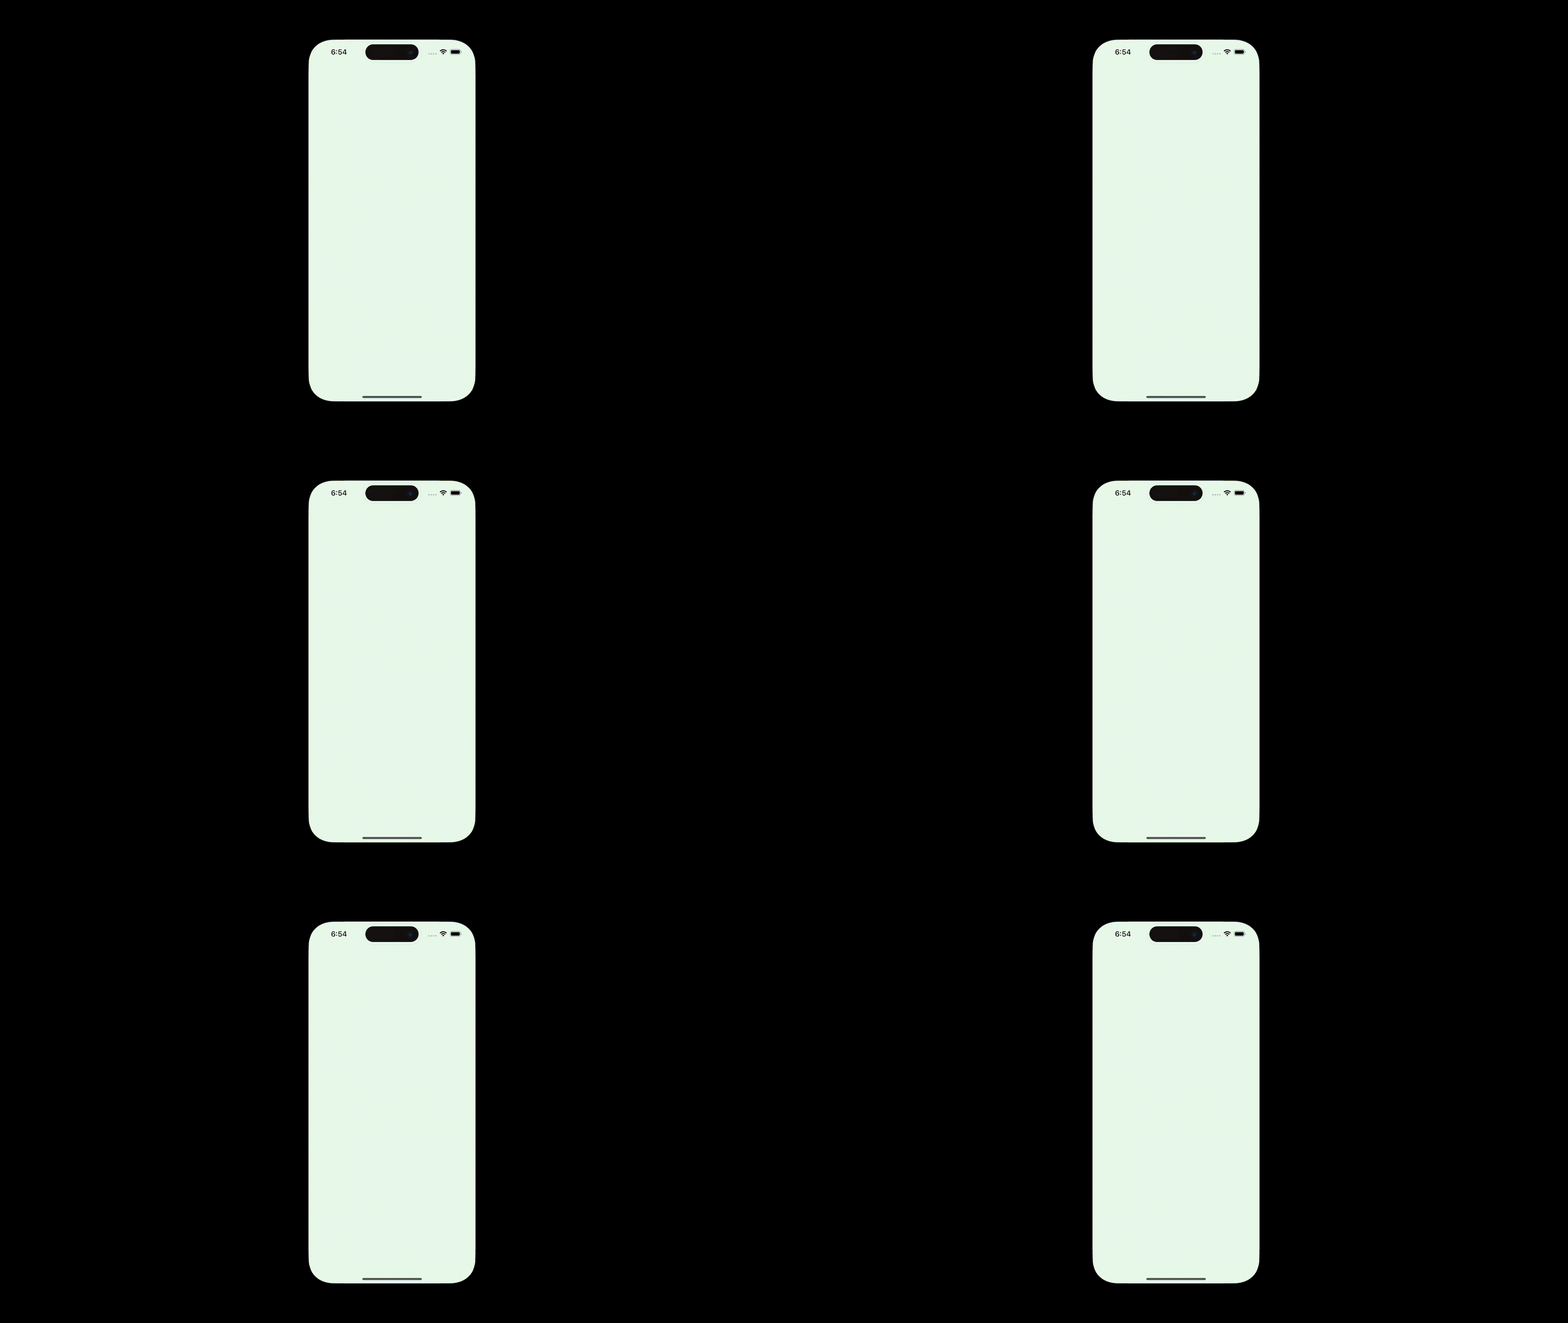
Video 4. Bug moving from left to right.
Adding more bugs
The last thing we want to do is to add a function that will continuously add bugs. To keep it simple, we can add a bug every second until we close the app by using a Timer class from Flame.
The Timer class accepts an argument limit that defines the time interval in which function, onTick, will be called. For our use case, we can set the limit to 1.0 second. We should also set the repeat argument to true. The onTick function will be a function to add a Bug to the game.
Using the update() method
Finally, we need to override the method update() from the Game class. The update method is called every game loop to give us an option on what to do with with the game based on the time elapsed. In this case, we want to create a Bug after 1 second has elapsed.
Since we are using the Timer class from Flame, all the implementation has been done for us, and we just need to call Timer's update() function inside our BugSquashGame's update method.
Following all these instructions, our new BugSquashGame will look like this.
//bug_squash_game.dart

import 'dart:async';
import 'dart:math';
import 'dart:ui';

import 'package:flame/components.dart';
import 'package:bug_squash_demo/bug.dart';
import 'package:flame/game.dart';

class BugSquashGame extends FlameGame {
  late Timer _interval;

  BugSquashGame() {
    _interval = Timer(1.0, onTick: _createBug, repeat: true);
  }

  @override
  void update(double dt) {
    _interval.update(dt);
    super.update(dt);
  }

  @override
  Color backgroundColor() {
    return const Color(0xFFEBFBEE);
  }

  // Function to be called in onTick() every 1 second
  void _createBug() {
    final bugComponent = Bug();
    final gameHeight = size.y;
    final randomYPosition = Random().nextDouble() * gameHeight;
    bugComponent.anchor = Anchor.center;
    bugComponent.position = Vector2(0, randomYPosition);
    bugComponent.angle = pi / 2;
    bugComponent.onTap = () {
      Future.delayed(const Duration(milliseconds: 500)).then(
        (value) {
          if (!bugComponent.isRemoved) {
            remove(bugComponent);
          }
        },
      );
    };
    add(bugComponent);
  }
}
Notice that we have removed overriding the onLoad() function. We can do this because we create the Bug after the BugSquashGame has been created through the _interval timer variable. Now every second, a new Bug will be spawned randomly at the left side of the screen.
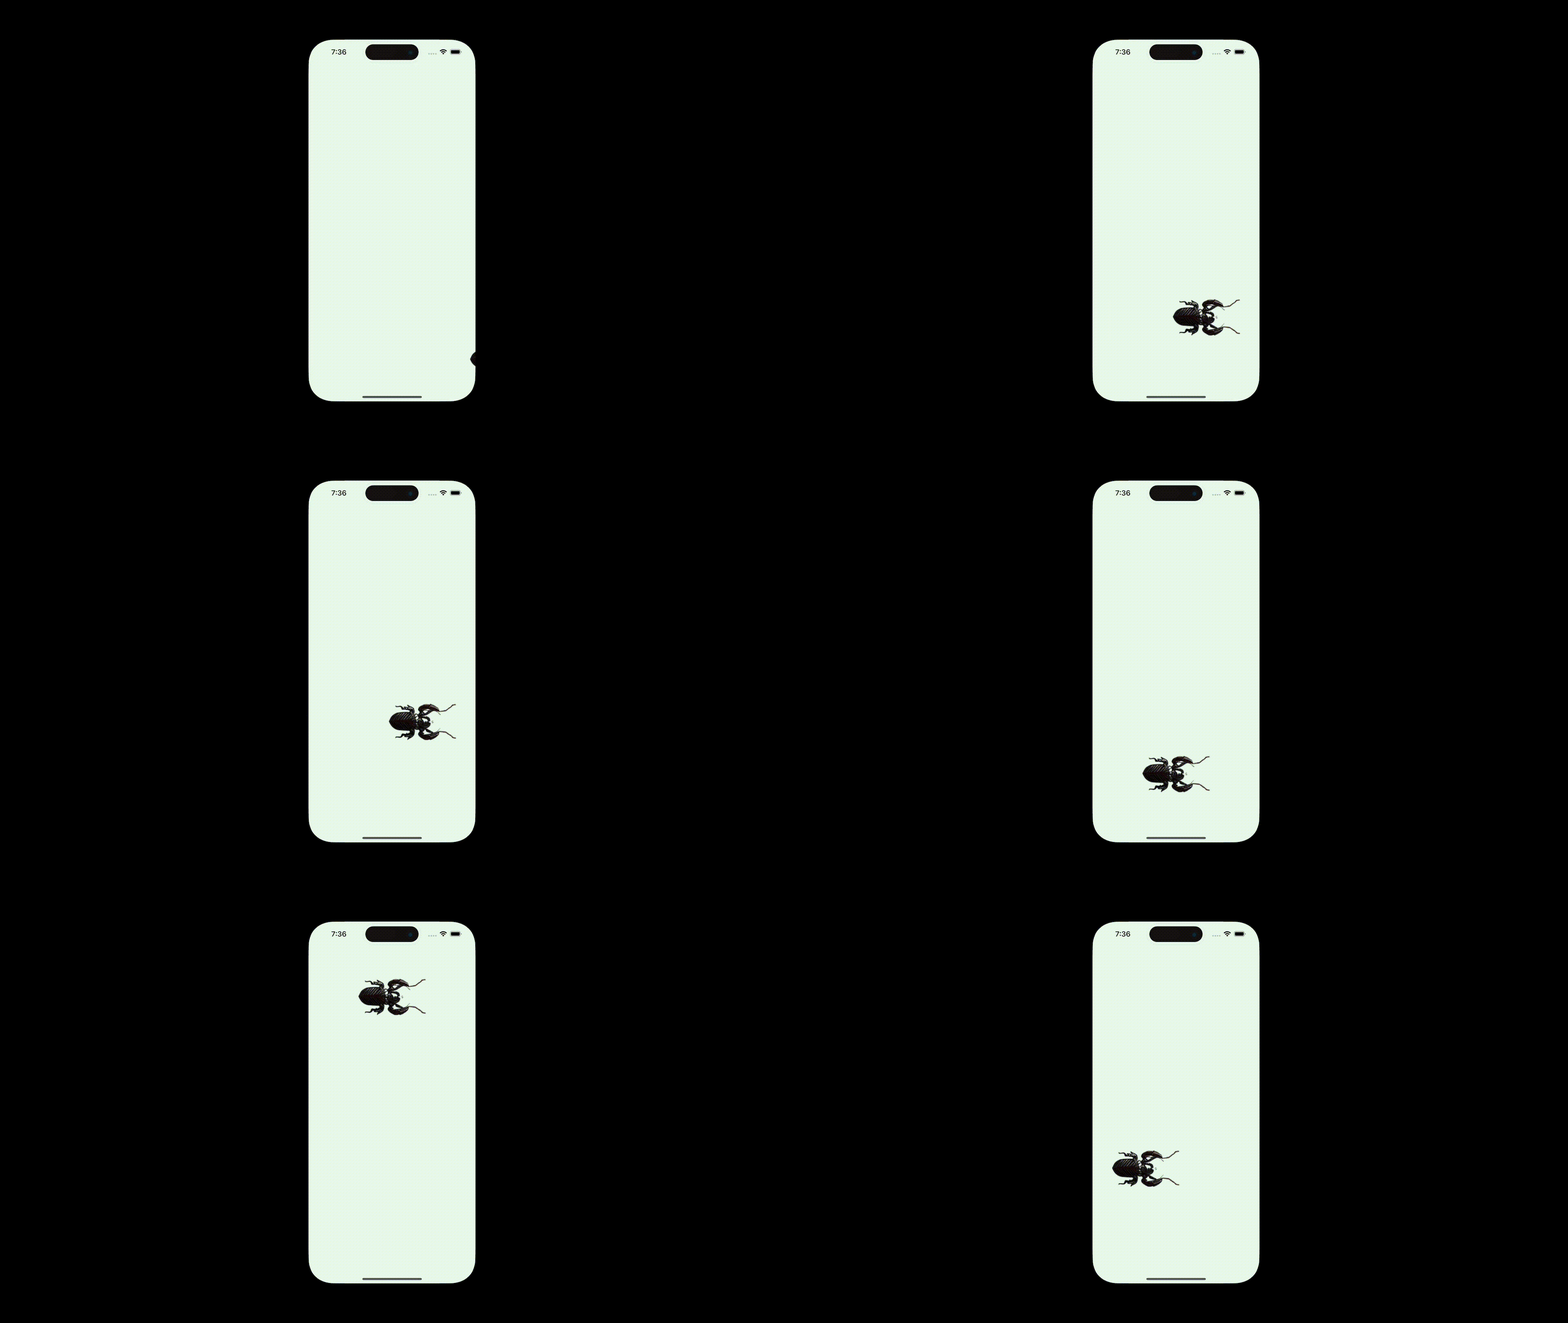
Video 5. Spawn bugs continuously.
Our game is now taking shape! There will be bugs crawling from left to right and it's up to you to squash them as soon as you can.
The last thing that we will do is to add the number of bugs squashed somewhere on the screen.
Adding the number of bugs squashed
The last part of this tutorial is to add a counter for the number of bugs squashed. One way to do this is to use a TextComponent where you can render any text on your game. Since this is a Component, using it would be the same as how we did with our sprite and effects.
We add the scoring logic in the BugSquashGame as this class has the general knowledge of how the game is played. The score can be stored in the _score variable and is displayed by the TextComponent called _scoreComponent. Let's bring the old onLoad() method to initialise the new component.
Initialising the TextComponent
A TextComponent can be initialised by setting the text and its text style. It is good to note that it is a subclass of PositionComponent, which means that we can put this anywhere in the game by updating the position property.
//bug_squash_game.dart

import 'dart:async';
import 'dart:math';

import 'package:flame/components.dart';
import 'package:bug_squash_demo/bug.dart';
import 'package:flame/game.dart';
import 'package:flame/text.dart';
import 'package:flutter/material.dart';

class BugSquashGame extends FlameGame {

  //rest of the code

  late TextComponent _scoreComponent;
  int _score = 0;

	//rest of the code

  @override
  FutureOr<void> onLoad() {
    _scoreComponent = TextComponent(
      text: "$_score",
      textRenderer: TextPaint(
        style: const TextStyle(color: Colors.black, fontSize: 24.0),
      ),
    );
    _scoreComponent.anchor = Anchor.center;
    _scoreComponent.position = Vector2(size.x / 2, 100);
    add(_scoreComponent);
  }

  //rest of the code
}
The _scoreComponent should be displayed at the top centre part of the game. Running this updated code should show you the default score of 0.
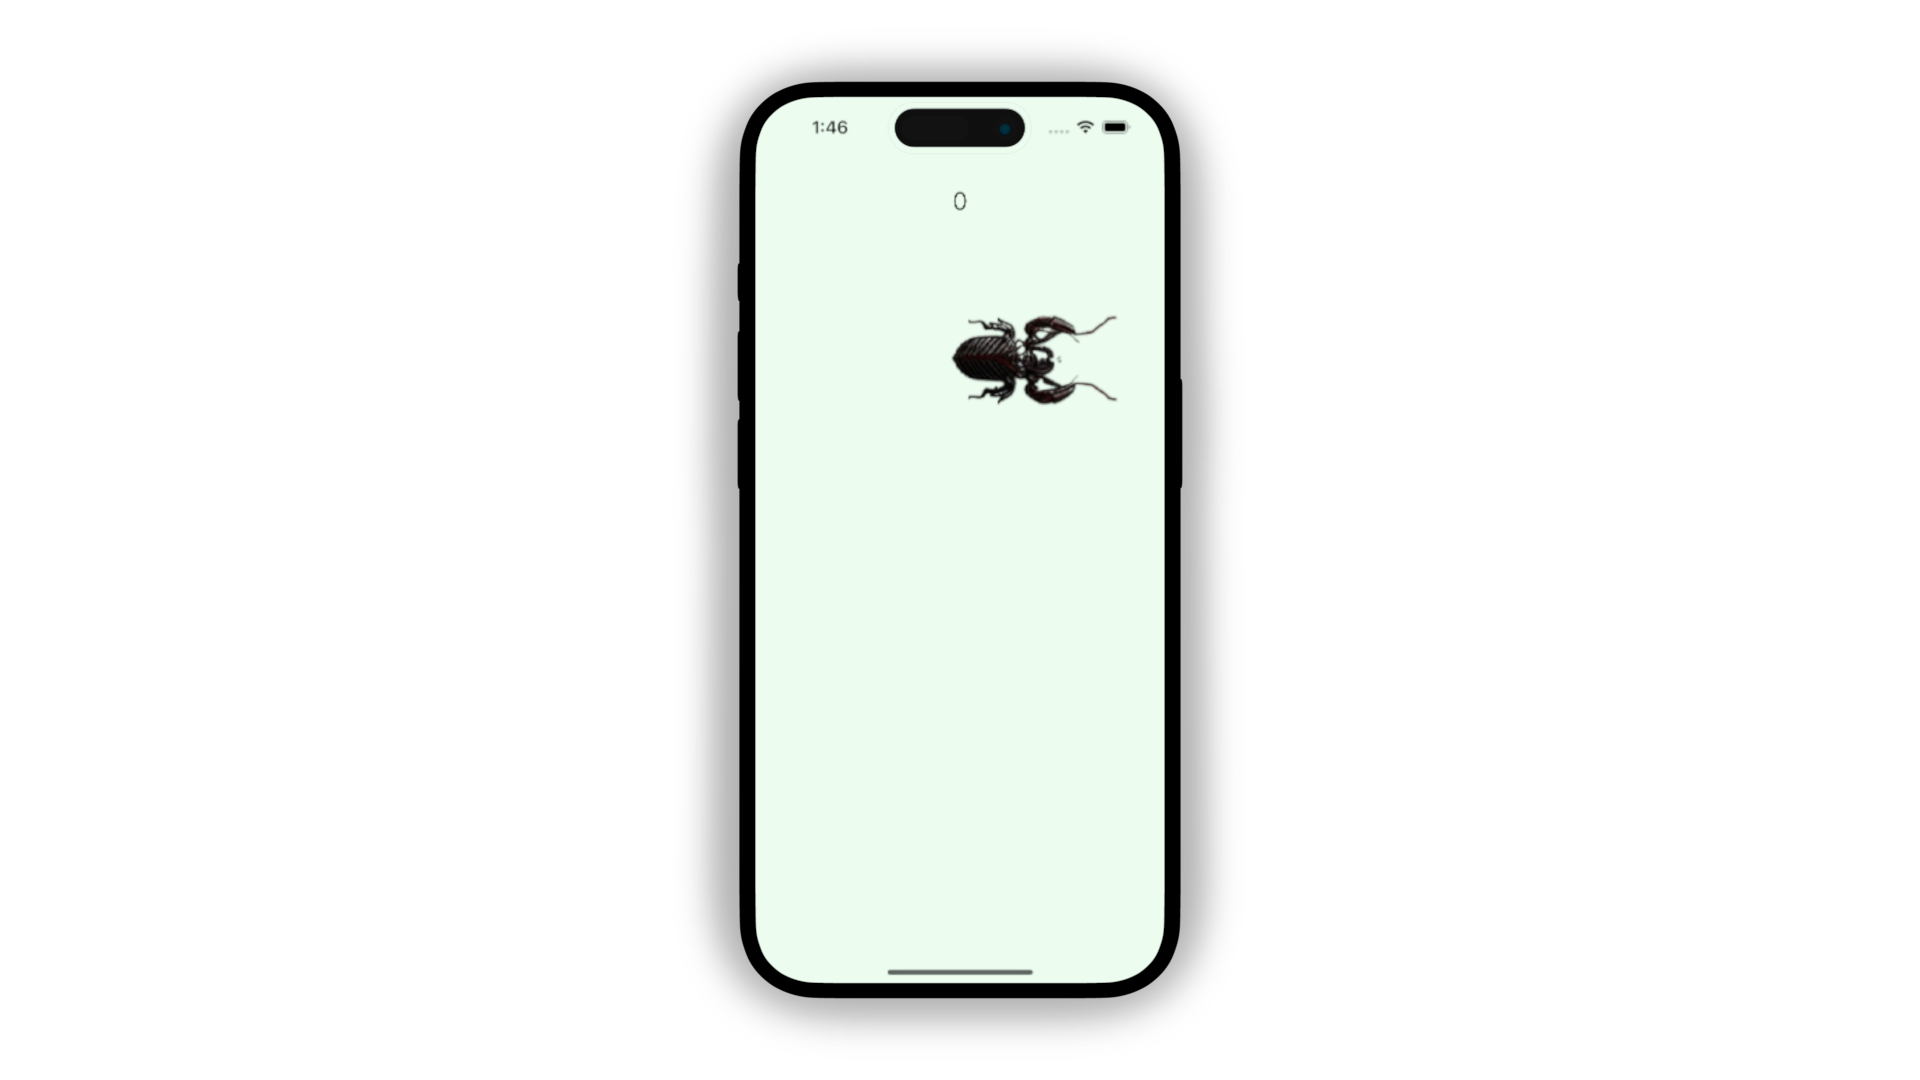
Figure 13. Game with a default score of 0.
Updating the score when tapping the bug
The last important bit that we have to do is to increment the score by 1 whenever we tap a bug. We can add this logic inside the onTap function that we set in the Bug class.
//bug_squash_game.dart

//rest of the code
		bugComponent.onTap = () {
      _scoreComponent.text = "${++_score}"; // Increment the score
      Future.delayed(const Duration(milliseconds: 500)).then(
        (value) {
          if (!bugComponent.isRemoved) {
            remove(bugComponent);
          }
        },
      );
    };
//rest of the code
This will work fine. However, you will notice that if you tap on a Bug multiple times, the score increases as much. The expected behaviour should be to only increment the score by 1 per bug, not by the number of taps. The fix for this can be added to the Bug class' onTapDown implementation.
// bug.dart

import 'dart:async';
import 'dart:math';

import 'package:bug_squash_demo/bug_squash_game.dart';
import 'package:flame/components.dart';
import 'package:flame/effects.dart';
import 'package:flame/events.dart';
import 'package:flame_audio/flame_audio.dart';

class Bug extends SpriteComponent
    with TapCallbacks, HasGameReference<BugSquashGame> {

  //rest of the code..

  var _isAlive = true; //status of the bug

  @override
  void onTapDown(TapDownEvent event) {
    //Stop the movement of the bug when tapped.
    if (!_moveEffect.isPaused) {
      _moveEffect.pause();
    }
    FlameAudio.play("squash.mp3");
    _squashedBugComponent.opacity = 1;

    // Call the onTap method set by the parent component
    if (_isAlive) {
      _isAlive = false;
      onTap?.call();
    }
  }

  //rest of the code..

}
When we tap the bug while it's still alive, we should first set it to be dead by clearing the _isAlive flag. Only if it is still alive that we call the callback function onTap() that we set from the BugSquashGame. This way, the onTap() method won't be spammed to inflate the score.
If I change the _interval of spawning bugs from 1 second to 0.4 seconds in BugSquashGame, the final result will look something like this.
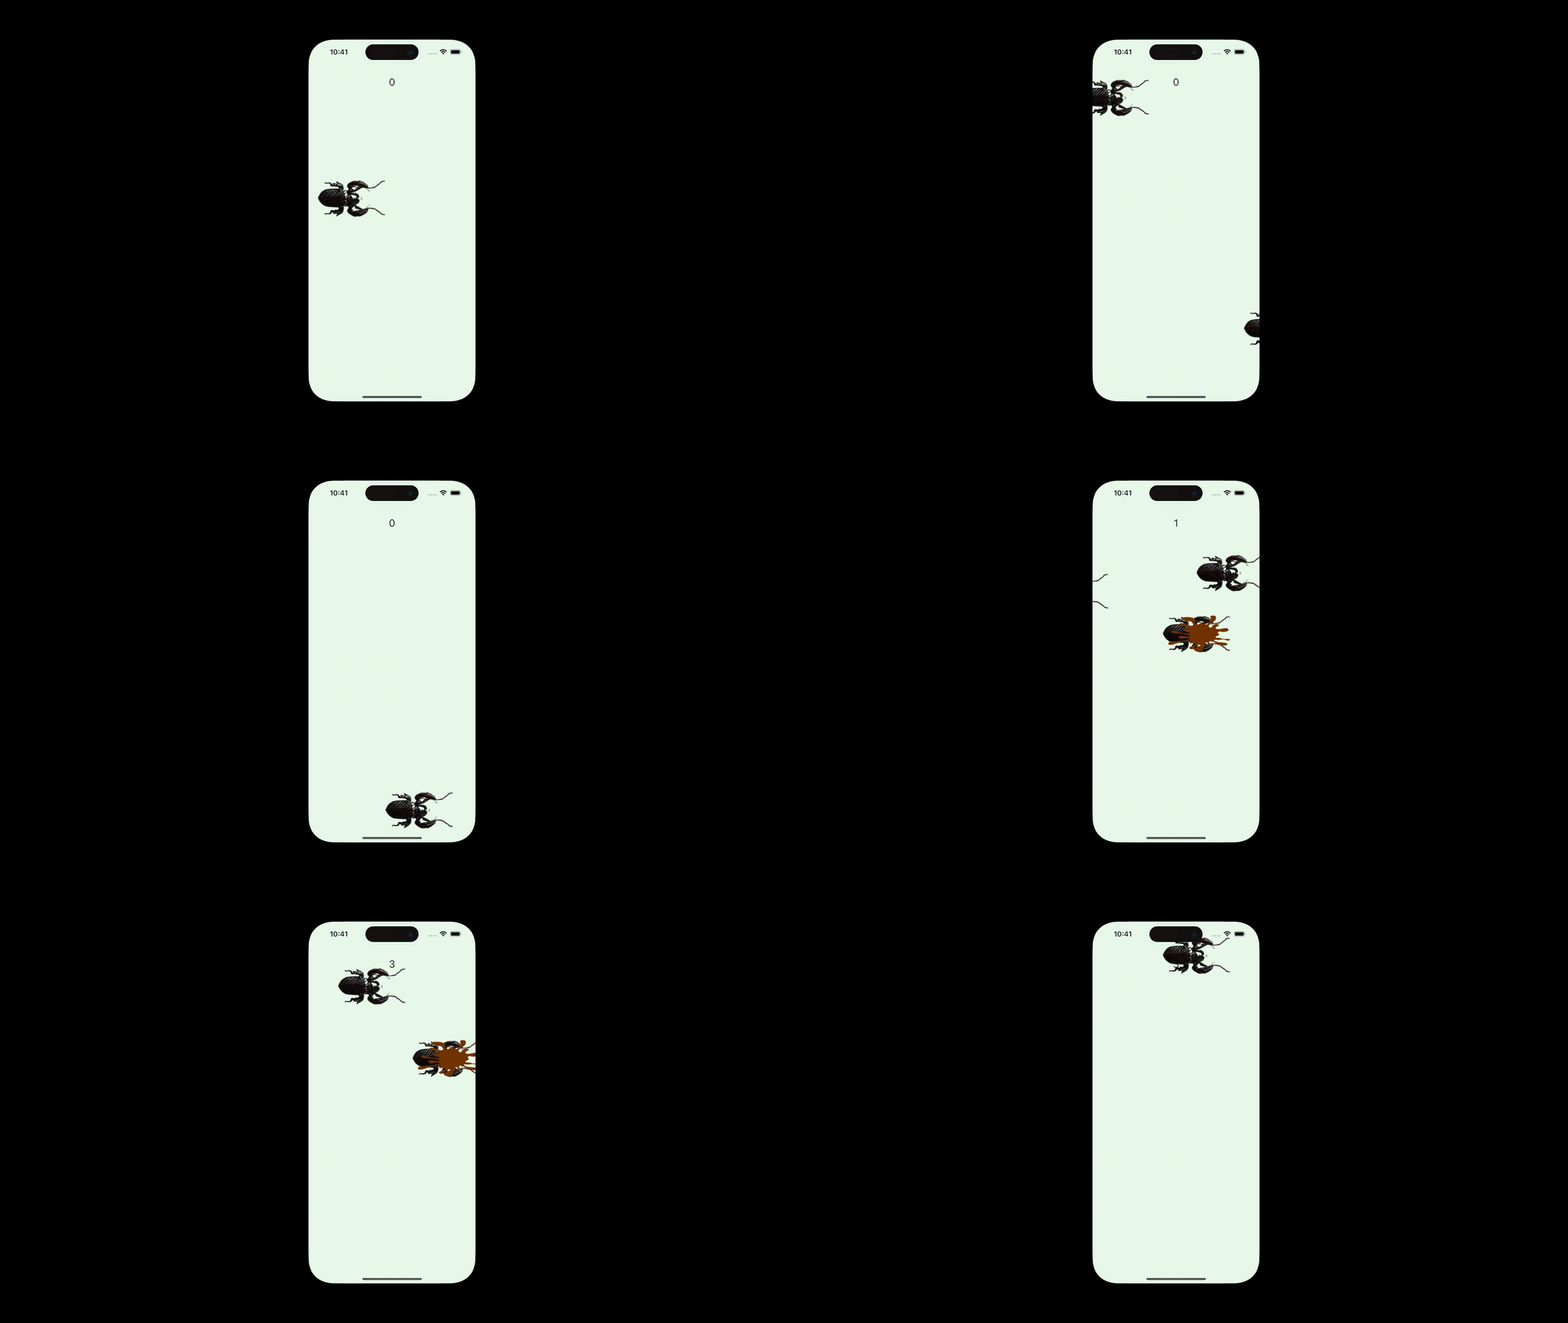
Video 6. The final version of the app with a spawn interval of 0.4 seconds
Conclusion
That's all I have for this simple game of squashing bugs using Flutter and Flame. For now, we have a game where the goal is to squash as many bugs as you can as they appear from the left side of the screen.
If you get lost in the article, you can use my source repository as a reference found below.
One way to improve this game further is to have a more customised and randomised path for the bugs to crawl through. You can also add stages, timers, and even multiple screens if you want to.
I encourage you to learn more about Flame to make cross-platform games with Flutter and share it with the world.

