Simpler and Better Flutter State Management with Cubit
Learn how to use Cubit to cleanly organise our Flutter codebase to be more readable, scalable, and testable.


In this article, we will learn how to use Cubit to cleanly organise our codebase to be more readable, scalable, and testable. This is also one of the better ways in Flutter to separate the UI logic and business logic.
Note that Cubit is only a piece of a bigger package called Bloc that provides a complete state management solution for Dart and Flutter.
Introduction
Why do we need to handle states?
State management and app architecture in Flutter has been and still is an on-going hot topic across different developers. Flutter developers have been given many options on which one to learn and use to start developing apps with.
It is important to use state management because each application needs to persist information and update the view with it. Without states (or technically, just one state), apps will look static and will not be very useful.
Let's look at a simple app that displays a counter with only one state.
// main.dart

import 'package:cubit_tutorial/counter_screen.dart';
import 'package:flutter/material.dart';

void main() {
  runApp(const MyApp());
}

class MyApp extends StatelessWidget {
  const MyApp({super.key});

  @override
  Widget build(BuildContext context) {
    return MaterialApp(
      title: 'Counter app',
      debugShowCheckedModeBanner: false,
      theme: ThemeData(
        colorScheme: ColorScheme.fromSeed(seedColor: Colors.deepPurple),
        useMaterial3: true,
      ),
      home: const CounterScreen(),
    );
  }
}
// counter_screen.dart
import 'package:flutter/material.dart';
class CounterScreen extends StatefulWidget {
const CounterScreen({super.key});
@override
State<CounterScreen> createState() => _CounterScreenState();
}
class _CounterScreenState extends State<CounterScreen> {
int _count = 0;
@override
Widget build(BuildContext context) {
return Scaffold(
body: Center(
child: Text(
'$_count',
style: const TextStyle(
fontSize: 86.0,
),
),
),
);
}
}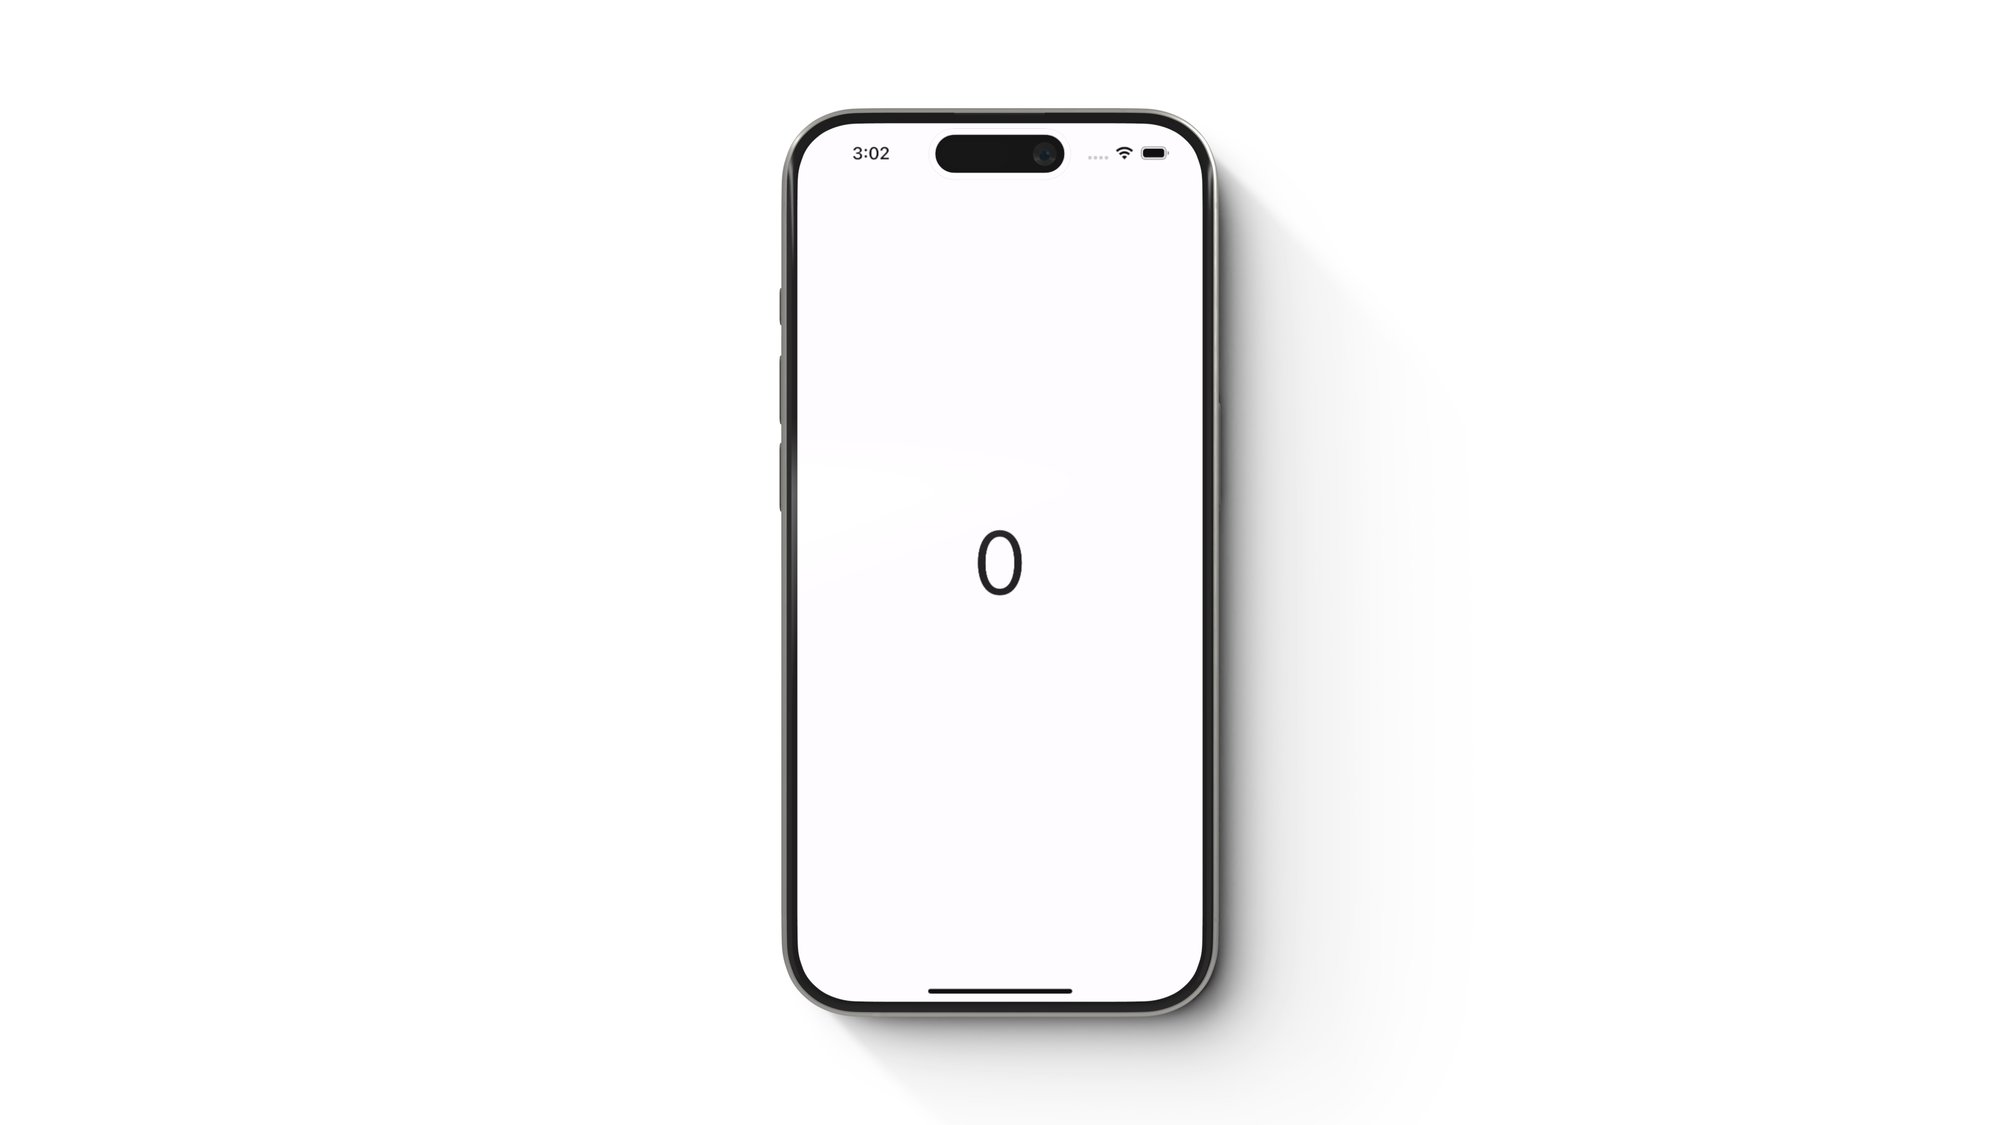
This is an app and it works. However, being an app that only has one state is as good as an image.
If we want to add features such as entering text, downloading images from a server, or in our example, displaying a counter and updating it, then we always need to show different states in our app. The question is how we do state management properly.
Why do we need state management?
The simplest way to change the state in Flutter is to use the setState method within a StatefulWidget. Using setState can change the information that we display in our app. In our simple example, we can add an onTapListener to our screen that increases the value of the counter whilst updating the UI that we display in the app.
 Rafael Delos Santos
Check out this tutorial to understand more about how to use setState in Flutter
If we update our example to increment the counter when tapping the screen using setState, the code will look something like this:
// counter_screen.dart

import 'package:flutter/material.dart';

class CounterScreen extends StatefulWidget {
  const CounterScreen({super.key});

  @override
  State<CounterScreen> createState() => _CounterScreenState();
}

class _CounterScreenState extends State<CounterScreen> {
  int _count = 0;

  @override
  Widget build(BuildContext context) {
    return GestureDetector(
      onTap: () {
        //Update the state and refresh the UI
        setState(() {
          _count = _count + 1;
        });
      },
      child: Scaffold(
        body: Center(
          child: Text(
            '$_count',
            style: const TextStyle(
              fontSize: 86.0,
            ),
          ),
        ),
      ),
    );
  }
}
Sure enough, the counter app example works by tapping anywhere in the app and updating the counter using the setState function.
However, once we start developing a more complex user-interface that has multiple widgets, our code can grow significantly in size. Having many setState calls can be difficult to track when they are being called from different parts of our widgets.
We also do not want all our business logic to be part of the UI class which would make these cases hard to test.
Cubit Basics
A Cubit is a class from the package Bloc that can expose functions and hold state. What this means is that Cubit can be used to manage the states of our app.

A Cubit class contains a state which can be any type that we define. This state can be changed through the functions that we define and expose back to our Flutter widgets.
A Cubit can also interact with the other layers of your app such as database, network, and even other Cubit instances.
Installing flutter_bloc
To be able to use Cubit, we need to install the flutter_bloc package.
flutter pub add flutter_blocAnother way is to manually add the flutter_bloc library in the pubspec.yaml file. Make sure to check the latest version of the package.
dependencies:
  flutter_bloc: ^8.1.5
Creating a Cubit
A Cubit can represent the state of a whole app at the most (for really simple apps), or a single widget at the very least. When creating a Cubit, we need to define the functions to expose to the clients, and the type of state that we want the Cubit to represent.
Let's create a CounterCubit for our sample app. This Cubit has type int as a state, and exposes a function to increment this state.
//counter_cubit.dart

import 'package:flutter_bloc/flutter_bloc.dart';

class CounterCubit extends Cubit<int> {
  // Default state
  CounterCubit() : super(0);

  void increment() {
    // Update the state
    emit(state + 1);
  }
}
Let's look at the CounterCubit example above.
When creating a Cubit, this class should extend the Cubit<T> abstract class. Doing so will inherit many of the functions and properties that we will use later on, one of which is the state. We also need to define the initial state of the cubit, which in our example is 0.
The state property represents the current state of type T. In the CounterCubit example, this state is represented by an integer. This type can be primitive types such as float, string, datetime, as well as customised data classes.
Calling the emit function updates the current state of the Cubit. In our example, we want to increment the current value of the state by 1.
Basic usage of a Cubit
We can use the CounterCubit above in different ways. Let's keep it simple first and start with an example that does not involve Flutter widgets.
import 'package:cubit_tutorial/counter_cubit.dart';

void main() {
  final cubit = CounterCubit();
  print(cubit.state); // Prints `0`
  cubit.increment();
  print(cubit.state); // Prints `1`
}
In our first example, we created an instance of the CounterCubit. We know that the initial state is going to be 0, and calling the increment() function will increase it by 1.
This simple example however does not represent the real usage of cubits in a Flutter application. In order to fully utilise this state management, we will need to use the other classes found in the Bloc library.
Let's see how we can use Cubit in our own counter app.
Using Cubit in Flutter
I have mentioned before that Cubit is part of a bigger state management solution called Bloc. In order to use Cubit with Flutter, we need to set up our app to respond to state changes in our Cubit.
The first thing we need to learn is how to provide our Cubit.
The BlocProvider widget
We can think of the BlocProvider widget as a form of dependency injection tool for our Cubit. In a normal app, it is expected to have different cubits that have different representations of states across the system.
BlocProvider<CounterCubit>(
	create: (context) {
    return CounterCubit();
  }
  child: MaterialApp(
    home: //Rest of the app
  ),
)
A BlocProvider requires the type of the Cubit that we want to be available to the children widgets. It has a create parameter where we initialise the Cubit, as well as the child property which contains the widget tree that will potentially access this Cubit.
If we want to provide multiple blocs or cubits, we can use the MultiBlocProvider instead.
MultiBlocProvider(
	providers: [
      BlocProvider<CounterCubit>(
        create: (context) => CounterCubit(),
      ),
      BlocProvider<AnotherBloc>(
        create: (context) {
          return AnotherBloc(userRepository: UserRepository());
        }
      )
    ],
    child: MaterialApp(
    home: //Rest of the app
  ),
);
Any widget in our app that needs access to a particular Cubit should have one of the parents that provides this Cubit.
Cubit or Bloc can be referencedThis is very important because trying to retrieve access to a Cubit that has not been "provided" will result in an app crash.
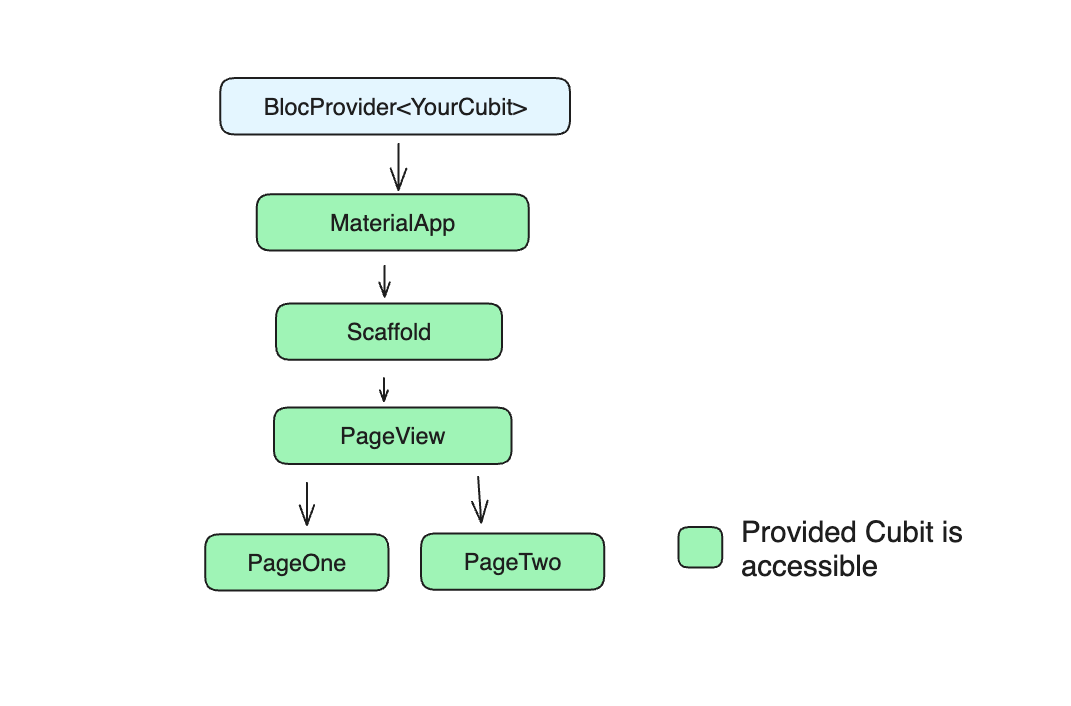
A good place to put the BlocProvider is at the topmost level of the app, which is usually the MaterialApp or CupertinoApp. This way, the cubits that you need will be readily accessible anywhere down the widget tree.
Here is our app wrapped with a BlocProvider<CounterCubit> so we can use the CounterCubit anywhere in the app.
// main.dart

import 'package:cubit_tutorial/counter_cubit.dart';
import 'package:cubit_tutorial/counter_screen.dart';
import 'package:flutter/material.dart';
import 'package:flutter_bloc/flutter_bloc.dart';

void main() {
  runApp(const MyApp());
}

class MyApp extends StatelessWidget {
  const MyApp({super.key});

  @override
  Widget build(BuildContext context) {
    return BlocProvider(
      create: (context) => CounterCubit(),
      child: MaterialApp(
        title: 'Counter App',
        debugShowCheckedModeBanner: false,
        theme: ThemeData(
          colorScheme: ColorScheme.fromSeed(seedColor: Colors.deepPurple),
          useMaterial3: true,
        ),
        home: const CounterScreen(),
      ),
    );
  }
}
The BlocBuilder widget
We need to know how to use the BlocBuilder widget to use our counter cubit. A BlocBuilder widget is a widget that observes the changes of a Bloc and rebuilds the widget when it does.
An important thing to note here is that a Cubit is a Bloc as cubits extend the BlocBase.
Given that we have already setup the app so that everything under the MaterialApp is wrapped with the correct BlocProvider for the CounterCubit, then we can use the BlocBuilder as such:
BlocBuilder<CounterCubit, int>(
  bloc: context.read<CounterCubit>(),	//instance of CounterCubit
  builder: (context, state) {
    //Build the widget according to the value of `state`
    return Text('$state');
  }
)
The BlocBuilder needs to be supplied by what type of Bloc it needs to observe and what type of state it reads. In our example, we want to observe a CounterCubit type with the state as type int. With this requirement, we can instantiate the BlocBuilder to be BlocBuilder<CounterCubit, int>.
The bloc parameter of BlocBuilder accepts an instance of CounterCubit. One way of providing one is by directly instantiating this as CounterCubit(). However, be warned that in doing so, we might refer to different instances of CounterCubit which may not be the expected behaviour in our app.
Since we want to refer to a single instance of CounterCubit which was provided by the BlocProvider, we can access this instance by using the extension function context.read<CounterCubit>(). This call tries to get the nearest CounterCubit in the parent widget tree.
The last parameter of BlocBuilder is the builder itself in which we construct the widget to return. If we want to display the state of CounterCubit in a Text, then we can do so by using the state parameter. Remember that this value in our example is of type int.
Updating the state through the Cubit
Instead of using the setState function of a StatefulWidget to update the UI, we can now use the BlocBuilder that listens to the state changes CounterCubit. As previously mentioned, we can access this Cubit through the extension function context.read<CounterCubit>().
If we update our onTap function to update the counter:
GestureDetector(
  onTap: () {
    //Access the CounterCubit
    context.read<CounterCubit>().increment();
  },
  child: Scaffold(
    //Rest of the code
  )
	//..
Whenever we call the increment(), the state of the CounterCubit is updated. The function emit is called which in turn updates the state of CounterCubit. The BlocBuilder that observes this Cubit will then see that the state has been changed and will rebuild the widget using the new value.
Applying all these things, the CounterScreen widget that we have will be:
// counter_screen.dart

import 'package:cubit_tutorial/counter_cubit.dart';
import 'package:flutter/material.dart';
import 'package:flutter_bloc/flutter_bloc.dart';

class CounterScreen extends StatefulWidget {
  const CounterScreen({super.key});

  @override
  State<CounterScreen> createState() => _CounterScreenState();
}

class _CounterScreenState extends State<CounterScreen> {
  @override
  Widget build(BuildContext context) {
    return BlocBuilder<CounterCubit, int>(
      bloc: context.read<CounterCubit>(),
      builder: (context, state) {
        return GestureDetector(
          onTap: () {
            context.read<CounterCubit>().increment();
          },
          child: Scaffold(
            body: Center(
              child: Text(
                '$state',
                style: const TextStyle(
                  fontSize: 86.0,
                ),
              ),
            ),
          ),
        );
      },
    );
  }
}
These changes did not really modify how the app behaves and will look exactly the same as Video 1. But with these changes, our app is much cleaner now because the logic is now separated from the UI.

State with custom data type
We have implemented a state management system using Cubit<T> with a primitive data type as its state. The way BlocBuilder determines whether to rebuild the widget or not depends on the state changes.
Primitive data types such as int or string can simply be compared to see if they're the same or not, but with custom data objects, it's not as straightforward as primitive data types.
For optimisation, we do not want BlocBuilder or other Bloc widgets to recreate the widgets even if the new state has the same values. In order to make sure that the equality of each state for custom data types is checked correctly, we can use the equatable package.
Install Equatable
Install the Equatable package using:
flutter pub add equatableUsing Equatable for custom data types
If you have a custom data type say, CustomDataType, extend the Equatable class and add the properties that you want to include for data comparison.
class CustomDataType extends Equatable {
  const CustomDataType({required this.name, required this.count});

  final String name;
  final int count;

  @override
  List<Object?> get props => [name, count];
}
In this example, we want to make sure that the properties name and count are used to compare this object with another CustomDataType and not just the object reference. To do so, we need to override the props method and include the properties that we want to include for comparison.
Once the class implements the props method, it's now ready to be used as the state type of our Cubit class.
Conclusion
Using Cubit is a good way to implement a scalable state management framework in Flutter through the bloc package. In order to fully utilise Cubit in Flutter, it is best to use the Flutter widgets provided by the bloc library such as BlocBuilder.
Finally, make sure that the Cubit we use is readily provided using a BlocProvider that is usually initialised at the topmost widget of the app.
With Cubit, our Flutter code is much more readable, scalable, and testable.
Reference