Using Future in Flutter - Get comfortable with asynchronous data
Learn how to use Future in Flutter and efficiently handle asynchronous data. After reading this post, you should be comfortable enough to implement Future concepts in your projects effectively.


A Future refers to an object that can hold data at a point in time when it is ready to do so. This is used in cases where the app should not block or freeze other processes if the data needed has not been obtained yet.
Learning to use Future in Flutter is essential because many applications you build will rely on packages and APIs that use Futures extensively. It also makes your app responsive. An app without Futures is like an app without features (get it? 😇).
Why do we need to use Future in Flutter?
It is easier to understand the concept of Future with examples. Let's look at a simple example: fetching data from the internet.

For simplicity's sake, let's write up a simple function that gets data from the internet and returns this value as a String. Because we are not using a Future, the code will look like this:
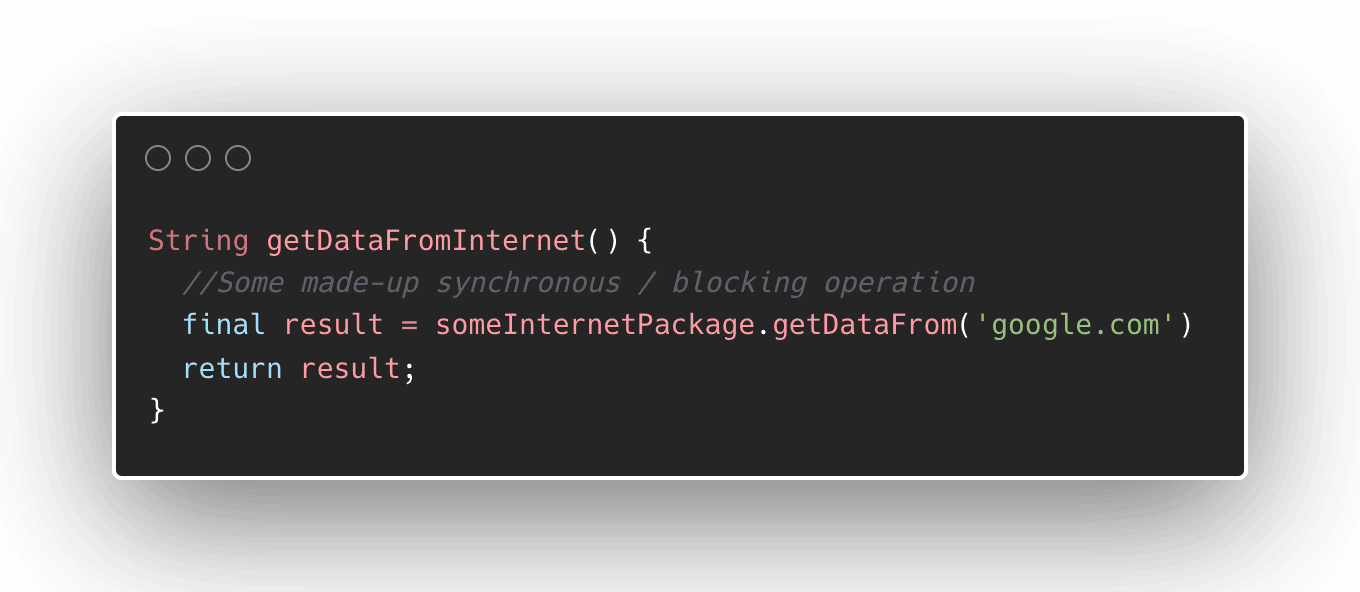
This code is a straightforward approach to fetching data from a website, but what happens then if the internet connection of the device is slow?
The line of code that gets the data will operate for a few seconds before it returns the result. This will cause the app to block until the work is complete.
You will not have a chance to show a loading animation or do anything else because this line of code is blocking or synchronous, rendering your app unresponsive.
Use Future for operations that take time to complete
If a function takes a long time to complete, then it is preferred to use Futures.
A Future can execute operations without blocking. Once the data is ready, a callback will be executed with the data ready to be used.
Let's use the http library as an example to get data from the internet. The http package has an API to make a GET request, which returns a Future of data type Response.
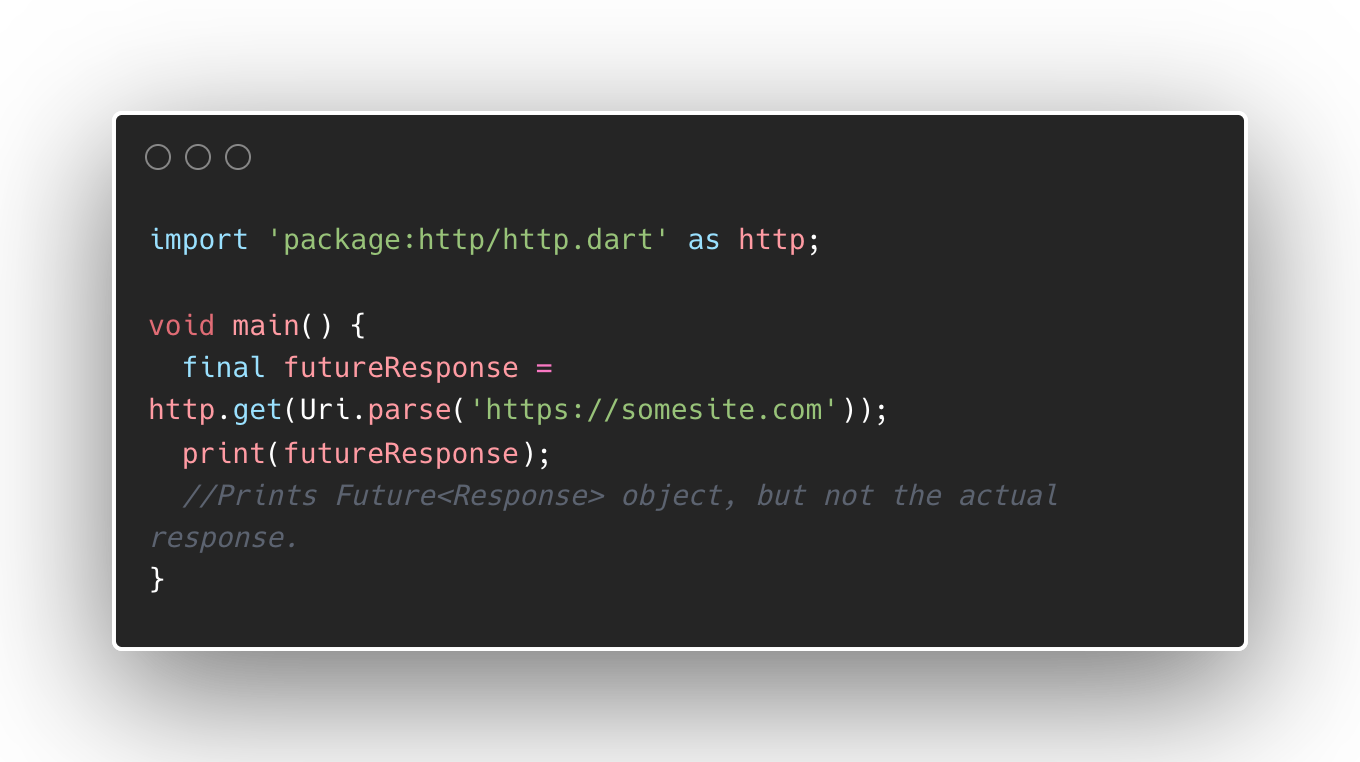
http package to fetch dataSince the object that we get from the http.get() method is a Future, the futureResponse value does not necessarily contain the actual response of fetching the data from some website.
The good news is this call to fetch the data will not block your app. But how can we obtain and use the actual value of the futureResponse?
Getting the value from Future asynchronously using callbacks
One way of evaluating the Future is to use callbacks.
For successful evaluation, we can use the Future function .then() which accepts a callback function to consume the Future value.
In some cases, evaluating a Future may throw an error or an exception. We can use the .onError() function to add a callback for this situation.
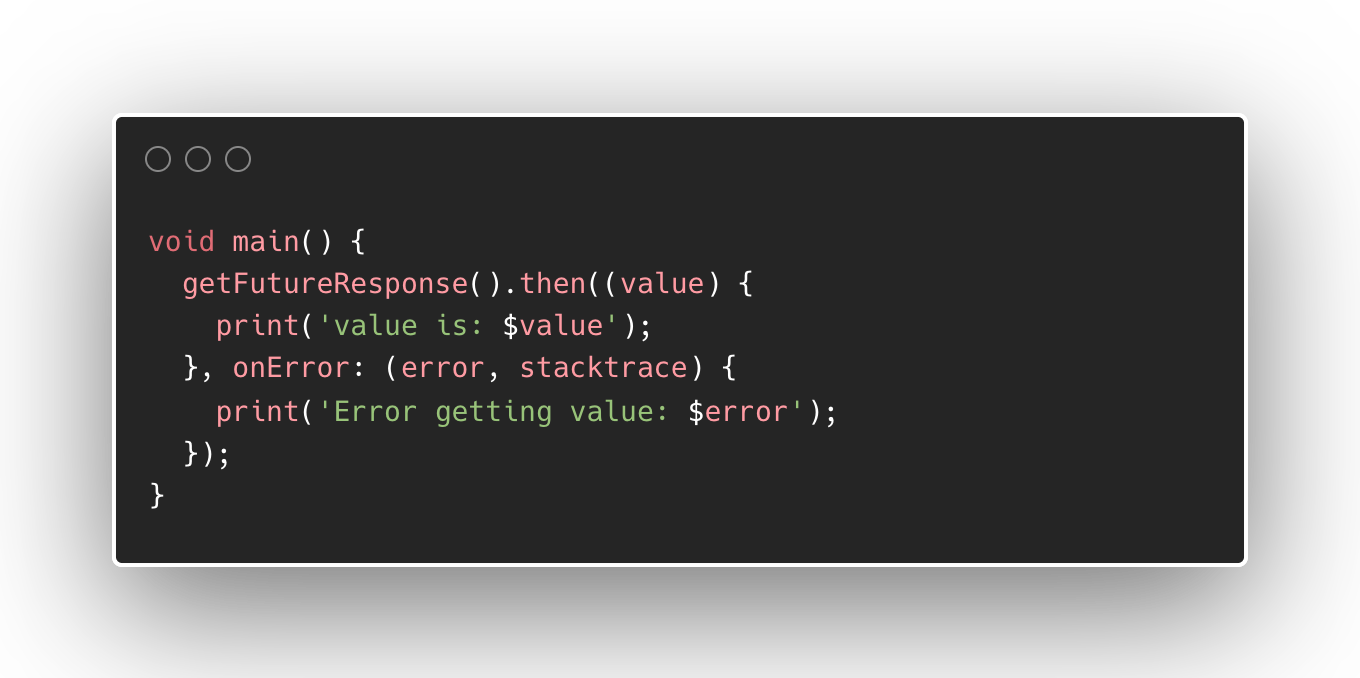
.then() and .error() to handle Future values with callback functionsMost use cases of using callbacks on Future values involved terminal operations such as saving to databases, sending analytics events, and other processes that do not require their results to be returned by the function.
Getting the value from Future synchronously using async and await
There are instances when we want to use the value of a Future such as transforming this into another object. In cases like this, the callback approach will not work because callback values cannot be returned by the function.
To evaluate the value of the Future, we need to use the keywords async and await.
The async keyword
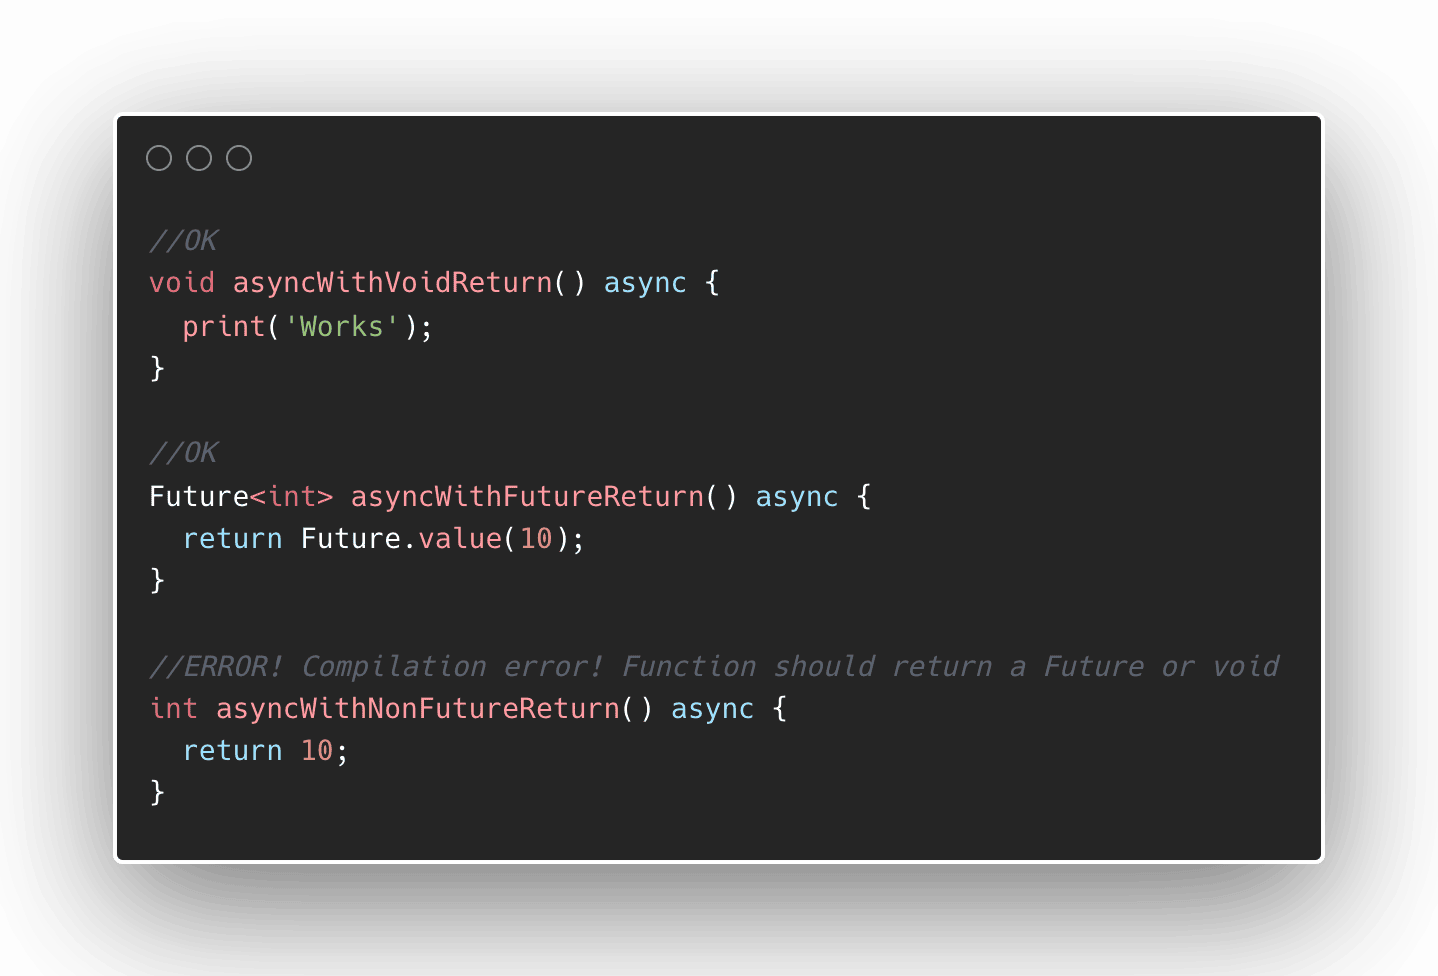
The async keyword modifies a function so that we can evaluate a Future value in that function using the await keyword. Keep in mind that marking your function as async means that it can never return data types other than void and Future<T> and will result in a compilation error if you try.
To define a function to be asynchronous, add the async keyword after the function name signature.
async keywordThe await keyword
The key to evaluating a Future synchronously is by using the await keyword. When you add an await keyword before a Future value or a function that returns a Future, this line will block and wait until the value has been evaluated.
The await operation will only work if this code is in an async function and will throw a compilation error if it is missing.
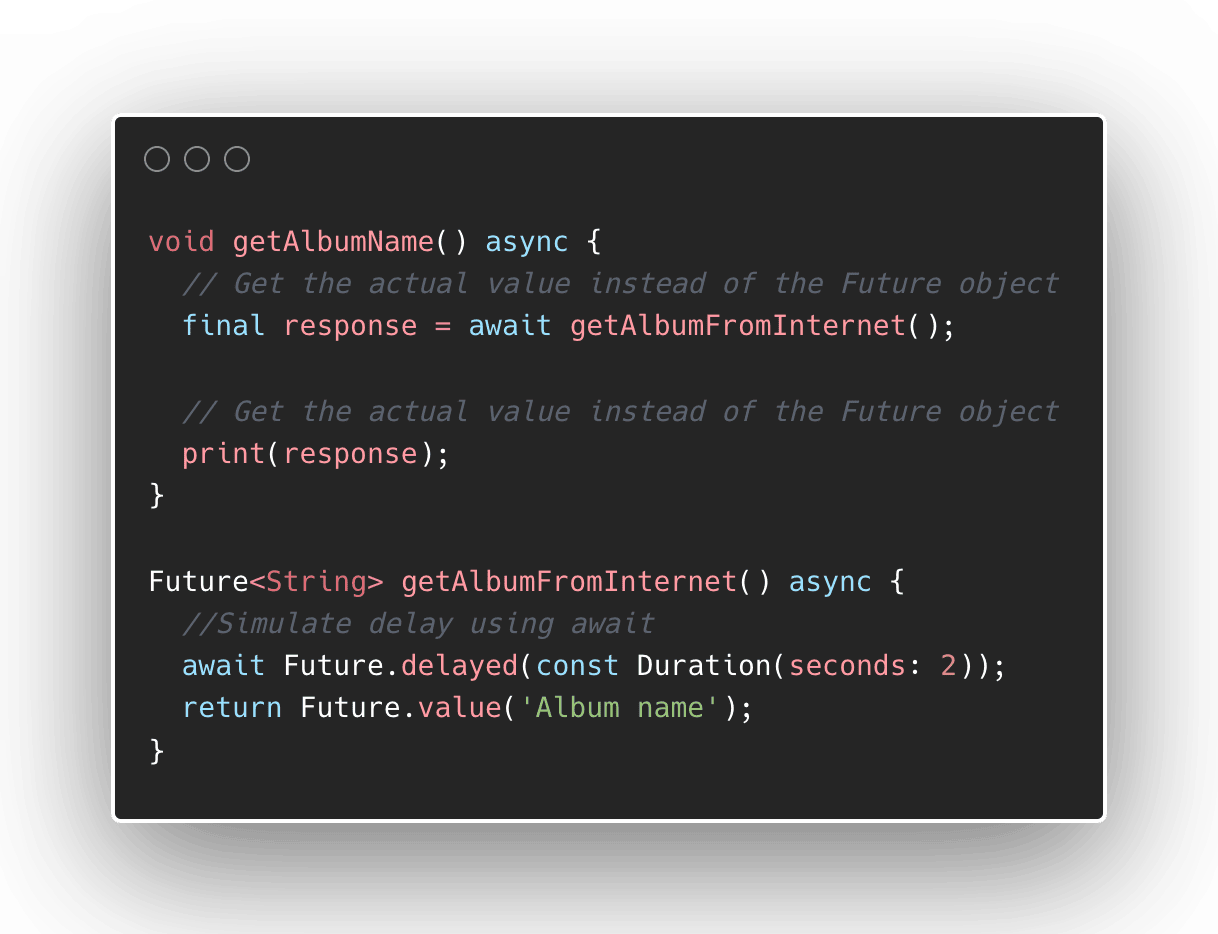
await keyword waits for the value of a FutureIn the example above, we have the getAlbumFromInternet() function that represents fetching data from the internet. Since this function is an async function, we can use the await keyword to evaluate the value of a Future.
Evaluating the Future.delayed() with async keyword will block this line until the elapsed duration. We also use the constructor Future.value() to return a Future with the value 'Album name'.
Using the same example, we have an asynchronous function that can evaluate another function that returns a Future. Inside the getAlbumName(), we can synchronously wait for the value of getAlbumName() with the await keyword.
In short, use await to evaluate the value of a Future inside an async function.
Using Future in Flutter widgets
Now that we have covered the basics of Future and the necessary keywords to use them, we can move on to using these concepts in a Flutter app.
FutureBuilder widget
The most basic way of consuming Future objects in a widget is through the FutureBuilder<T>.
Building this widget requires a few parameters.
The first parameter is the Future itself future: which will be evaluated when the widget is built. This argument allows you to set the Future that you wanted to get a value from.
The next one is the initial value initialData: of type T which will be used when the Future<T> value has not been evaluated yet. This is useful for situations where the Future takes time to assess, such as fetching data with slow internet or doing long processes in the background. Although not a required argument, it's better to include an initial value to constrain the possible values of the Future.
Finally, the most important argument of FutureBuilder is the builder: itself. The builder function lets you decide what widget to display depending on the state of the future based on its function argument AsyncSnapshot<T>.
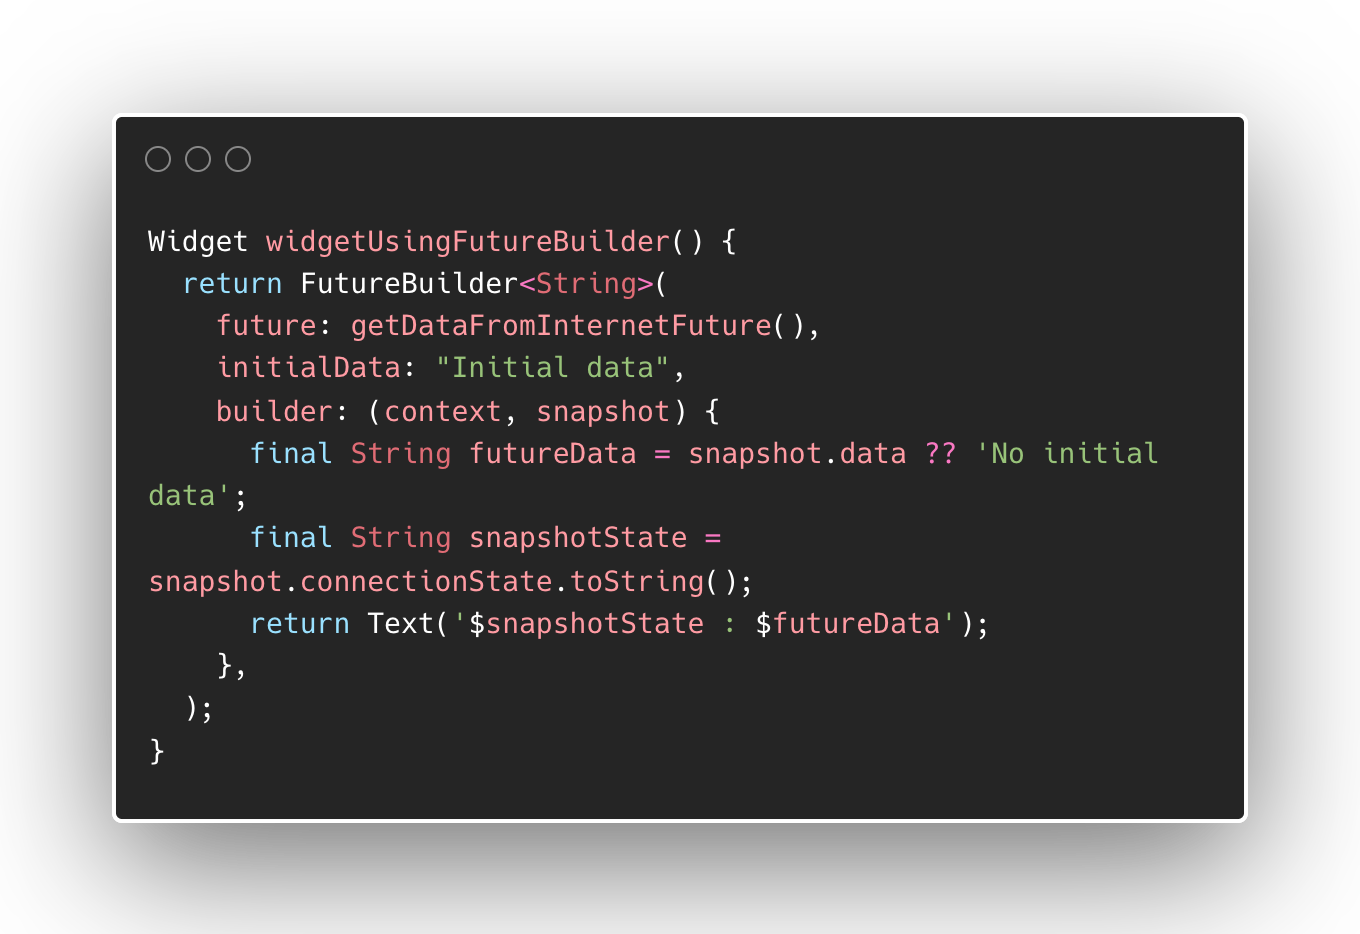
FutureBuilderThe builder function of the FutureBuilder<T> provides access to an AsyncSnapshot argument that gives you both the current state and the current value of the Future that you provided.
You can get the current state of the FutureBuilder through the snapshot.connectionState getter method. The values include active, waiting, done, or none. In most cases, you can check the connectionState if it is done and then show the appropriate widget by obtaining the value of the Future using snapshot.data.
The current value of the Future can be null sometimes depending on the state of Future, that's why it is better to do a null check on snapshot.data or validate the current state through snapshot.connectionState to show the appropriate widget.
Sample weather app using Future
Let's put our learnings into practice by creating a simple app that fetches data from a publicly available API.
Setup
A weather app can be a good example to demonstrate the use of Futures.
One of my favourite sources of free public APIs is the public-api repo from Github, so let's use one of the weather API there called open-meteo.
In this example, we will need to use the http package for fetching data from the internet. The result is a json formatted file, so we will also need the dart:convert for converting json formatted string to a usable object in our app.
Install the http package by running flutter pub add http on the terminal inside your project directory, or add http: ^1.1.0 (latest version at the time of writing) as part of your dependencies inside the pubspec.yaml.
As I am using a macOS machine to run this app, I also have to add the necessary permission to access the network by adding this snippet in macos/Runner/DebugProfile.entitlements.
<key>com.apple.security.network.client</key>
<true/>
App source code
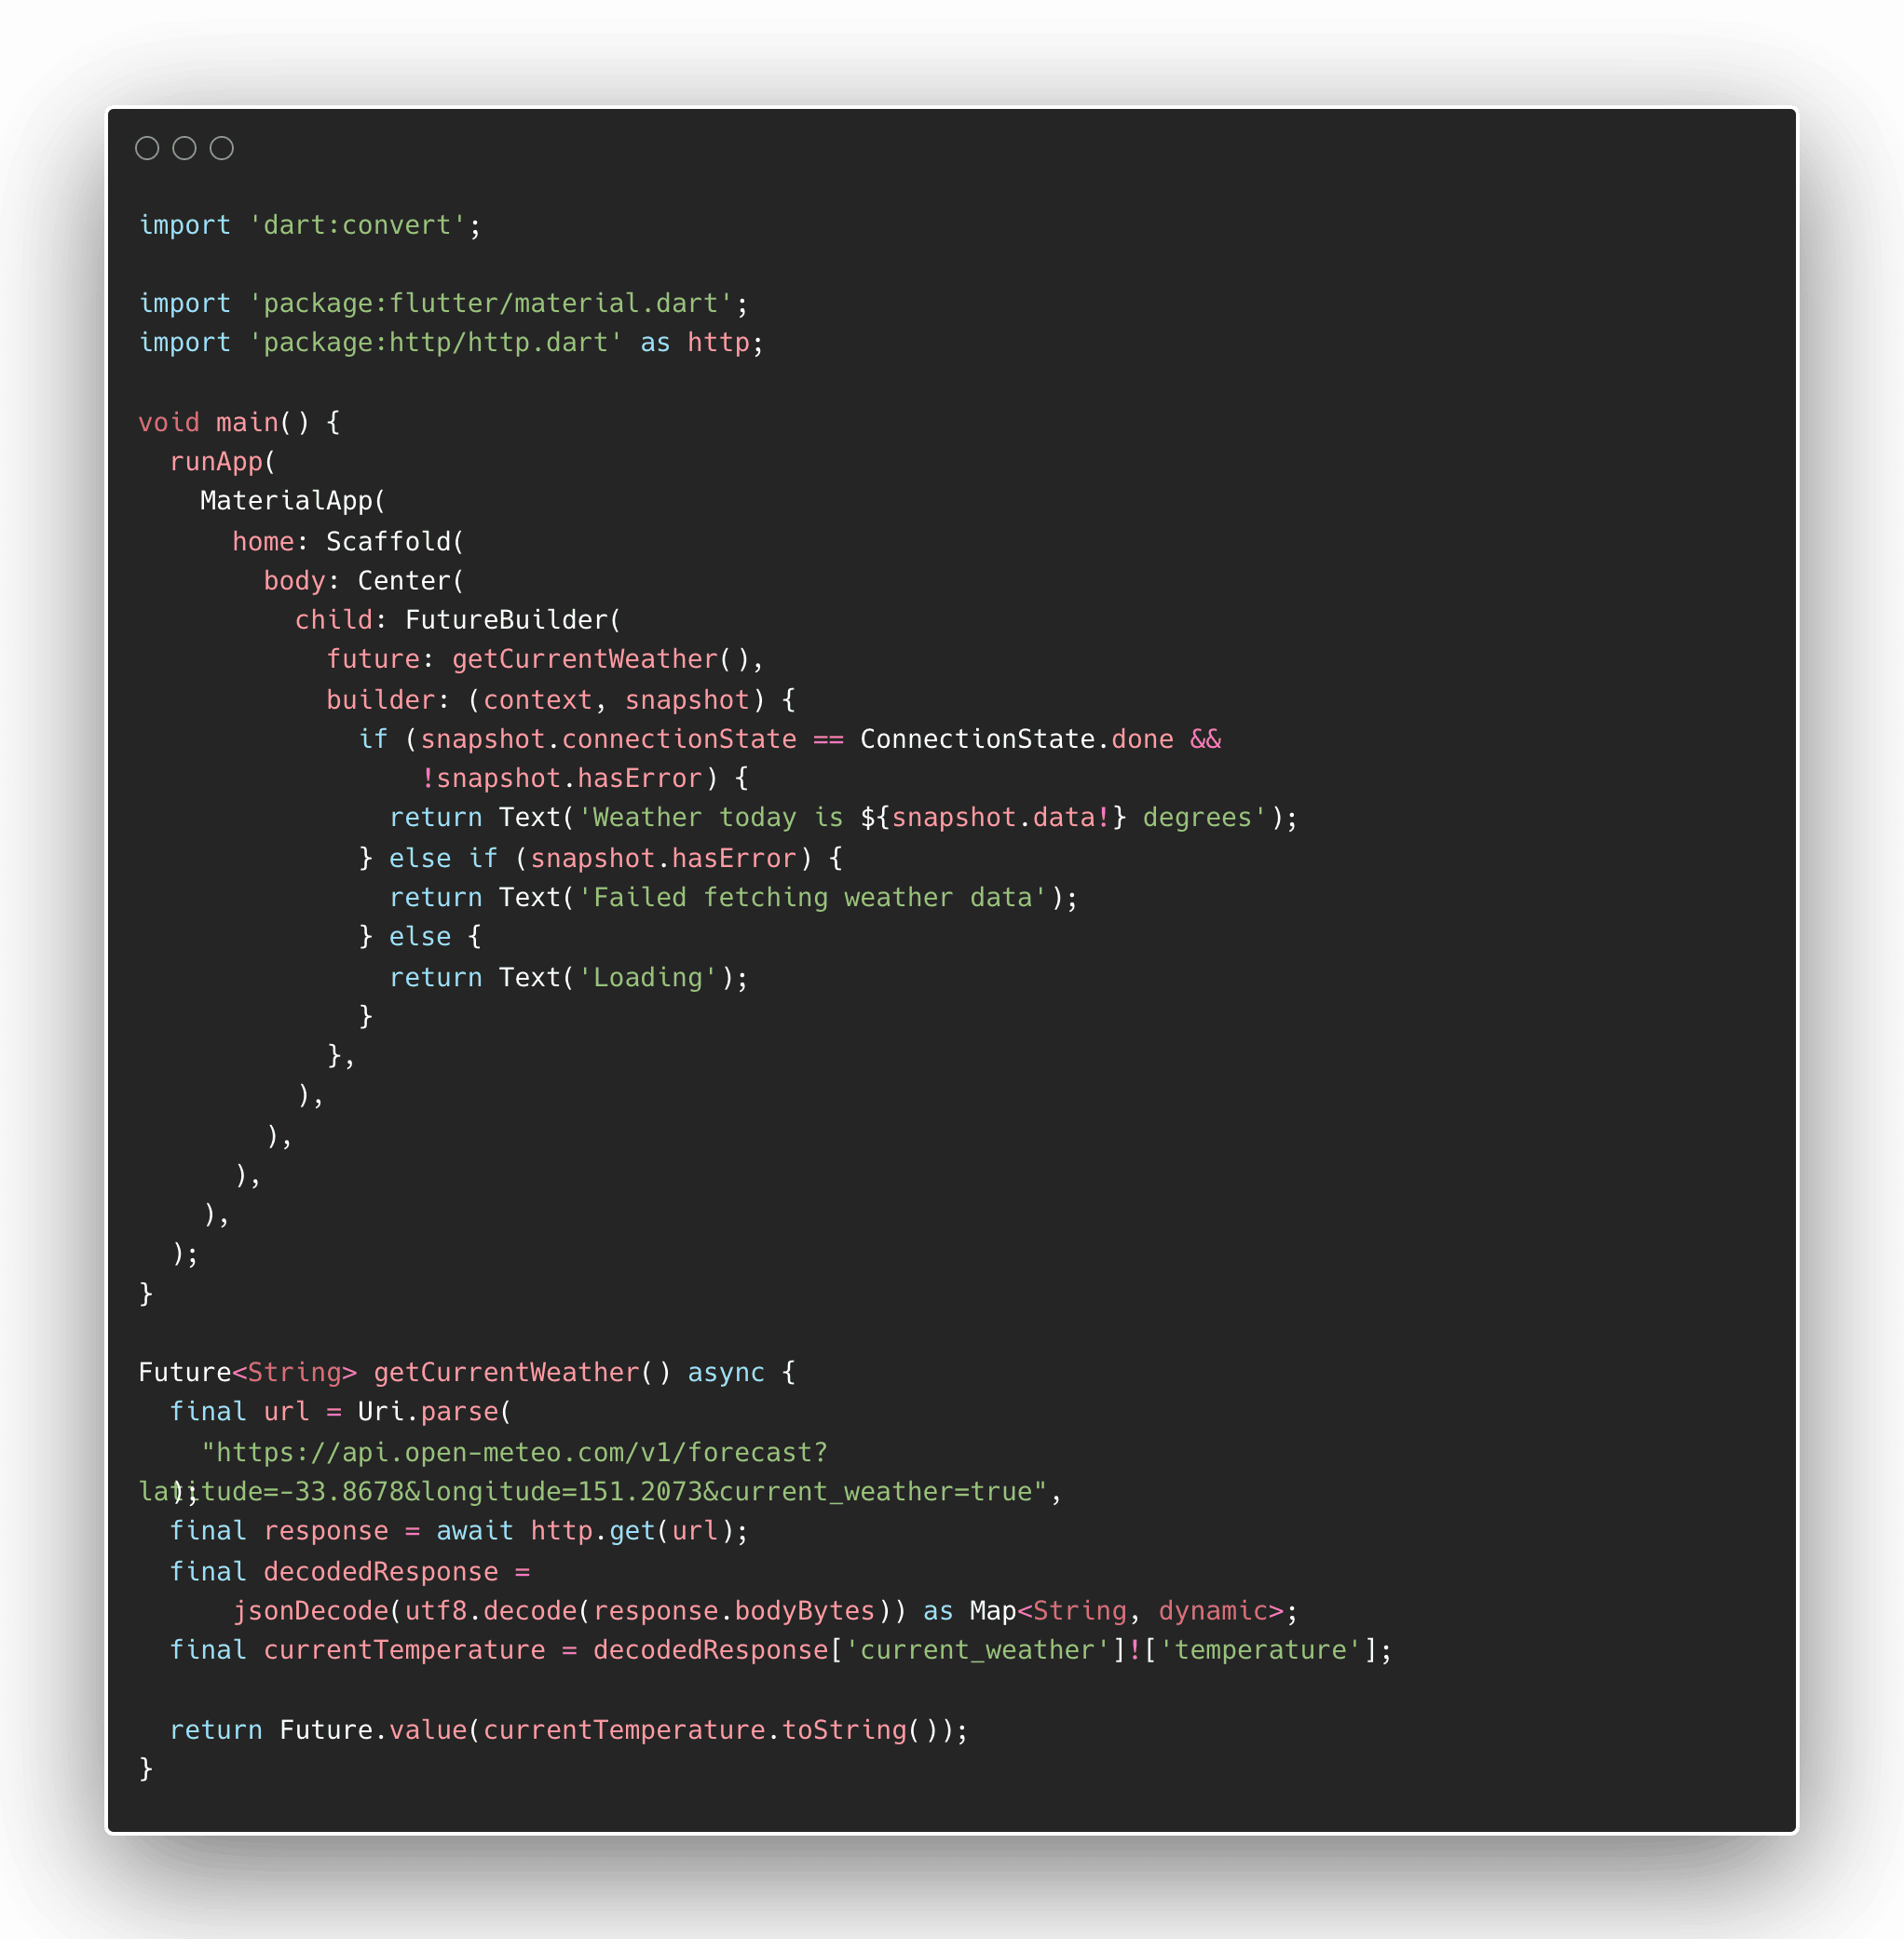
Here's the full code for our weather app example:
Future to obtain and display the current temperatureWhen you run this code, you should have something like this:
Code explanation
Let's dissect the source code and understand what each of the parts is doing by first looking at the getCurrentWeather() Future function.
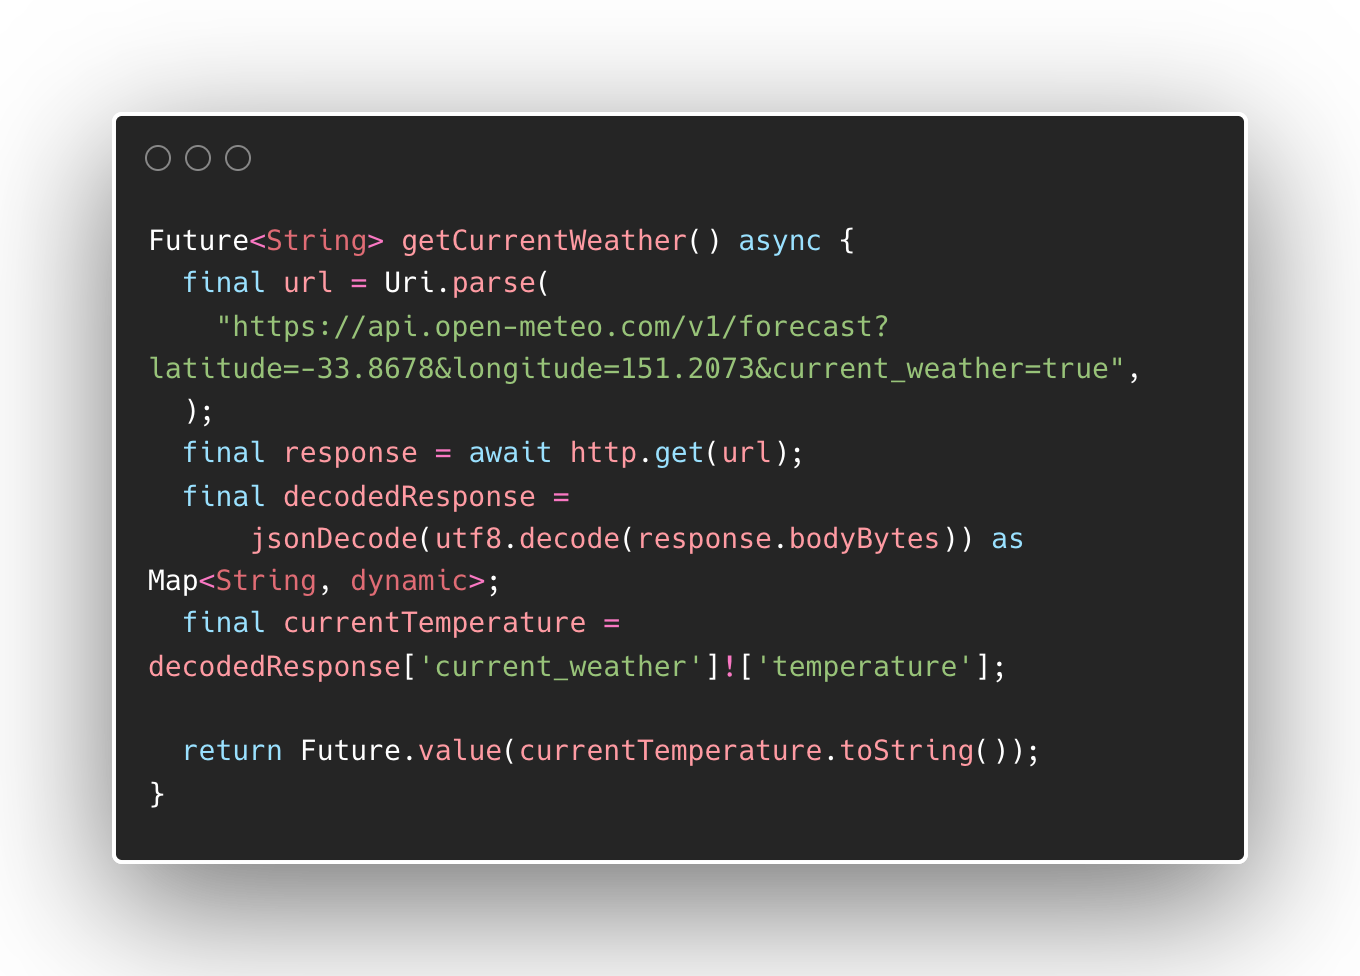
async function getCurrentWeather()The getCurrentWeather() function provides our app with the weather data that we need to display. Since we know that fetching data from the internet may block our app while waiting for the result, this is the perfect time to use a Future<T>.
We also want to display the weather data as a String, so we defined the return type to be Future<String>.
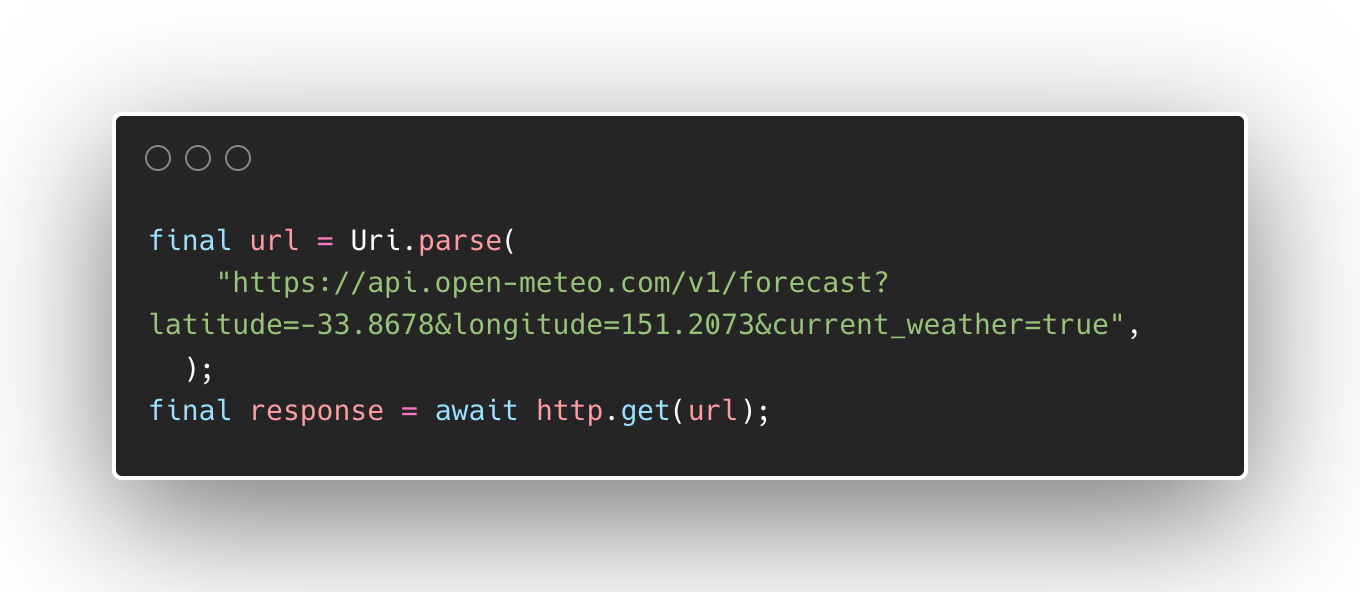
awaitThe first thing that this function does is to fetch data from the open-meteo API. Since we need to process the JSON result from http.get(), we have to use the await keyword to block this function while waiting for the result.
The response will have a data type Response as part of the http interface. The response body will have a value in JSON format similar to this:
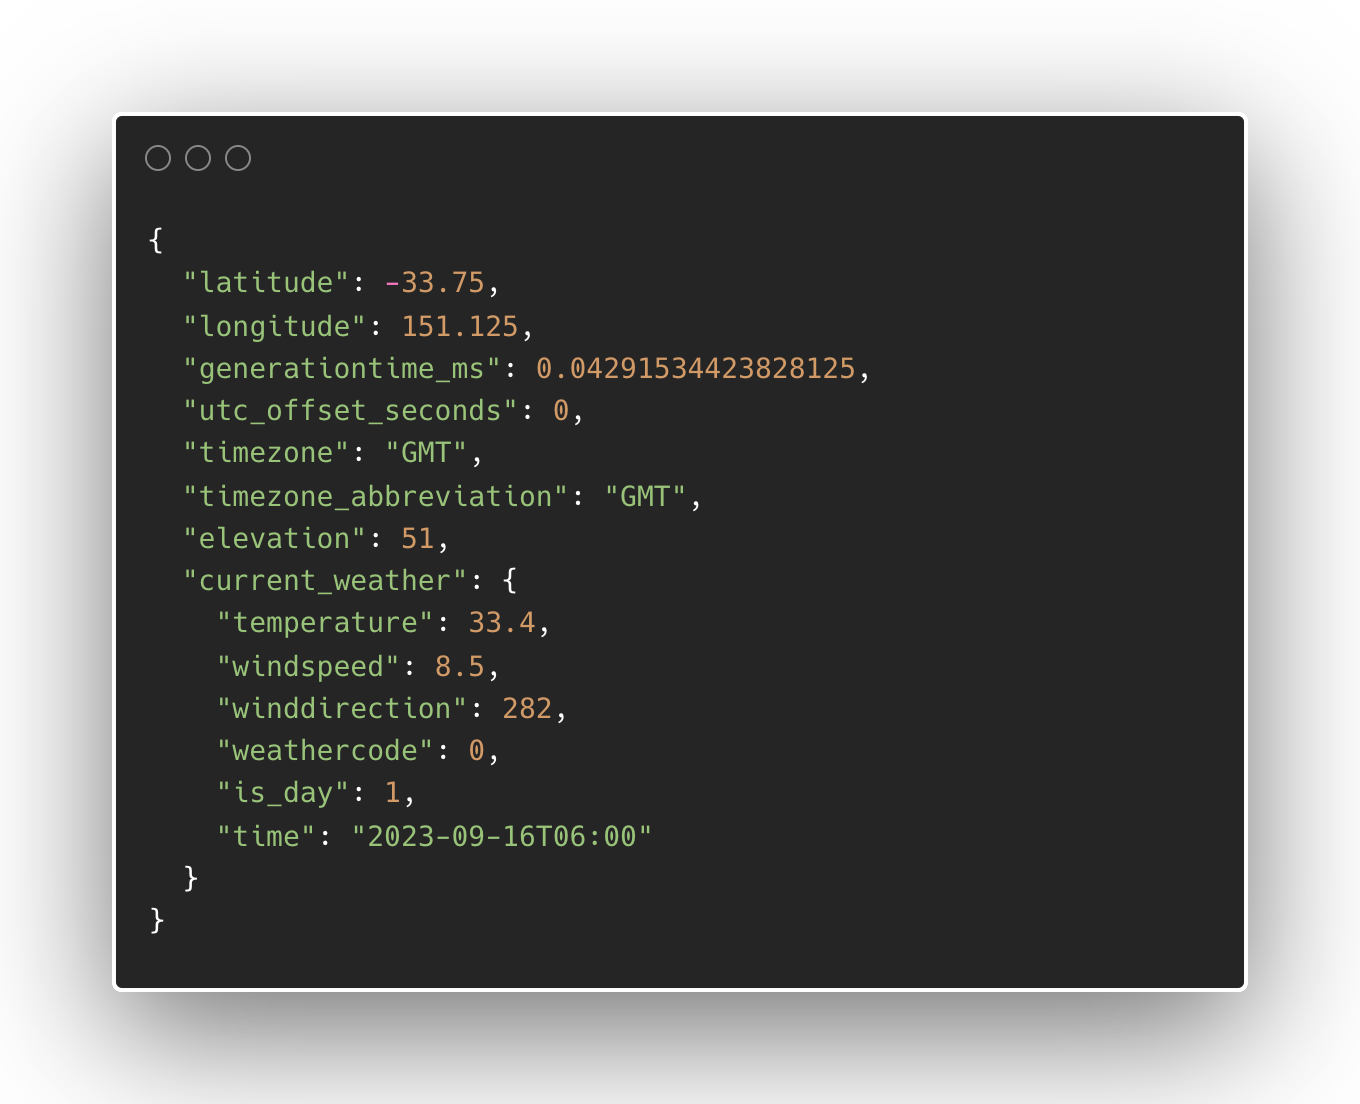
We use the jsonDecode from dart:convert package to convert this JSON object into a Map. Since we want to traverse this JSON and get the current_weather, we access this value using the Map interface.
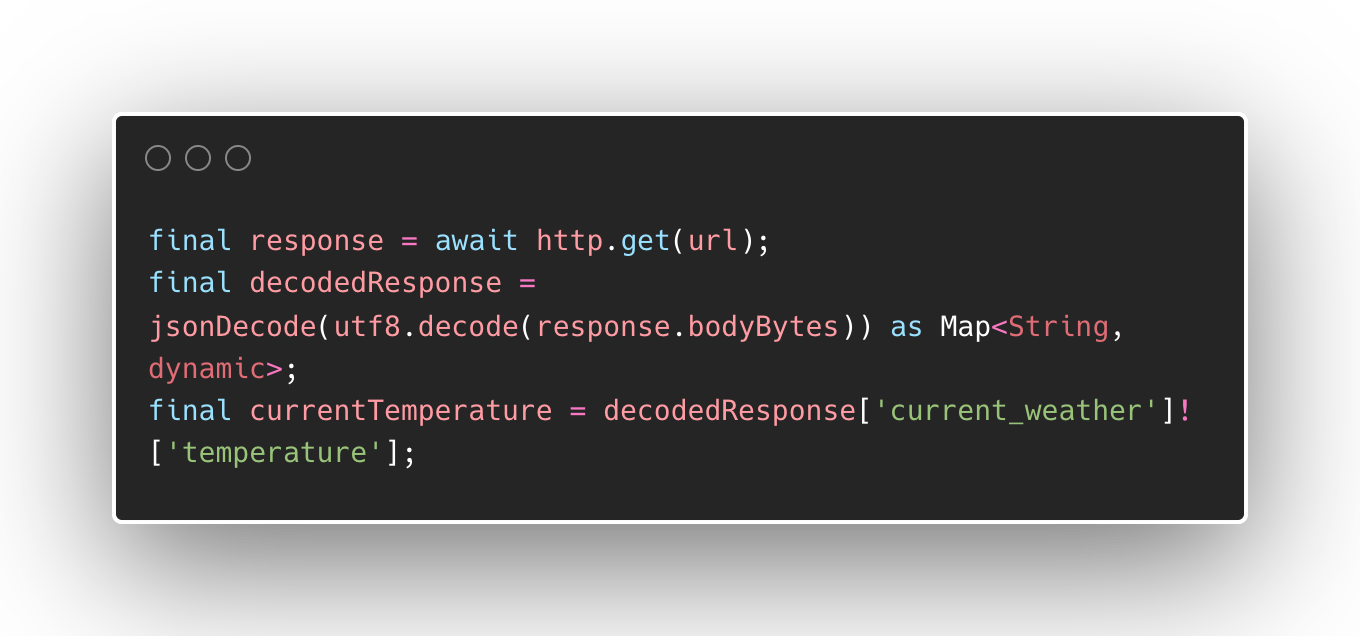
Once we have the temperature value, we can return this value to type Future<String> by constructing a Future with the temperature as its value in String.
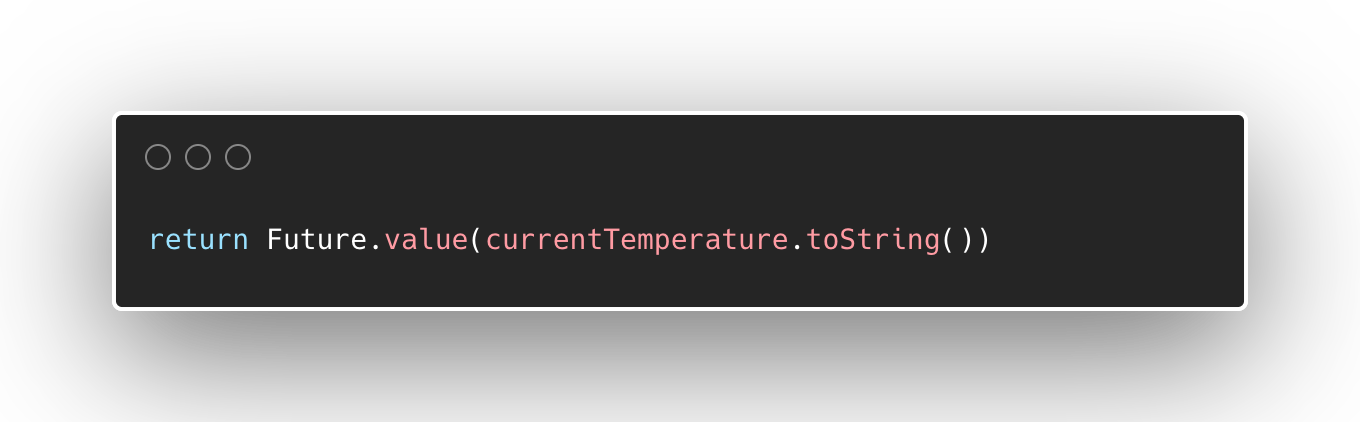
Future with valueData fetch is asynchronous
While all the data were being fetched and converted from the internet, the sample app DOES NOT block because we use a FutureBuilder that processes the Future. If we look at our FutureBuilder, we show a Loading widget while waiting for the Future to get the actual result.
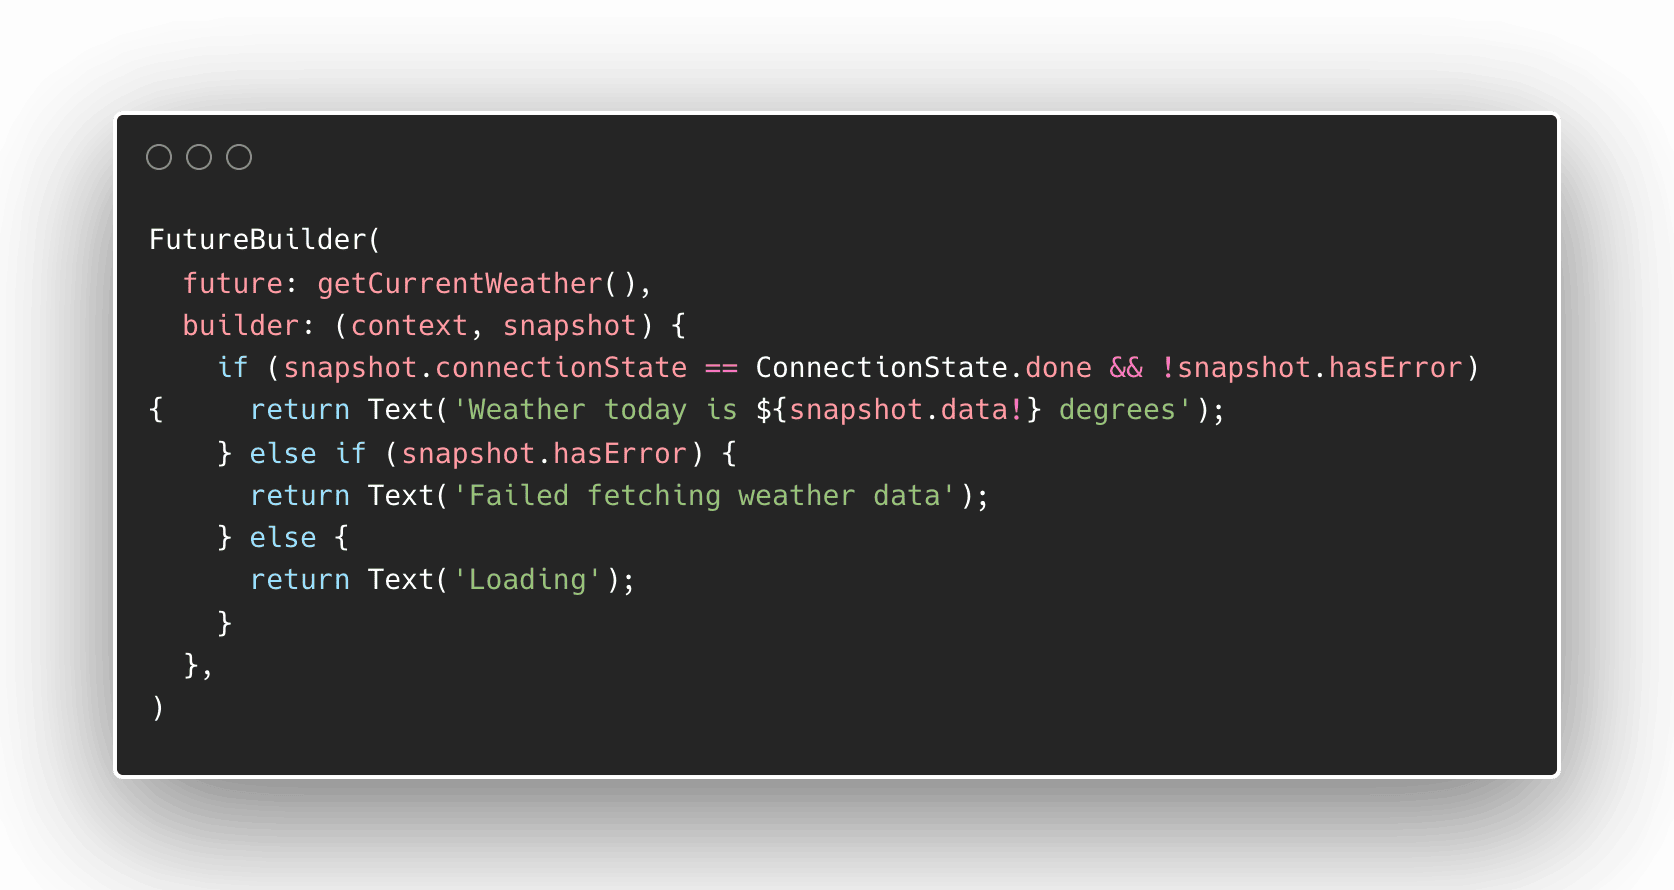
FutureBuilderThis is one way of ensuring we display the appropriate widget according to the state of the Future. We can check for the current status of the Future in a FutureBuilder by using the ConnectionState of the snapshot argument in the function. Based on the status, we can decide which widget to display, such as a loading spinner widget or an error widget, whichever is more appropriate.
The sample app shows a Text widget with a Loading text because the snapshot.connectionState is equal to active as it has not finished fetching the data yet.
The snapshot argument also lets you know if an error has occurred so you can display the appropriate message to the app's users.
Conclusion
Implementing Futures is an essential part of responsive apps in Flutter. Using Future allows your app to process data asynchronously so it can run smoothly.
Understanding Futures also lets you use a wide range of Flutter packages, which is very important to save time creating your own features.
The await keyword lets you wait for a Future value to be processed within an async function. This enables you to treat Future values synchronously in some parts of your app for data transformation and eventually make your apps responsive.