How to use Isolates for parallel processing in Flutter
Learn the basics of running tasks in parallel in Flutter using Isolate. Follow the step-by-step approach of running your heavy Flutter tasks in the background.

Every dart program and consequently, Flutter apps, run on a single-thread event loop called Isolate. This means that every asynchronous code we use, such as Future and Stream, does not run on a separate thread when processed.
This is important to understand because when Flutter apps start doing some heavy work, whether synchronously or asynchronously, each work will take away valuable resources that will cause your app to slow down.
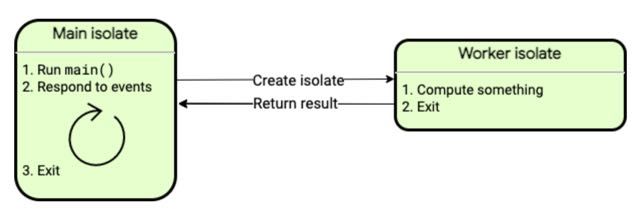
Dart does not support multiple threads but runs in an environment with its memory called Isolate. While technically not a multi-threaded or multi-process environment, we can use Isolates to run different workloads in parallel.
Dart / Flutter Isolates
It might feel like the functions in our apps run in parallel when we use Future calls whilst still accepting input events and updating the UI being displayed. However, according to Dart's documentation, this is not the case.
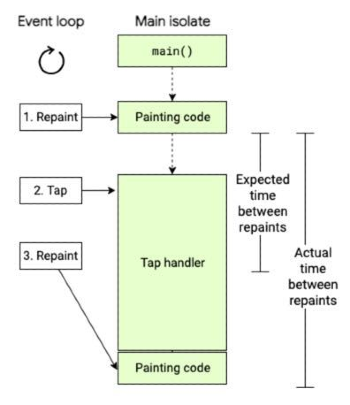
By default, Flutter apps run on a single Isolate called Main isolate which accepts input events and works on some computations while updating the UI. If we replace the computations with heavy computations, we will notice a significant difference.
I have made a simple app to demonstrate this behaviour. This app constantly updates the timer every ~60 milliseconds. The app also has two tasks triggered by button presses; one light process and a heavy process.
In this demo app, the light computation involves a delay to represent a light task. This is similar to a light process such as retrieving data from the internet. The heavy computation on the other hand is a function that loops 1 billion times.
//Light load process
Future<void> _lightComputation() async {
  return await Future.delayed(const Duration(seconds: 2));
}
Light computation function that represents light processing such as fetching data from the internet.
//Heavy load process
Future<void> _heavyComputationWithoutIsolate() {
  int x = 1;
  for (int i = 1; i < 1000000000; i++) {
    x = x + i;
  }
  return Future.value();
}
Heavy computation representing light processing such as image conversions and file manipulation.
Note that both functions are wrapped in a Future, so one might think that everything should be fine. Let's observe this behaviour.
Running light computations without Isolate
Observe the timer in the app in the video below. The time value itself is irrelevant but focus on how it gets updated.
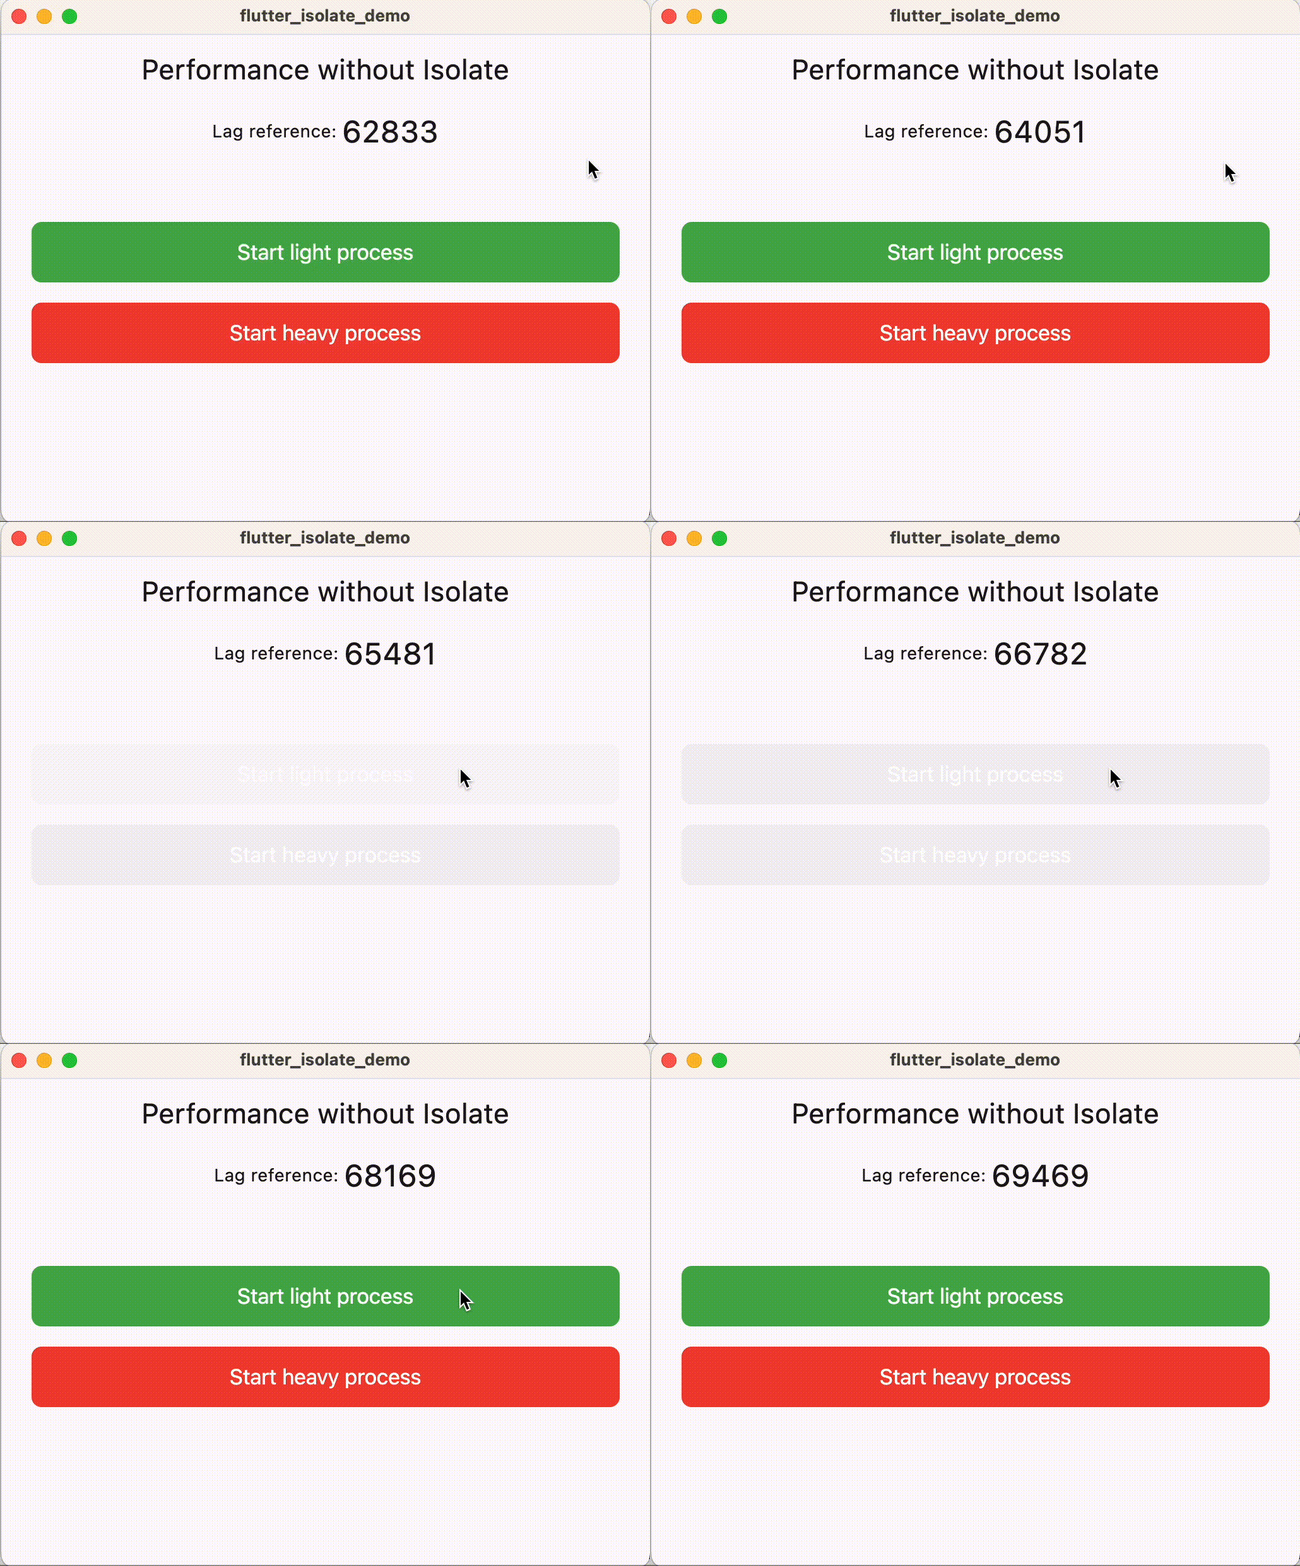
When it is a simple task, a normal asynchronous call works well. You will not notice any performance issues when you try to load something from the internet.
But what happens when we do a more complicated task?
Running heavy computations without Isolate
Looping through a task a billion times is a good representation of a heavy computation. As such, we need to run this on a background thread.
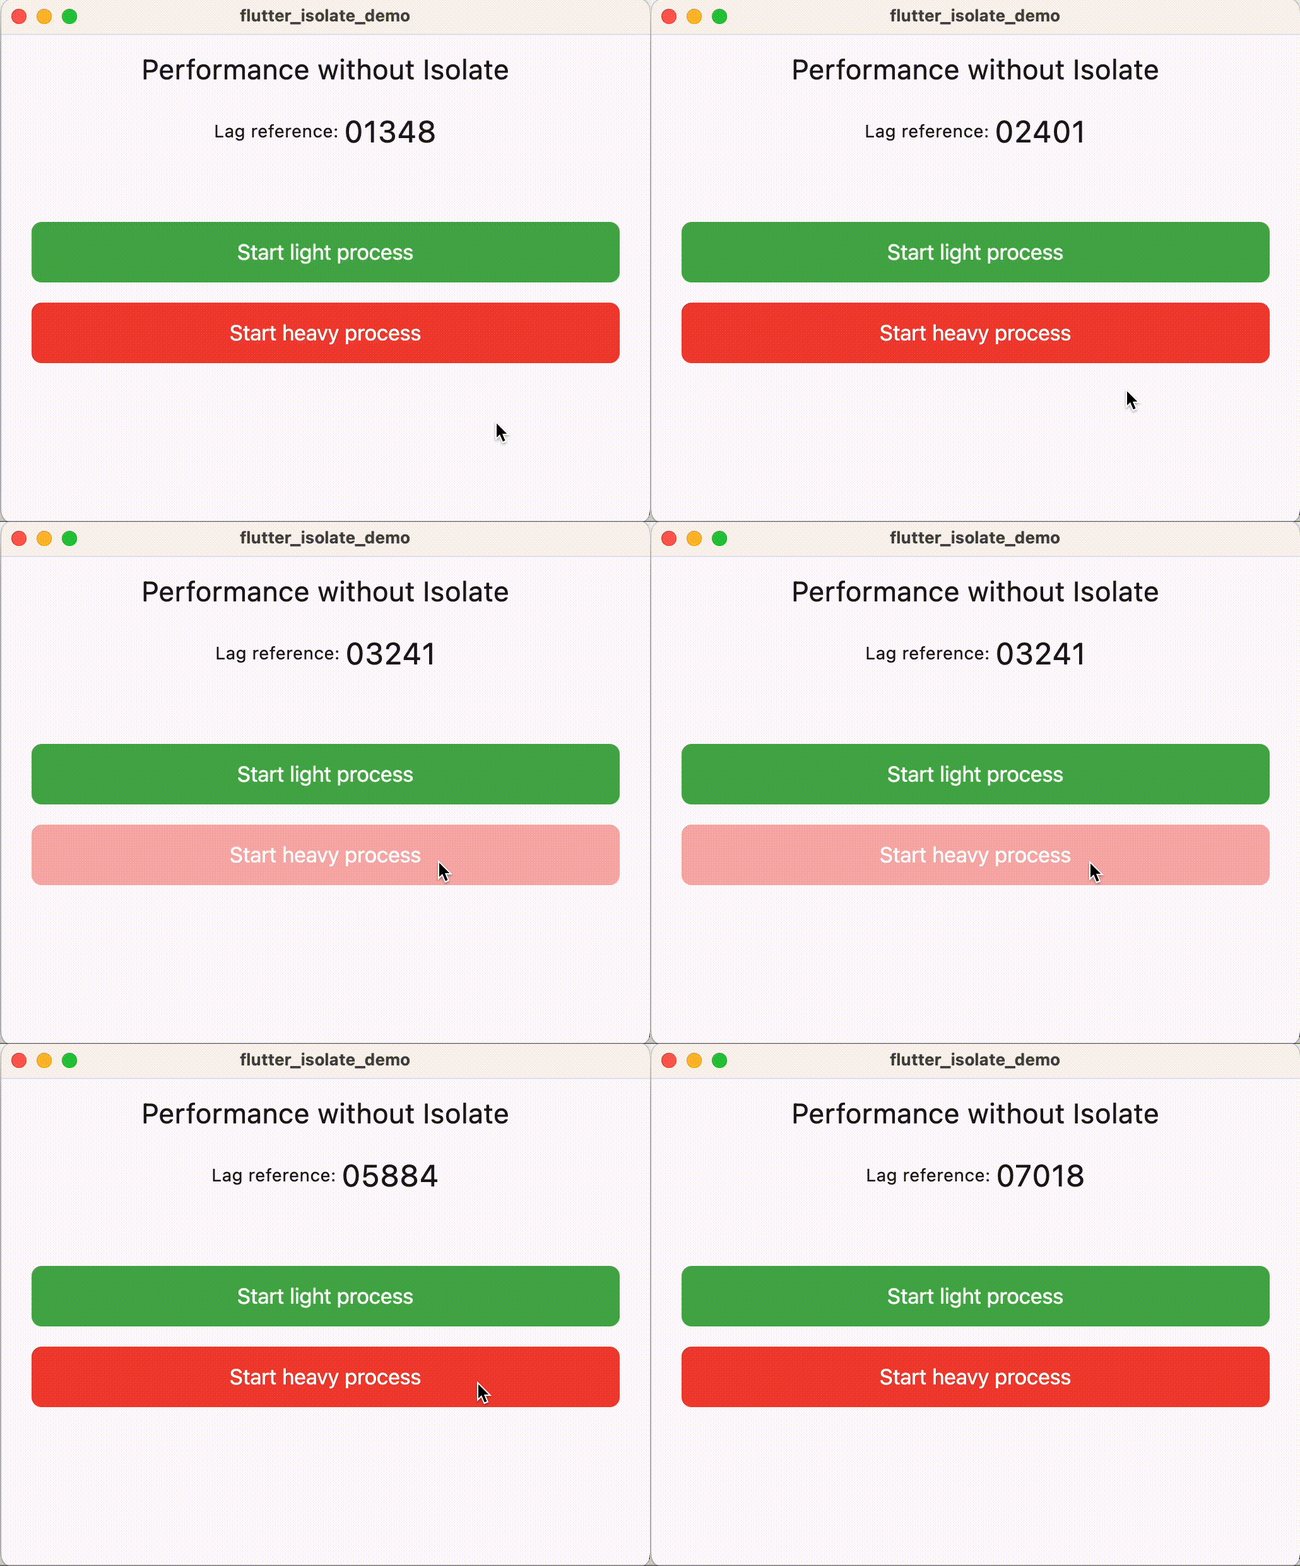
There is a noticeable jank in the timer display the moment we start running the heavy computation. Even if it runs asynchronously using Future, the speed still depends on the capacity of the main Isolate of the code.
Running one-off computations on an Isolate
Heavy tasks need to be performed on an Isolate. The simplest way to do that is by using Isolate.run().
Future<void> _heavyComputationUsingIsolateRun() async {
  return await Isolate.run(
    () {
      _heavyComputation(1000000000);
    },
  );
}

void _heavyComputation(int count) {
  int x = 1;
  for (int i = 1; i < count; i++) {
    x = x + i;
  }
}
Isolate.run() code example.
The Isolate.run() method accepts a Function as an argument that will run on a separate Isolate. This method allows you to offload a heavy task, runs it separately, and notifies you once it's finished.
Using our simple example, the Isolate.run code will result in this behaviour.
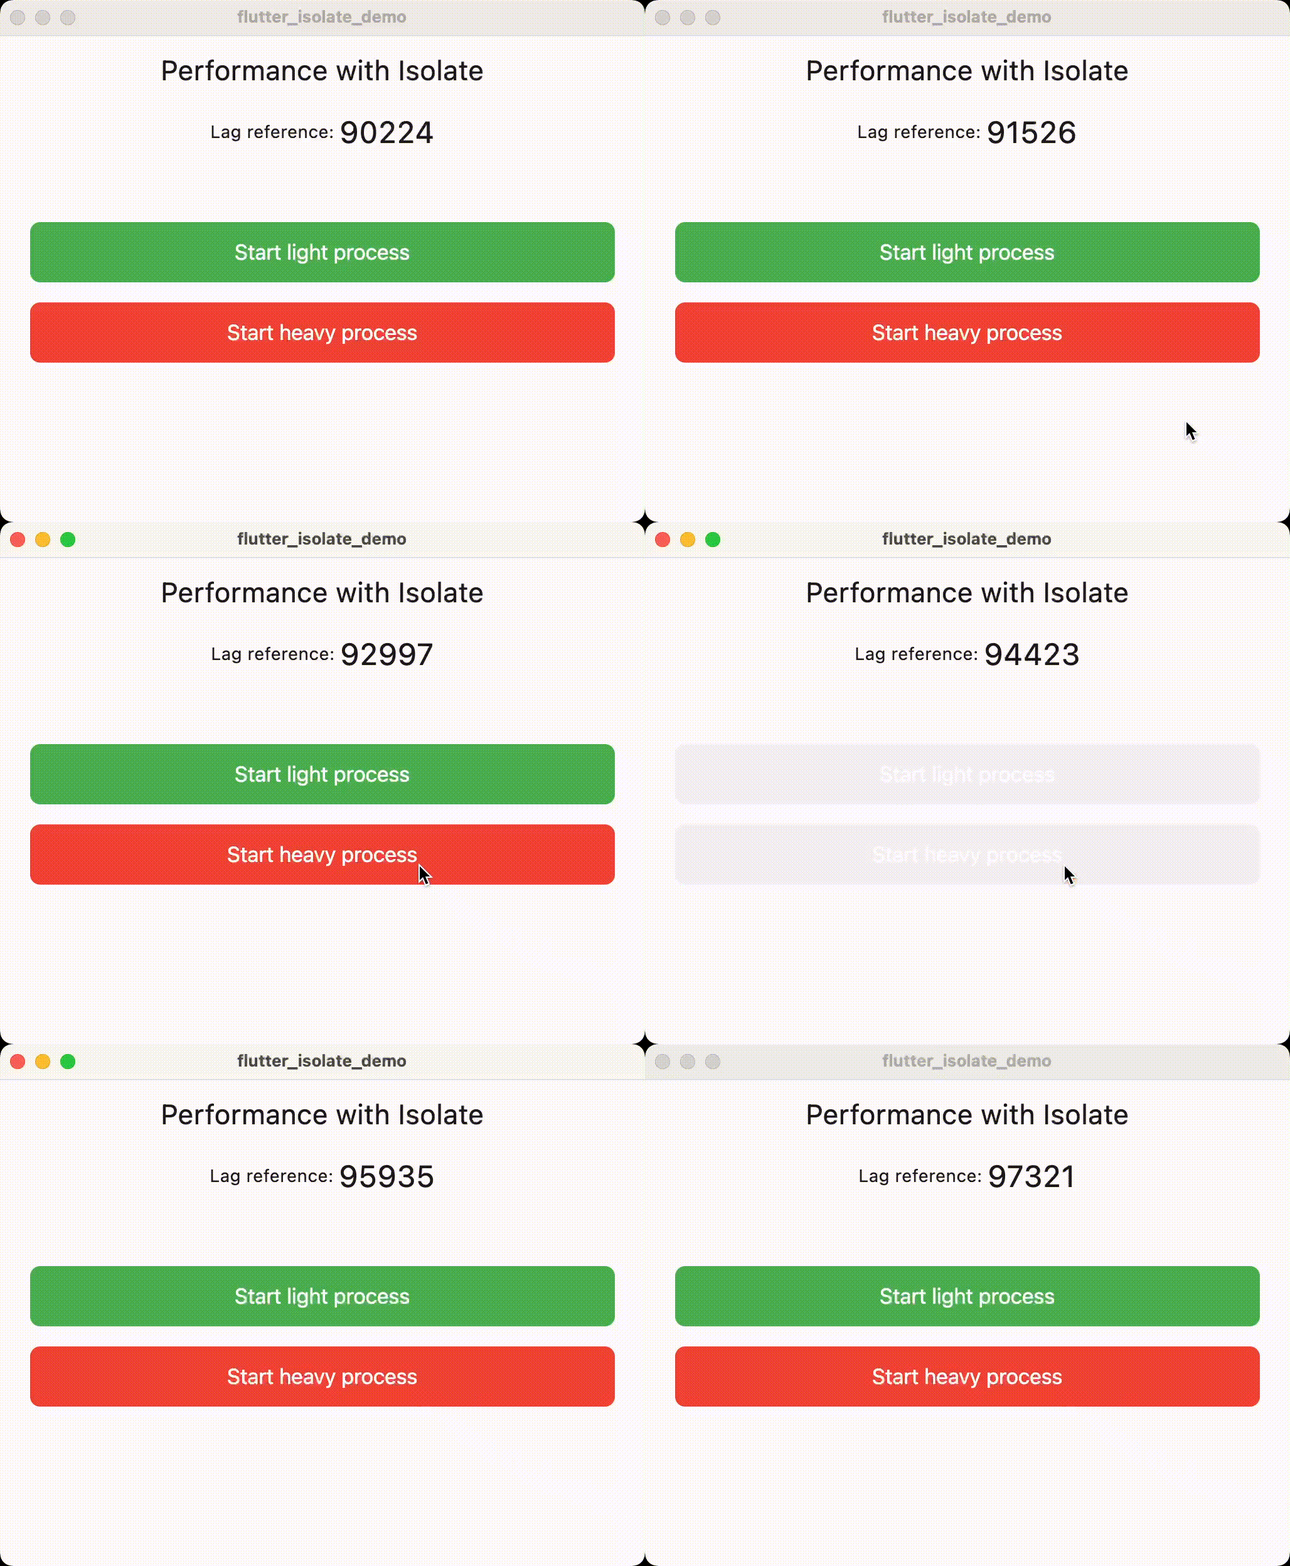
We have now solved our issue with the app freezing when doing a for loop 1 billion times. It makes sense that this heavy workload was offloaded to the new Isolate that we just created. Happy days!
The next thing to consider is how the new Isolate communicates with the main Isolate. Isolates cannot simply access the memory space of other Isolates and will result in thrown errors if you attempt to. Calling Isolate.run() can only return a value to the calling Isolate the moment the task has finished.
The solution is to communicate Isolates through ports.
Communication between Isolates through Isolate.spawn() and ports
There are many reasons why some tasks performed in an Isolate should communicate with the Main isolate.

One thing that comes to mind is informing the progress of a task. If we are converting some images, we may need to show our users the elapsed time of how long their image is being processed or how much data has been processed.
Another reason for communicating between Isolates is for tasks that run for a long time. The Main isolate may require some data from time to time. The same thing goes in which the new Isolate may need some commands from the Main isolate.
All of these can be implemented using Isolate.spawn() and ports.
The common usage of Isolate.spawn() is to pass two arguments; the function to run and a single argument to that function. As a simple example, if we want to use Isolate.spawn() to run a function with an int argument, then we do:
val isolate = Isolate.spawn(
  (integerArg) {
    //Prints 1000
    print('argument: $integerArg')
  },
  1000,
);
Isolate.spawn() code example.
However, if we want these Isolates to communicate with each other, we need to pass a SendPort. A SendPort is a channel in which an Isolate can send messages that can be listened to by a ReceivePort. A SendPort is usually obtained by first creating a ReceivePort which has a SendPort field.
val receivePort = ReceivePort();
val sendPort = receivePort.sendPort();
Defining receive and send ports.
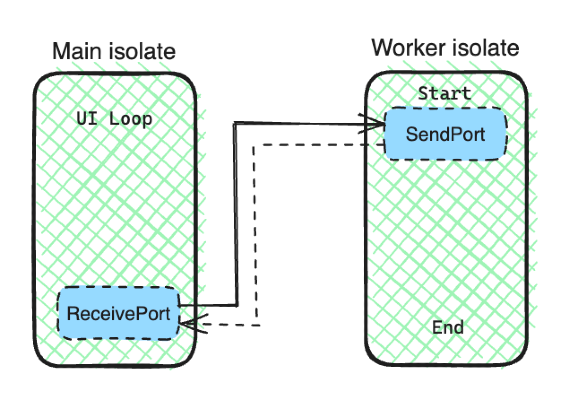
We can pass this SendPort instance the moment we create an Isolate using the .spawn() method.
final receivePort = ReceivePort();
final sendPort = receivePort.sendPort;
Isolate.spawn(
  (sendPort) {
    //Use sendPort to communicate with other isolates
  },
  sendPort,
);
Passing the SendPort as an argument.
Creating an Isolate using .spawn() won't let you have more than one arguments for the function that you will run.
To get around this limitation, we can pass a List of arguments instead containing the SendPort as well as other arguments that you need to pass.
final receivePort = ReceivePort();
final sendPort = receivePort.sendPort;
const iterationCount = 10000000;
Isolate.spawn(
  (args) {
    //Cast the arguments inside the list of args
    final sendPort = args[0] as SendPort;
    final countIteration = args[1] as int;

    //Use the arguments as you need
  },
  [sendPort, iterationCount], //List argument
);
Use a List of arguments to get around the single argument limitation.
The next thing to do is to typecast these arguments in the function to use them correctly.
The last step is to listen to the messages sent by the child Isolate through the ReceivePort that we just created.
final receivePort = ReceivePort();
final sendPort = receivePort.sendPort;
const iterationCount = 10000000;

receivePort.listen((message) {
  //Process the message from the spawned isolate
  //e.g. update the UI state
});

Isolate.spawn(
  (args) {
    //Cast the arguments inside the list of args
    final sendPort = args[0] as SendPort;
    final countIteration = args[1] as int;

    //Use the arguments as you need
    int x = 1;
    for (int i = 1; i < countIteration; i++) {
      sendPort.send('Processing ${i + 1} of $countIteration');
      x = x + i;
    }
  },
  [sendPort, iterationCount],
);
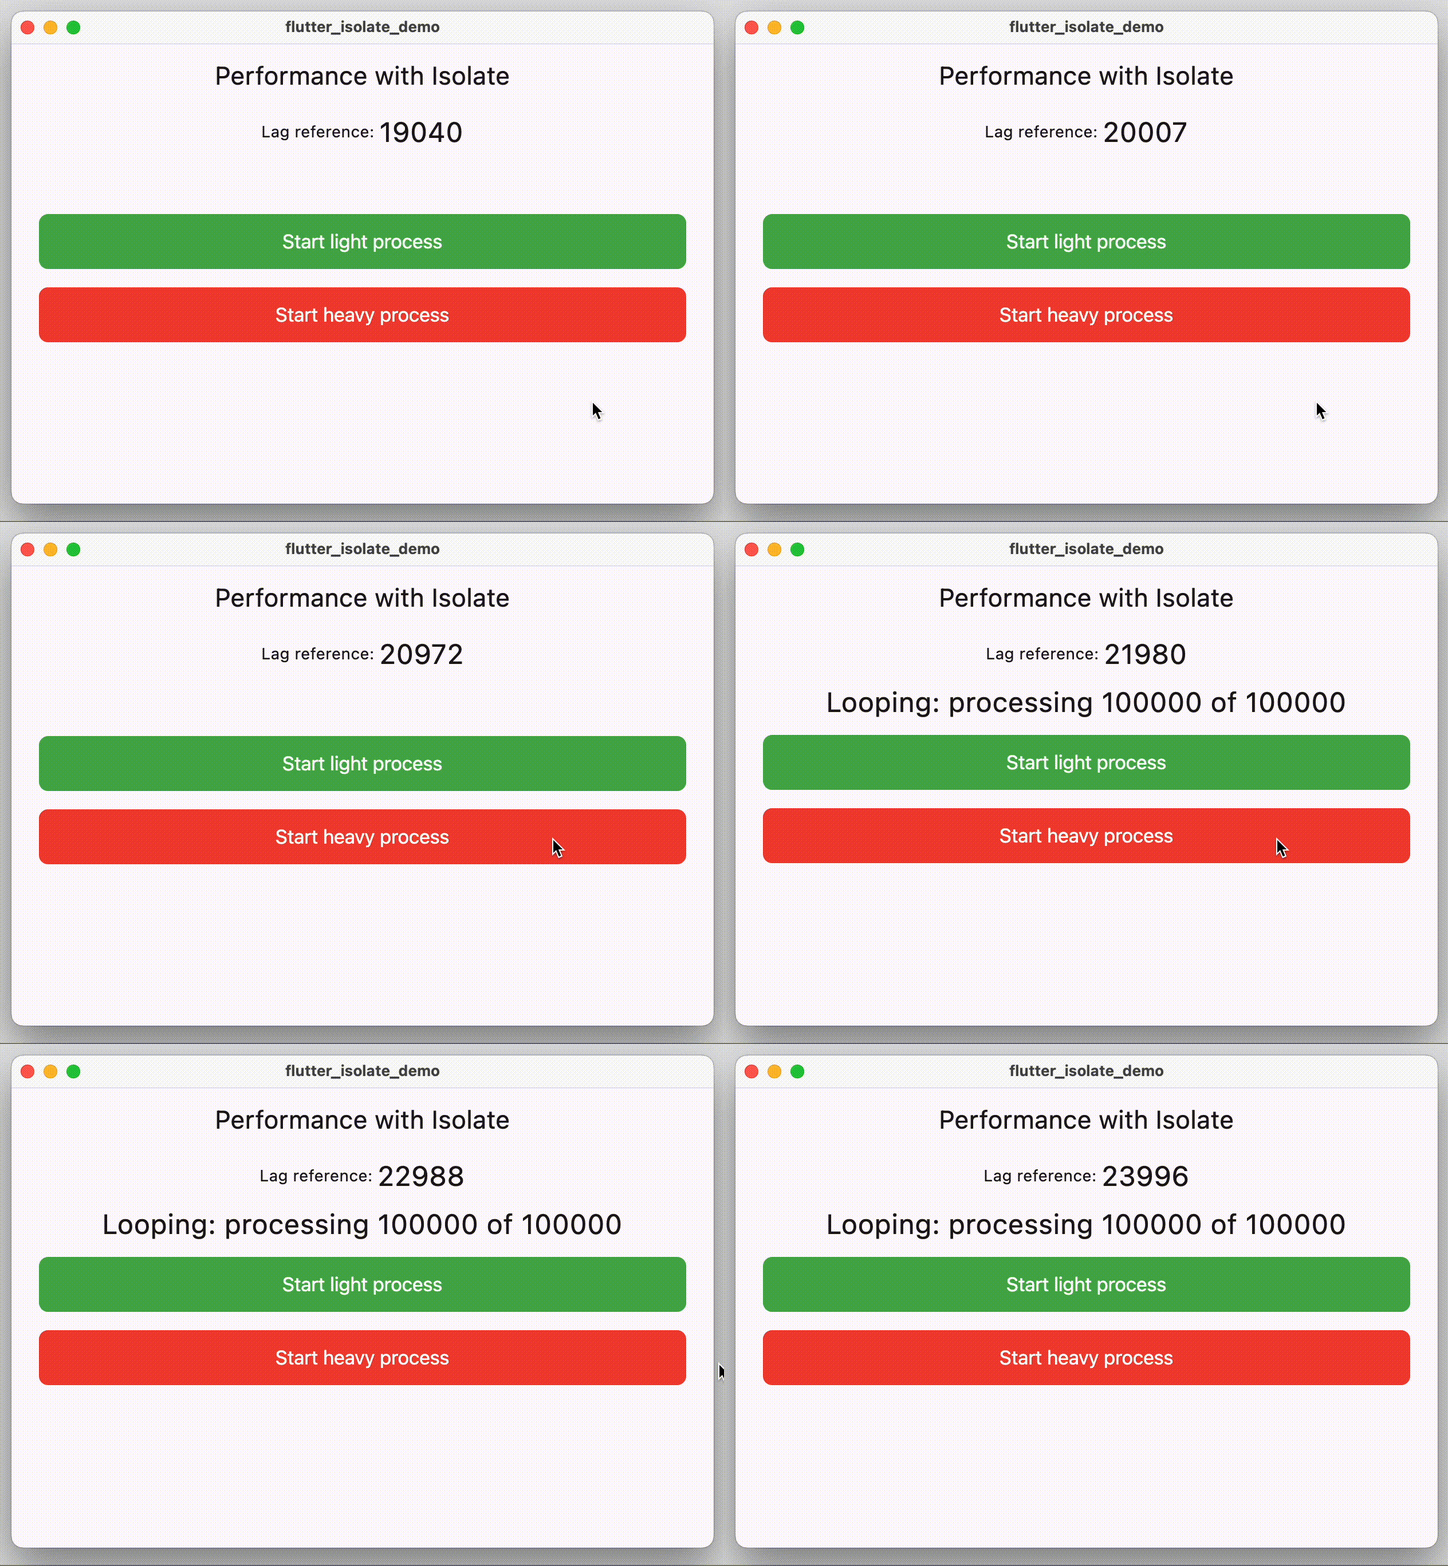
Going back to our example, we can now have the child Isolate send updates to the main one through these ports. The listener would get these messages and update the UI accordingly to show the progress of the task.
Data types that are acceptable as arguments
Unfortunately, there are some restrictions as to what types of arguments you can pass through an Isolate. You can pass simple data types such as int, float, String, and Lists. However, you cannot pass objects such as Sockets, closure functions, or objects that can alter state across different Isolates.
Check out the documentation for a complete list of objects that are allowed to be used as an argument.
Obtaining the result of an Isolate
There are cases where we need to know if the task running inside another Isolate has finished. It is also useful to know whether this task running in parallel successfully finished or failed due to an error.
Getting the result from Isolate.run()
It is simple to get the result of a task that was executed using Isolate.run(). This method returns a Future<R> where R is the return type of the function inside it. What it means is that we can simply return the result if the Isolate.run() call as a Future<R> or with async - await approach.

Learn more about asynchronous functions with Future
Future<bool> getResultFromIsolateRun() {
  return Isolate.run(_processSomething)
}

bool _processSomething() {
  //Do some stuff
  return true
}
Consume the result of Isolate.run()
Getting the result from Isolate.spawn()
Calling Isolate.spawn() however does not return the data type of the function passed to it. This method call returns a Future<Isolate> in which you can do additional things such as add error listeners, exit listeners, and even terminal this Isolate.
If we want to get the result of the task inside an Isolate created using the spawn() method, we would need to utilise the onExit and onError arguments. These two arguments require a SendPort which would get the event the moment the task has finished or produced an error.
Using onExit for successful result and onError for errors
To determine if the Isolate finishes whether successfully or not, we can check when the message sent by the SendPort is either null or a List<String> for successful and failed results respectively.
final receivePort = ReceivePort();
final sendPort = receivePort.sendPort;

receivePort.listen((message) {
  //Process the message from the spawned isolate
  if (message == null) {
    //Task in the isolate has successfully finished
  } else if (message is List) {
    //Task threw an error
    print('Error: ${message[0]}');
  }
});

Isolate.spawn(
  (args) {},
  [sendPort],
  onExit: sendPort,
  onError: sendPort,
);
If you want to have a more distinct message, you can use addOnExitListener() and addErrorListener as they let you define what message the SendPort will send when the task finishes. The caveat here is that you need get a reference of the Isolate before you can use these methods.
Errors will always have a List<String> as a message when it happens even if we use addErrorListener().
final receivePort = ReceivePort();
final sendPort = receivePort.sendPort;

receivePort.listen((message) {
  //Process the message from the spawned isolate
  if (message == 'EXIT_MESSAGE') {
    //Task in the isolate has successfully finished
  } else if (message is List) {
    //Task threw an error
    print('Error: ${message[0]}');
  }
});

Isolate.spawn(
  (args) {},
  [sendPort],
).then(
  (isolate) {
    isolate.addOnExitListener(
      sendPort,
      response: 'EXIT_MESSAGE',
    );
    isolate.addOnErrorListener(sendPort);
  },
);
Make Isolate.spawn() task to be blocking call
The last thing that I want to discuss is the approach to make sure that the caller of our Isolate tasks gets the result of this run. This can be achieved by using a Completer object.
In our app example above, we want to reset the button states to be clickable again once the function within the Isolate.spawn() call is finished, whether successfully or not. We use a Completer object to block the call and only complete it when we get a successful or error result.
Future<bool> doBackgroundWork() async {
  final receivePort = ReceivePort();
  final sendPort = receivePort.sendPort;
  final completer = Completer<bool>();

  receivePort.listen(
    (message) {
      //Process the message from the spawned isolate
      if (message == null) {
        //Task in the isolate has successfully finished, so unblock this function
        completer.complete(true);
      } else if (message is List) {
        //Task in the isolate has an error, so unblock this function
        completer.complete(false); // or use completer.completeError()
      }
    },
  );

  Isolate.spawn(
    (args) {},
    [sendPort],
    onExit: sendPort,
    onError: sendPort,
  );
  //Blcoked until completer.complete() is called
  return completer.future;
}
Using Completer to block Isolate.spawn
With this approach, any outside caller of the function doBackgroundWork can treat it as a normal function that returns a Future<bool> and can decide how to handle the results accordingly.
Conclusion
That's all the basic things that we need to understand to do parallel processing in Flutter through Isolates. We can use Isolate.run() for simple one-off tasks and use Isolate.spawn() for tasks that require constant updates and communication.
While this is a very basic introduction of the topic, there are still many problems that we might encounter when using Isolates that are not covered in this article. But I still hope that you can apply immediate improvements to your apps with this introductory article.
References
https://dart.dev/language/concurrency
https://api.flutter.dev/flutter/dart-isolate/Isolate-class.html
https://api.dart.dev/stable/3.1.5/dart-isolate/Isolate/spawn.html

